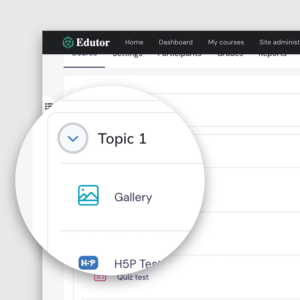
Moodle Theme Edutor – How To Configure And Customise The Frontpage FAQ Section

moodle-theme-edutor-faq-section-demo-view

Adding a FAQ (Frequently Asked Questions) section to your Moodle site’s landing page is a great way to provide useful information to visitors about your organisation and courses. A well-written FAQ section can also bring new traffic to your training site and build trust. Our latest Moodle 4.x theme Edutor is perfect for building your corporate training site and you have the option to add a customisable FAQ section on the frontpage.

In this tutorial we will walk you through the section settings and teach you how to create professional imagery to make your Moodle site stand out.

Section Settings

To configure the FAQ section, go to: Site administration > Appearance > Themes > Edutor > Frontpage FAQ

moodle-theme-faq-section-settings-screencast

Add Q&As

You can add up to 10 Q&As. If you have a dedicated FAQ page you can use this section to list your top Q&As and then link the section to a dedicated FAQ page.

moodle-theme-faq-section-settings-add-questions

Design Customisations

You can change the section background colour and upload an image to the section.

moodle-theme-edutor-faq-section-settings-change-color-upload-image

You can find free high-quality stock images on PixaBay and Unsplash to use in the section. We have included a Photoshop design template in the Edutor theme zip file you can use to create well-designed images as shown below.

FAQ Section Photoshop Design Template

moodle-theme-edutor-faq-section-photoshop-design-template

Design Example One

moodle-edutor-theme-faq-section-example-images

Similar to the figure used on our theme demo this example uses an image with a transparent background.

PhotoRoom is a free online image editing tool you can use to create PNG images with transparent backgrounds.

photoroom-remove-bg-moodle-theme

moodle-theme-edutor-faq-section-photoshop-template-2

Design Example Two

Using our Photoshop design template you can create a visually impactful FAQ section.

moodle-theme-edutor-faq-section-photoshop-template-3

moodle-theme-edutor-faq-section-image-design-3.1

moodle-theme-edutor-faq-section-image-design-3.2

moodle-theme-edutor-faq-section-image-design-3.3

moodle-theme-edutor-faq-section-image-design-3.4

Design Example Three

moodle-theme-edutor-faq-section-photoshop-template-4

moodle-theme-edutor-faq-section-image-design-4.1

moodle-theme-edutor-faq-section-image-design-4.2

moodle-theme-edutor-faq-section-image-design-4.3

Moodle Theme Edutor – How To Use The Hero Section To Captivate Learners

Our brand new Moodle Theme Edutor is specifically designed for corporate training and university online learning. It has a modern design and the overall look and feel is highly customisable. It can quickly transform a functional Moodle 4.x site into a professionally designed training and learning platform.

First impressions matter and a great first impression is vital to an online training/learning site. Configuring Edutor theme’s hero section with the right hero images and copy can empower your site to make a visual impact to captivate your target audience.

In this tutorial we will show you how to configure Edutor’s hero section for a corporate training site. The hero images we used here are different from the ones we used on our theme demo site. You can see that it’s very easy to customise the section to reflect your organisations’ branding and identity.

Hero Image Previews

Slide One Example

moodle-theme-edutor-hero-section-slide-design-1

Slide Two Example

moodle-theme-edutor-hero-section-slide-design-2

To configure the section you need to log in as a site admin and go to the theme settings page: Site administration > Appearance > Themes > Edutor > Frontpage Hero Section

General Settings

You can configure the general settings of the section in the first part of the page. You have the option to display your organisation’s logo above the hero slideshow content area to emphasise your branding identity. You can also add a video play button to play a promo video (YouTube or Vimeo) in a modal window.

moodle-theme-edutor-hero-section-settings-general

moodle-theme-edutor-hero-section-front-view

Hero Slideshow Settings

You can add up to 6 hero slides and each slide can hold a hero image, content, and a Call-To-Action button.

We highly recommend you resize your hero image’s width to be around 1600px for optimised display. To reduce site loading time it’s also a good idea to compress your hero images before uploading to the section. There’re free online sites you can use to compress images for web (eg. iloveimg.com and tinypng.com).

Add Slide 1

As you can see in the screencast below, the colour of the CTA button is customisable. You can change its default colour to work with your hero image.

In our example, we set the slide 1 CTA button’s background colour to be #e51470 which echos with the uploaded hero image’s accent colour.

moodle-theme-edutor-hero-section-add-slide1

Tip: you can add HTML code
in the slide heading field to create desired line break as shown in the screencast below.

moodle-theme-edutor-hero-section-add-slide1.1

Add Slide 2

Comparing slide 2 with slide 1 you can see that different hero images can give your site different looks.

moodle-theme-edutor-hero-section-add-slide2

Photoshop Template

Want to create impactful hero images similar to the ones we used in our live demo and this tutorial? You can get the original Photoshop design template in the theme zip file.

You can change the colours and replace the stock images to suit your branding and make your site truly bespoke!

To get FREE stock images for using on your site you can try unsplash.com and picjumbo.com

moodle-theme-edutor-hero-photoshop-file

We will be adding more hero image designs to the Edutor theme so keep your eyes peeled!

How To Generate Course Certificates In Moodle

Are you running a training course on Moodle? Do you want to issue digital course certificates to students for completing your course or for simply participating? In this tutorial we will show you how to dynamically generate a PDF certificate right inside of a Moodle course.

how-to-generate-digital-course-certificates-in-moodle-4-certificate-examples

All the screenshots and screencasts in this tutorial were taken from our Moodle demo site and you can view the example certificates by logging into the demo site as a student.

Live Demo

Certificate Images Download:

You can download the certificate background images we used in the example below:

Free Download (13685 downloads)

Step 1

Download Moodle’s free plugin “Custom Certificate”. To install the plugin from the downloaded zip file, you need to log in to your Moodle site as a site admin and go to the “Install Plugin” page: Site administration > Plugins > Install Plugins.

how-to-generate-digital-course-certificates-in-moodle-4-install-custom-certificate-plugin

Alternatively, you can ask your IT support to upload the uncompressed plugin folder “customcert” to the site server. The correct path on the server is: Your Moodle site > mod > customcert

how-to-generate-digital-course-certificates-in-moodle-4-install-custom-certificate-plugin-ftp-view

Step 2

Go to your desired Moodle course and add a “Custom Certificate” activity as shown in the screencast below.

how-to-generate-digital-course-certificates-in-moodle-4-screencast-1

Step 3

After adding the certificate click the “Save and display” button. Now you can start customising your certificate by clicking the “Edit Certificate” tab in the tabbed course nav bar.

how-to-generate-digital-course-certificates-in-moodle-4-screencast-2

You need to set the width and height of the certificate. If you’re going to use a background for the certificate design, you need to make sure the aspect ratio of the width and height value is the same as your background image’s ratio. Otherwise your background image will look distorted. To work with the certificate background images we want to use, we set the width as 200mm and height as 140mm in the settings page (see figure below).

how-to-generate-digital-course-certificates-in-moodle-4-size

Step 4

Now you can start designing and customising your certificate by adding static and dynamic elements (eg. background image, student name, course name, text etc).

List of elements you can add to the certificate:

how-to-generate-digital-course-certificates-in-moodle-4-editing-certificate-1

After adding the elements:

Note: You should add a background image first so other elements are layered on top of it.

how-to-generate-digital-course-certificates-in-moodle-4-editing-certificate-2

Add background image:

Note: you must upload an image first, save it then go back to select the uploaded image in the “Image” dropdown menu as shown below.

how-to-generate-digital-course-certificates-in-moodle-4-screencast-3

Add student name (dynamic value):

how-to-generate-digital-course-certificates-in-moodle-4-screencast-4

Add text (static):

how-to-generate-digital-course-certificates-in-moodle-4-screencast-add-text

Add image:

how-to-generate-digital-course-certificates-in-moodle-4-screencast-add-image

Change design:

You can change the design of the added elements in the “Reposition elements” page as shown in the screencast below.

how-to-generate-digital-course-certificates-in-moodle-4-screencast-5.1

how-to-generate-digital-course-certificates-in-moodle-4-screencast-5.2

Step 5

Click the “Save and preview” button to save your changes and preview the generated PDF certificate.

how-to-generate-digital-course-certificates-in-moodle-4-screencast-5.2

Once you’re happy about the certificate design you can then go back to the activity settings page and configure “Restrict access” so you can issue students certificates based on certain criteria.

Certificate restrictions:

how-to-generate-digital-course-certificates-in-moodle-4-screencast-6

If you want Moodle to email your students copies of their available certificates automatically, please make sure you only set the email settings to “Yes” after you have completed creating the certificate in Step 4. Otherwise your students might receive incomplete certificates.

how-to-generate-digital-course-certificates-in-moodle-4-email-settings

Certificate email example:

how-to-generate-digital-course-certificates-in-moodle-4-email-view

Certificate Global Settings

You can find all of the global settings for the Custom Certificate module under the Plugins tab: Site administration > Plugins > Activity modules > Custom certificate settings

Site admin can create global certificate templates and upload certificate design images so course teachers can access them to speed up the certificate creation process.

how-to-generate-digital-course-certificates-in-moodle-4-screencast-7

Want to learn more about “Custom Certificate” and explore all the possibilities you can implement? You can find detailed plugin documentation here.

How To Add A Responsive Custom Menu In Moodle

Moodle 4.x is finally here. It has a brand new look and contains lots of sought-after UX features and improvements. Now you can add a responsive custom menu which stays in the header area for desktop and mobile devices. In Moodle 3.x the custom menu is not responsive and Moodle displays all the menu items in the footer area as a flat list (in mobile view).

Custom Menu In Moodle 5 & 4.x

The screencast below was taken from our Moodle demo using the Edutor theme. As the screen viewport decreases in size, the custom menu will generate a “More” dropdown menu to hold all the menu items which are not able to fit in the space. When in mobile view, Moodle 4.x uses the mobile menu to hold all the custom menu items.

moodle-4-moodle-theme-edutor-custom-menu-responsive-screencast

Add A Custom Menu

To add a custom menu you need to go to the “Theme settings” page: Site administration > Appearance > Themes > Theme settings

moodle-4-moodle-4-how-to-add-custom-menu-1

On the “Theme settings” page you can enter your menu items in the “Custom menu items” field.

If you want the menu item to open in a new browser window you can add "target="_blank at the end of the URL.

moodle-4-moodle-4-how-to-add-custom-menu-2

Useful Moodle Links

You can also add page links inside of your Moodle site. Below is a list of useful URLs for some popular Moodle pages:

All Courses | /course
Course Category (ID:1) | /course/index.php?categoryid=1
Blog | /blog/
Contact support | /user/contactsitesupport.php

All Courses

moodle-4-moodle-4-how-to-add-custom-menu-4

Course Category

moodle-4-moodle-4-how-to-add-custom-menu-5

Blog

moodle-4-moodle-4-how-to-add-custom-menu-6

Contact Support

moodle-4-moodle-4-how-to-add-custom-menu-3

Moodle Theme Edutor – How To Configure And Customise The Frontpage Featured Section

Our latest Moodle Theme Edutor is a super modern and on-trend premium theme for sites running Moodle 4.0+. Packed with highly customisable theme settings, it’s the perfect design solution for transforming your plain Moodle LMS into a top-notch professional learning portal. Designed with higher education and corporate training sites in mind, it offers many theme options for site administrators to create front page marketing sections to promote featured courses and site content.

Among all the other configurable sections, the “Frontpage Featured Section” is specifically designed to showcase your featured courses. It combines an intuitive tabbed structure with beautiful responsive carousel sliders which enables you to promote your courses by category.

Frontpage Featured Section:

moodle-theme-edutor-frontpage-featured-section-view

moodle-theme-edtor-featured-section-screencast

You can add up to 6 tabbed panes and each pane allows you to add an optional content area and a responsive carousel slider with up to 10 blocks.

moodle-theme-edtor-featured-section-pane-settings-overview

For the tab icons, you can choose from Bootstrap Icons (1600+) or Moodle’s default Font Awesome Icons (v4).

moodle-theme-edtor-featured-section-pane-settings

Each carousel block can contain a title, an image, a description, a label, a text area for displaying price and a link for pointing to a course.

moodle-theme-edtor-featured-section-block-settings

From Edutor v1.3 you can make the pane blocks respond to different screen sizes. Find out more here.

moodle-theme-edutor-featured-section-slider-settings

You can also fine tune the colours related to the carousel blocks and the nav tabs via the Featured Section General Settings.

moodle-theme-edtor-featured-section-color-settings

For demonstration purposes, we will apply the colours of two well-known universities to the section to show you the customisation possibilities.

Example One

We configure the section to have the brown and orange colours taken from The University of Texas at Austin’s website.

University website screenshot:

moodle-theme-edtor-featured-section-design-color-combo-1

Custom Featured Section (two design possibilities):

moodle-theme-edtor-featured-section-design-example-1

moodle-theme-edtor-featured-section-design-example-1.1

Example Two

We configure the section to have the dark blue and mustard yellow colours taken from Berkeley’s website.

University website screenshot:

moodle-theme-edtor-featured-section-design-color-combo-2

Custom Featured Section (two design possibilities):

moodle-theme-edtor-featured-section-design-example-2

moodle-theme-edtor-featured-section-design-example-2.1

Moodle 4.x Theme Edutor – How To Install And Activate The Theme

Edutor is our latest premium Moodle 4.x theme designed for higher education and corporate training sites. You can follow the steps below to install the theme.

Before installing the theme please make sure your site is running Moodle 4.0+. If you’re still using Moodle 3.x you need to upgrade your Moodle site first.

Step 1

After purchasing you will receive an email containing a download link to the theme zip file. Download the zip file to your computer and then unzip.

You should see two folders and a readme file as shown in the figure below. The “edutor” folder is the actual theme folder. The other folder “edutor-theme-demo-psd” contains useful Photoshop design templates for creating our demo images.

Zip File Content:

moodle-theme-edutor-installation-folder

Photoshop PSD files

Hero slideshow images:

moodle-theme-edutor-psd-1

Promo images:

moodle-theme-edutor-psd-2

Teacher profile image:

moodle-theme-edutor-psd-3

Step 2

Upload the “edutor” folder to your server via a FTP program. Make sure you upload the “edutor” folder under your Moodle site’s theme folder. The correct path is: Your Moodle site > theme > edutor

FileZilla is a free FTP program for PC and Mac – https://filezilla-project.org

moodle-theme-edutor-installation-ftp-server-folder-structure

Step 3

Log into your Moodle site and go to the “Theme Selector” page: Site administration > Appearance > Themes > Theme Selector

moodle-theme-edutor-installation-1

Click the “Change theme” button next to the default Moodle theme and select the “Edutor” theme in the next page to activate the theme.

moodle-theme-edutor-installation-2

moodle-theme-edutor-installation-3

moodle-theme-edutor-installation-4

To configure the Edutor theme you can head to the theme settings pages (figure below).

moodle-theme-edutor-installation-5

Moodle Theme Edutor – How to add footer menu

We have released a brand new Boost-based premium Moodle theme “Edutor“. You can use the theme footer content blocks to add footer menu links to your Moodle 4.0+ site. In this tutorial we will show you how to create the menu links as shown in our live demo and share the HTML code snippets used.

Live Demo

Footer menu view:

moodle-4-theme-edutor-footer-menu

Step 1

Log into your Moodle site as an administrator and navigate to the theme settings page: Site administration > Appearances > Themes > Edutor > Footer Area

moodle-theme-edutor-add-footer-menu-links-footer-settings

Step 2

On the Footer Area page find the Footer Content Blocks section and enter the HTML code below. To enter HTML code in a Moodle text editor you need to activate the HTML code editor by clicking the code icon as shown below.

moodle-theme-edutor-add-footer-menu-links

moodle-theme-edutor-add-footer-menu-links-footer-settings-footer-content-blocks

HTML Code Snippets

To use the code below for your site you need to update the menu name text and their links.

Footer content block 1

<h4 class="footer-block-title">About Us</h4>
<ul class="footer-links list-unstyled">
    <li class="link-item"><a href="#">Our Value</a></li>
    <li class="link-item"><a href="#">Our Instructors</a></li>
    <li class="link-item"><a href="#">Our Partners</a></li>
    <li class="link-item"><a href="#">Press</a></li>
</ul>

Footer content block 2

<h4 class="footer-block-title">Learning</h4>
<ul class="footer-links list-unstyled">
    <li class="link-item"><a href="#">Code of Conduct</a></li>
    <li class="link-item"><a href="#">Accessibility</a></li>
    <li class="link-item"><a href="#">T&amp;C</a></li>
    <li class="link-item"><a href="#">Privacy</a></li>
</ul>

Footer content block 3

<h4 class="footer-block-title">Support</h4>
<ul class="footer-links list-unstyled">
    <li class="link-item"><a href="#">Learning Guide</a></li>
    <li class="link-item"><a href="#">FAQs</a></li>
    <li class="link-item"><a href="#">Report</a></li>
    <li class="link-item"><a href="#">Contact</a></li>
</ul>

Edutor – A Premium Moodle Theme Based On Boost (Main Features & Settings)

moodle-4.0-theme-edutor-features

Moodle has continued to evolve with exciting new UX features and improvements. To keep pace with these changes, we’ve developed a premium theme called Edutor, built on Moodle’s core Boost theme. Edutor is fully compatible with both Moodle 4.x and the latest Moodle 5.x, and it inherits the best UX and UI features from Boost – making it a future-proof choice for universities and corporate Moodle sites.

Edutor theme’s overall design is super modern and on-trend. It also contains a plethora of configurable settings and features which empower you to quickly convert your plain Moodle site into a professional-looking bespoke online learning platform.

Live Demo Theme Details

Below are the main theme settings pages.
You can configure them via Site administration > Appearance > Themes > Edutor

Page Index

General Settings

You can set your site’s overall branding colours in this section. It also gives you the option to fine tune the course header image styling.

Theme Settings:

moodle-theme-edutor-settings-general

Header Area Settings

You can upload your site logo to be displayed in the top bar area and add Moodle’s responsive custom menu next to it. You also have the option to display an alert right under the top bar on the front page.

Frontend View:

eutor-moodle-theme-header-area

Theme Settings:

moodle-theme-edutor-settings-header-area

In the footer area you can add your site’s branding (eg. logo and about information), social media links, footer content areas (perfect for adding a footer menu and additional content).

Want to learn how to add the footer menu as shown on our demo? Check out our post here.

Frontend View:

edutor-moodle-theme-footer-view

Theme Settings:

moodle-theme-edutor-settings-footer-area

Frontpage Hero Section Settings

You can configure the hero section slideshow in this section. Edutor theme allows you to upload up to 6 slides with captions and call-to-action buttons. You can also add one Youtube or Vimeo video in this section. The original Photoshop PSD file for creating the demo hero background images is included in the theme zip file so you can make similar hero images to use for your site.

Want to learn how to use the Hero Section to captivate learners? Check out our post here.

Frontend View:

edutor-moodle-theme-hero-section-view

Theme Settings:

moodle-theme-edutor-settings-hero-section-2

moodle-theme-edutor-settings-hero-section-2

Frontpage Logo Section Settings

This section is great for adding partnership or your organisation’s credential logos. You can add up to 12 logos with optional links.

Frontend View:

Theme Settings:

moodle-theme-edutor-logos-section-view

moodle-theme-edutor-settings-logos-section

Frontpage Search Section Settings

You can add a course search section in the frontpage with section intro and a call-to-action button (optional).

Frontend View:

edutor-moodle-theme-search-section-view

Theme Settings:

moodle-theme-edutor-settings-search-section

This section is perfect for adding your featured courses or content. It’s a tabbed structure and you can add up to 6 tabbed panes. Each pane allows you to add custom HTML and up to 10 pre-designed blocks. In each block you have the option to upload your own course image, add course description, target link, course label and price.

Want to learn more about how to configure and customise this section? Check out our post here.

Frontend View:

edutor-moodle-theme-featured-section-view

Theme Settings:

moodle-theme-edutor-settings-featured-section-general

Frontpage Categories Section Settings

This section allows you to add up to 20 blocks with titles, images, descriptions and links. It’s perfect for adding custom Moodle course categories.

Want to learn more about how to configure and customise this section? Check out our post here.

Frontend View:

moodle-theme-categories-section-view

Theme Settings:

moodle-theme-edutor-settings-categories-section

Frontpage Call-To-Action Section Settings

Apart from adding the call-to-action content and image you can also add up to 4 data boxes and up to 6 benefit boxes.

Want to learn more about how to configure and customise this section? Check out our post here.

Frontend View:

moodle-theme-edutor-cta-section-view

Theme Settings:

moodle-theme-edutor-settings-cta-section-1

moodle-theme-edutor-settings-cta-section-2

moodle-theme-edutor-settings-cta-section-3

Frontpage FAQ Section Settings

In this section you can add up to 10 Q&As and you can also link the section to a dedicated FAQ page.

Want to learn more about how to configure and customise this section? Check out our post here.

Frontend View:

moodle-theme-edutor-frontpage-faq-section-demo-view

Theme Settings:

moodle-theme-edutor-frontpage-faq-section-settings

Frontpage Promo Section Settings

You can add up to 6 promo items in this section. Each item can have a title, a description (HTML), a call-to-action button and link to a Youtube or Vimeo video. The original Photoshop PSD template file for creating the demo promo images is included in the theme zip file so you can make similar images to use for your site.

Want to learn more about how to configure and customise this section? Check out our post here.

Frontend View:

moodle-theme-edutor-promo-section-view

Theme Settings:

moodle-theme-edutor-settings-promo-section

Frontpage Teachers Section Settings

In this section you can add up to 20 profiles with names, images and bio description (HTML). The Photoshop PSD template file for creating the demo profile images is included in the theme zip file.

Frontend View:

edutor-moodle-theme-teachers-view

Theme Settings:

moodle-theme-edutor-settings-teacher-section-1

moodle-theme-edutor-settings-teacher-section-2

Frontpage Testimonials Settings

In this section you can add up to 6 testimonials with user profile images, quote highlight and star ratings.

Frontend View:

moodle-theme-edutor-testimonials-section-view

Theme Settings:

moodle-theme-edutor-settings-testimonials-section-quote-1

moodle-theme-edutor-settings-testimonials-section

Course Settings

You can configure how the Moodle course list is displayed on the frontpage in this section. You can also fine tune the course header image.

Frontend View:

edutor-moodle-theme-course-list-view

Theme Settings:

moodle-theme-edutor-settings-course-related

Login Page Settings

You can upload a site logo and a background image for the login page.

Frontend View:

moodle-theme-edutor-login-page-view

Theme Settings:

moodle-theme-edutor-settings-login-page

Advanced Settings

This section contains advanced settings for theme customisations.

Theme Settings:

moodle-theme-edutor-settings-advanced-section

What’s New In Moodle 4.x

Moodle 4.0+ is released in April 2022 and it contains significant UX and UI improvements desired by the whole Moodle community. In this blog post we have listed all of the improvements and new features related to Moodle courses.

Moodle 4.x Live Demo

New course tabbed navigation design

Prior to Moodle 4.0, all of the course management related options are hidden under the “Actions Dropdown Menu” which is only accessible by clicking the cog icon in the course header area. Moodle 4.0 revamped the old dropdown menu system and replaced it with a tabbed navigation system. The new navigation system contains all the contextual management options related to the current course page which is more intuitive to users.

whats-new-in-moodle-4-compare-course-navigation

New course sliding side panels

Moodle 4.0 added two sliding side panels on the left and right hand side of the course page.

Left Panel

The left panel contains the course index items. It not only provides a quick way for learners to jump to a specific course section or activity/resource, it also enables course teacher/admin to rearrange the course activities/resources by dragging and dropping them directly in the panel.

moodle-4-whats-new-left-drawer-side-panel

Right Panel

The right panel contains the course side blocks. Prior to Moodle 4.0 all of the side blocks were displayed on the course page which took up valuable screen space. Now users can toggle the panel to hide the blocks and focus on the course content.

moodle-4-whats-new-right-drawer-side-panel

New Moodle course icons for activities and resources

Moodle 4.0 completely revamped the old icon system and replaced the old dated-looking icons with modern sleek line icons.

whats-new-in-moodle-4-new-icons-compare

Collapsible course sections

In Moodle 4.0 course sections are collapsible. Users can collapse all of the sections at once or collapse individual sections.

moodle-4-whats-new-collapsible-course-sections

Extra information for course activity

Moodle 4.0 displays extra information for each activity. For example, the assignment activity displays “opened date” and “due date” under the activity description. (see the comparison figure below)

moodle-4.0-whats-new-course-activity-extra-information

New way to activate course editing mode

Moodle 4.0+ places an “Edit mode” switch in the page header area across the site. Users can click the switch to toggle the Moodle site between editing and non-editing mode. Moodle 3.x displays a “Turn Editing On” button on the course page for users to toggle course editing mode.

moodle-4-whats-new-turn-editing-on

New langue menu position

If your Moodle site has more than one language pack installed, a language menu will be displayed by default. Moodle 3.x displays the language menu in the Moodle custom menu. Moodle 4.0+ displays the language menu in the page header top bar area for logged-out users. Logged-in users can access the language menu under the user dropdown menu.

Moodle 4.0+ guest view:

moodle-4-whats-new-language-menu-loggedout

Moodle 4.0+ logged-in view:

moodle-4-whats-new-language-menu-loggedin

How to force users to log in before viewing default content in Moodle

Update:

This post has been updated to reflect changes in Moodle 5.x and 4.x

By default, Moodle’s Front page usually contains a list of available courses, news items and some Moodle blocks depending on the site’s configuration, and the default Moodle content on the page can be viewed by all the site’s visitors. Some of our clients wanted to prevent anonymous site visitors from seeing any of Moodle’s default content (eg. available Moodle courses), and asked us if it is possible to force users to log in to view Moodle content. The answer is Yes and it is actually really easy to do in Moodle.

Step 1

Log into your Moodle site as an admin user, and navigate to the Site security settings option by going to Site administration > Security > Site security settings

moodle-4.0-force-users-to-login-1

Step 2

Tick the “Force users to login” option checkbox.

moodle-4.0-force-users-to-login-2

Step 3

Click the “Save changes” button. Now, if you log out and try to access your Moodle site again, you will need to log in first before viewing any Moodle content.

moodle-4.0-force-users-to-login-3

How To Check Your Moodle Site’s Version And Build

Update:

This post has been updated to reflect changes in Moodle 4.x

The Moodle installation package is built weekly with new fixes. As a Moodle site administrator it’s always handy to know your installation’s version and build to be able to identify version or build related bugs and decide if you need to upgrade to the latest version.

To check this piece of information, all you need to do is navigate to the “Notifications” option by going to Site administration > General > Notifications as shown on the screenshots below.

The screenshots used are taken from our latest Moodle 4.x theme Edutor.

moodle-4.x-how-to-check-moodle-site-version-and-build-1
moodle-4.x-how-to-check-moodle-site-version-and-build-2

How To Install A New Moodle Theme

There are two ways of installing a new Moodle theme. In this tutorial we will show you the two methods by installing one of our premium Moodle themes, Maker.

Update:

This post has been updated to reflect interface changes in Moodle 4.x

Method 1 – Upload the theme folder to your server directly

This is the traditional method and our preferred way of installing a new Moodle theme. It’s very easy if you have FTP access to your remote server or for working on your localhost. All you need to do is to upload or place your new theme’s theme folder (extracted from the zip file) under the “theme” folder in your Moodle installation.

Upload/place the theme folder on your remote or local server:

Your Moodle installation > theme > maker

moodle-install-a-new-theme-via-ftp-server-upload

Method 2 – Upload the theme zip file via Moodle’s plugin page

If for some reason you don’t have access to your server, you can also use Moodle’s “Install Plugins” page to install the theme.

Log in as an admin and go to:

Site administration > Plugins > Install plugins

moodle-install-a-new-theme-via-install-plugin

moodle-install-a-new-theme-via-plugin-installer

If you want to install a free Moodle theme you’ve downloaded from Moodle’s official site, you can upload the downloaded theme zip file directly there.

Please note: For all of our premium Moodle themes you need to follow the steps below to create a valid zip file before uploading via Moodle’s “Install plugins” interface:

Step 1

Extract the product zip file you’ve downloaded and you will see a readme file and the theme folder

moodle-theme-zip-file-extracted

Step 2

Compress the theme folder into a zip file. Give the newly created zip file whatever name you like and upload the zip file via Moodle’s “Install plugins” interface.

moodle-theme-compress-zip-file

Activate the new theme

Now you’ve successfully installed your new theme. To use the new theme for your Moodle site you have to activate the theme in Moodle first.

Go to the theme selector page as an admin and activate the theme as shown below:

moodle-install-a-new-theme-activate-new-moodle-theme

moodle-install-a-new-theme-maker