Unlike WordPress, Moodle doesn’t support creating standalone “Pages” out of the box – it only allows you to create “Courses”. Fortunately, there’s a great third-party plugin called Static Pages that makes it easy to add HTML pages to your Moodle site. It’s a great solution for adding essential content like an About Us page or a Privacy Policy, helping to make your Moodle site feel more complete and professional.
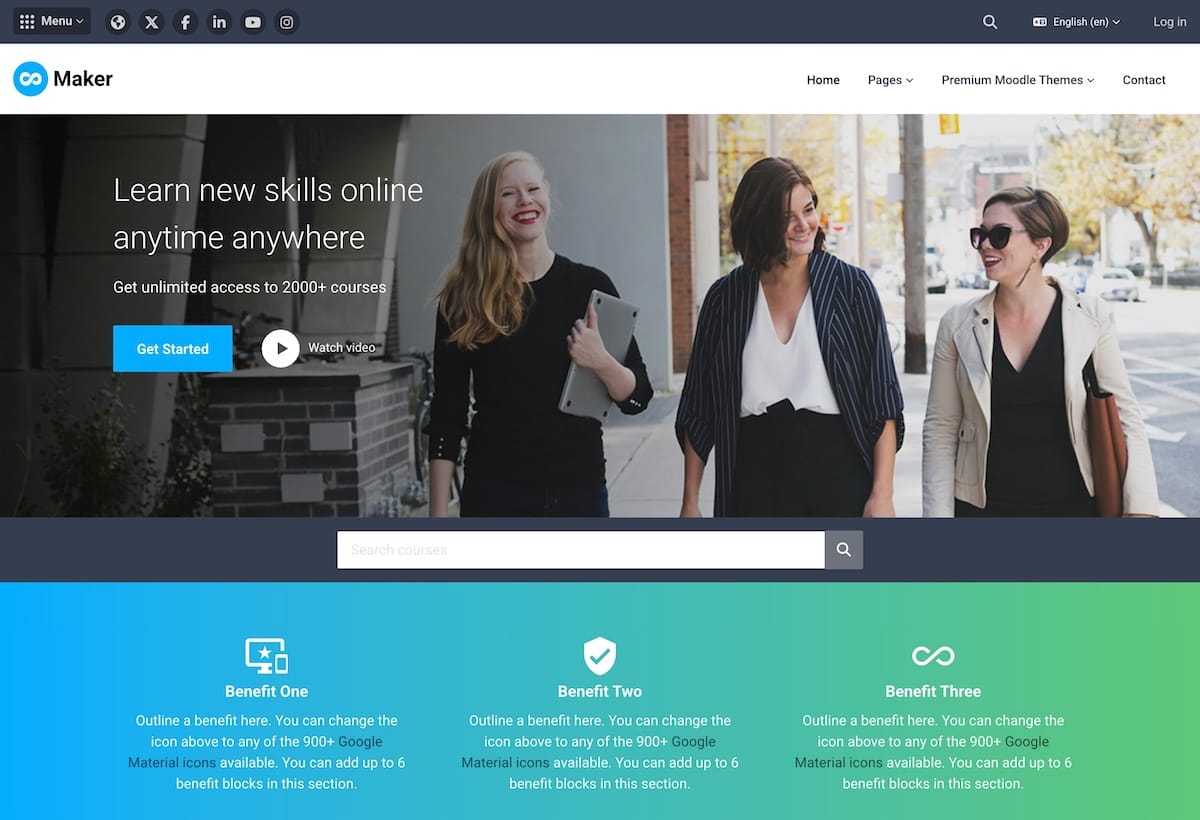
We’ve used this plugin to add the following pages to the demo sites of our Moodle themes – Lumo, Edutor, and Maker:
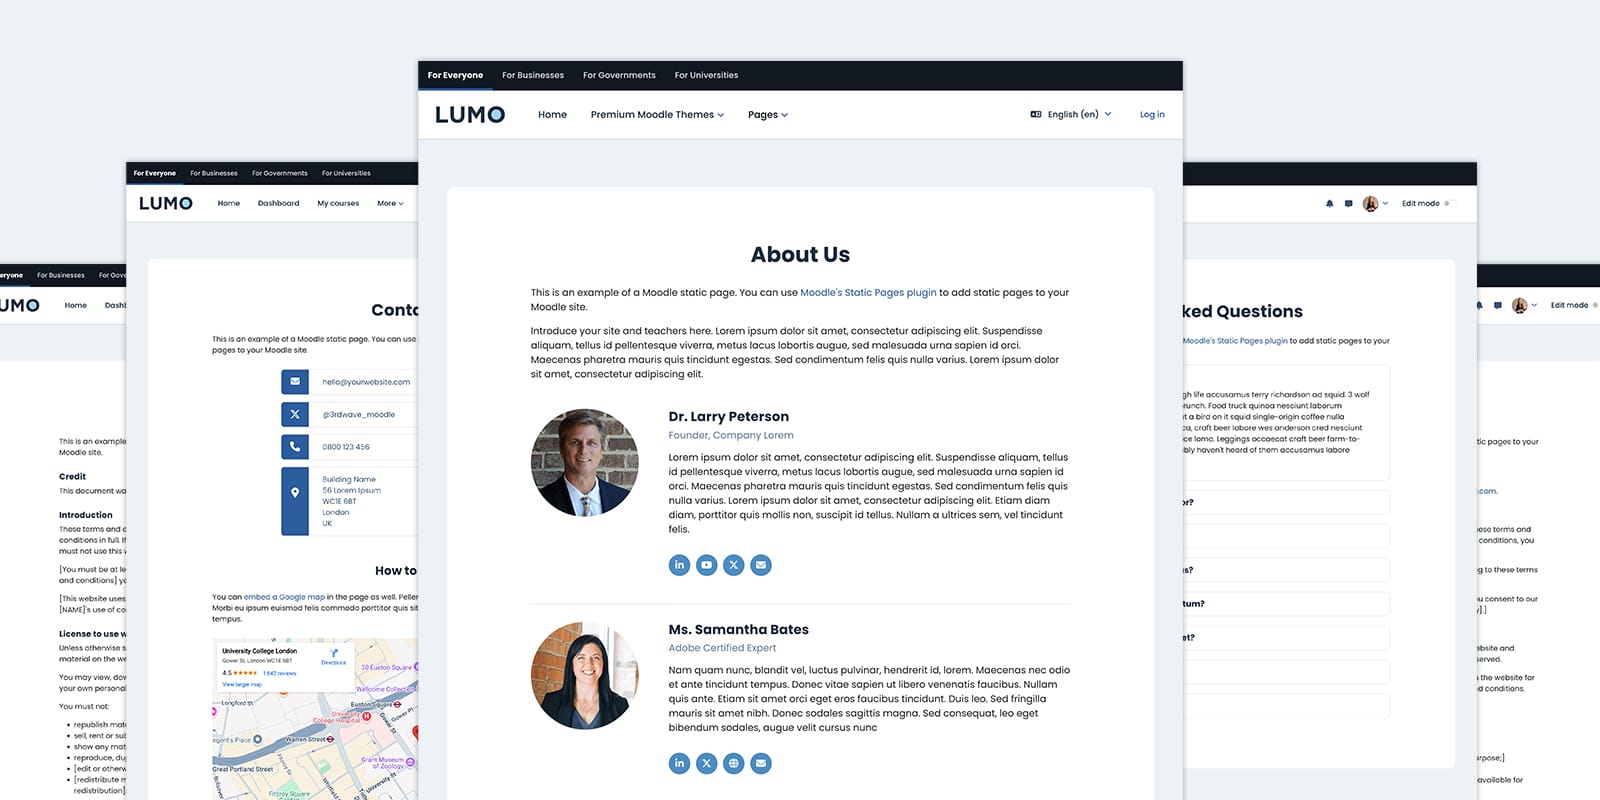
- About (Lumo Demo | Edutor Demo | Maker Demo)
- Contact (Lumo Demo | Edutor Demo | Maker Demo)
- FAQ (Lumo Demo | Edutor Demo | Maker Demo)
- Privacy Policy (Lumo Demo | Edutor Demo | Maker Demo)
- Terms and Conditions (Lumo Demo | Edutor Demo | Maker Demo)
In this tutorial, we’ll walk you through how to set up the Static Pages plugin and use it to add custom pages just like the ones in our theme demos. You can also download the matching HTML page templates at the end of the post.
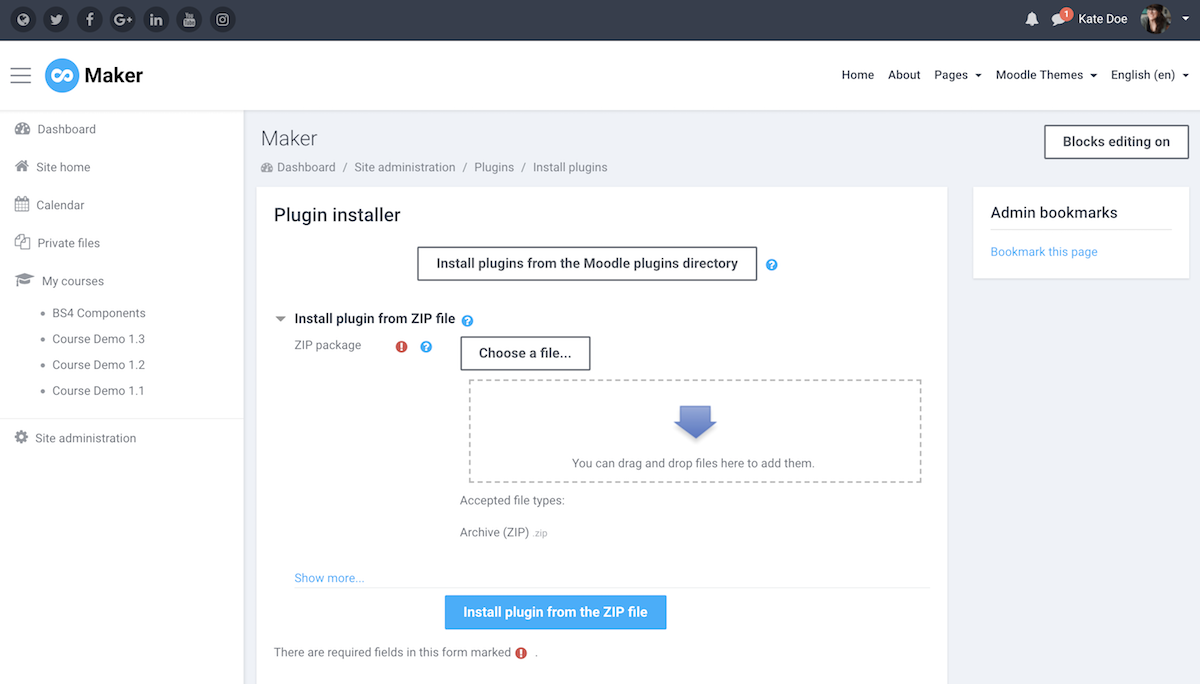
Step 1 – Install the Static Pages Plugin
Download the Static Page plugin and upload the downloaded zip file to your Moodle site via the Install plugins page: Site Administration > Plugins > Install plugins. You need to be a site admin to install and use the plugin.
Step 2 – Configure the Plugin
After installing the plugin, you can see the “Static Pages” option under the “Site Administration” section as shown in the figure below.
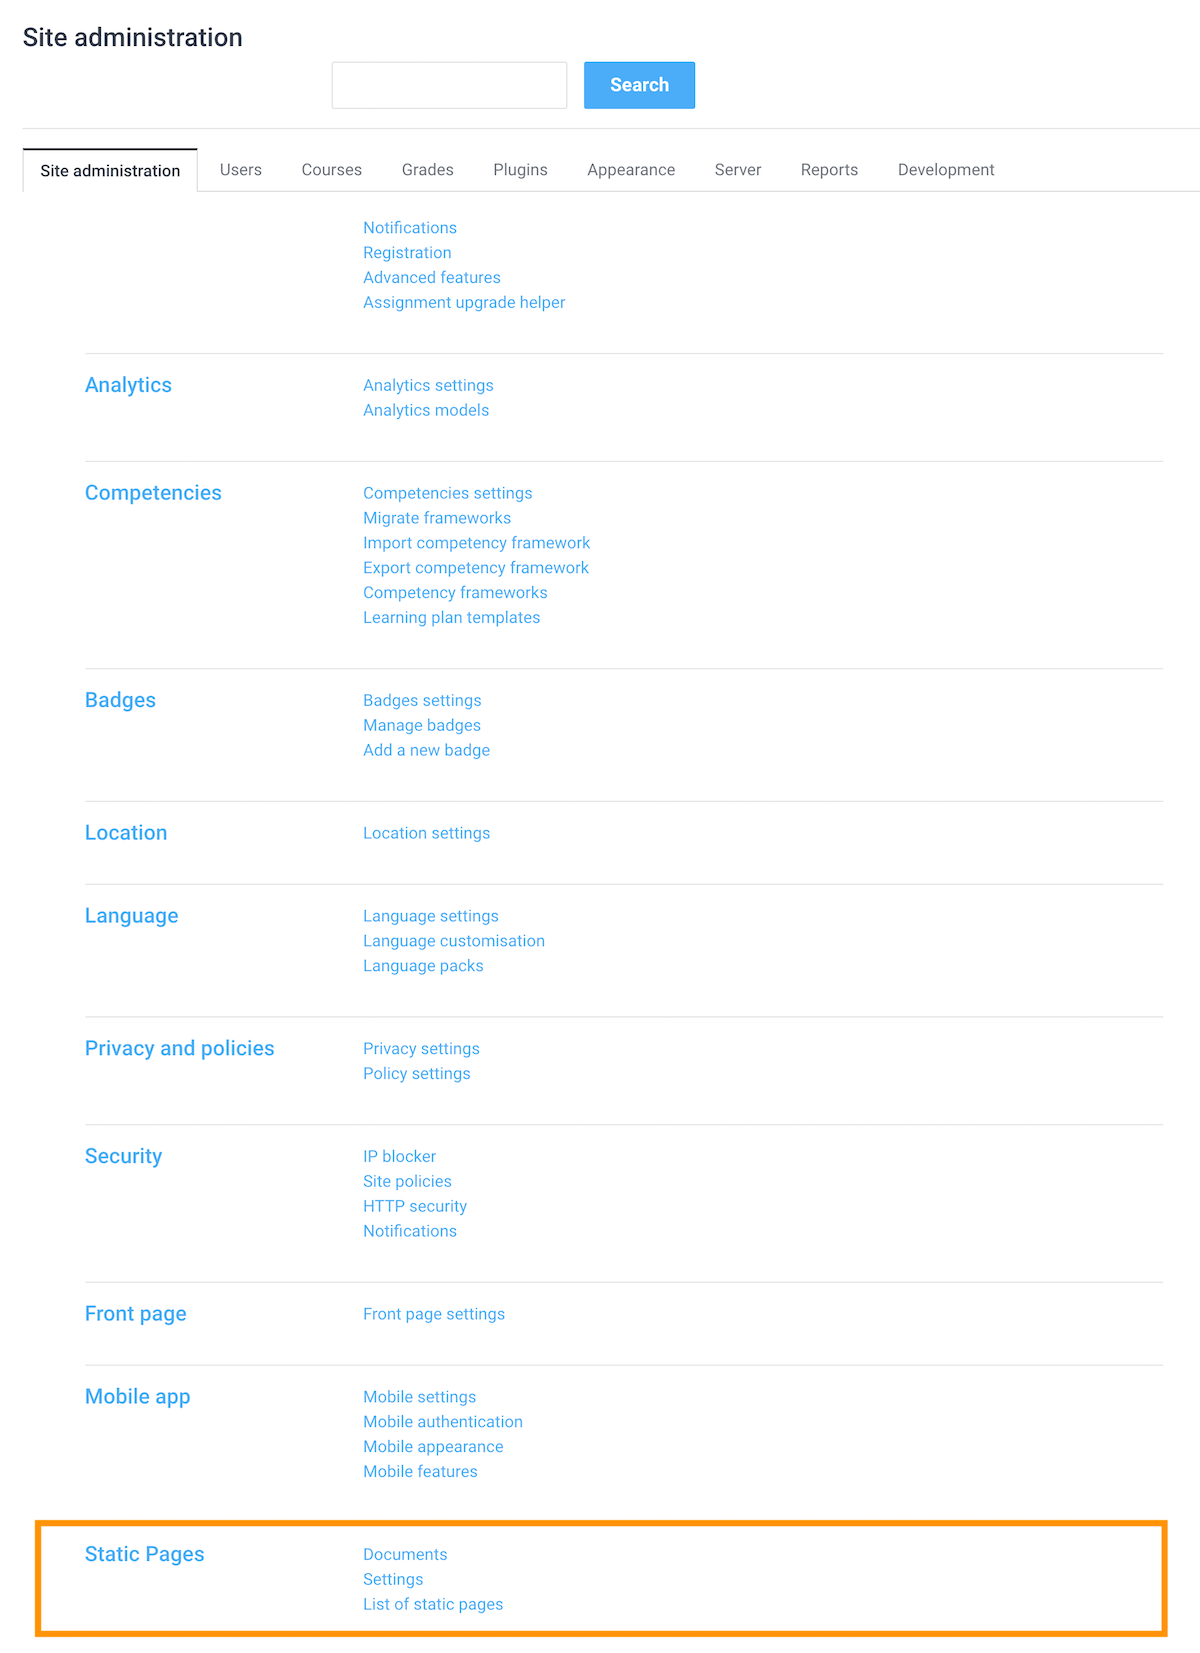
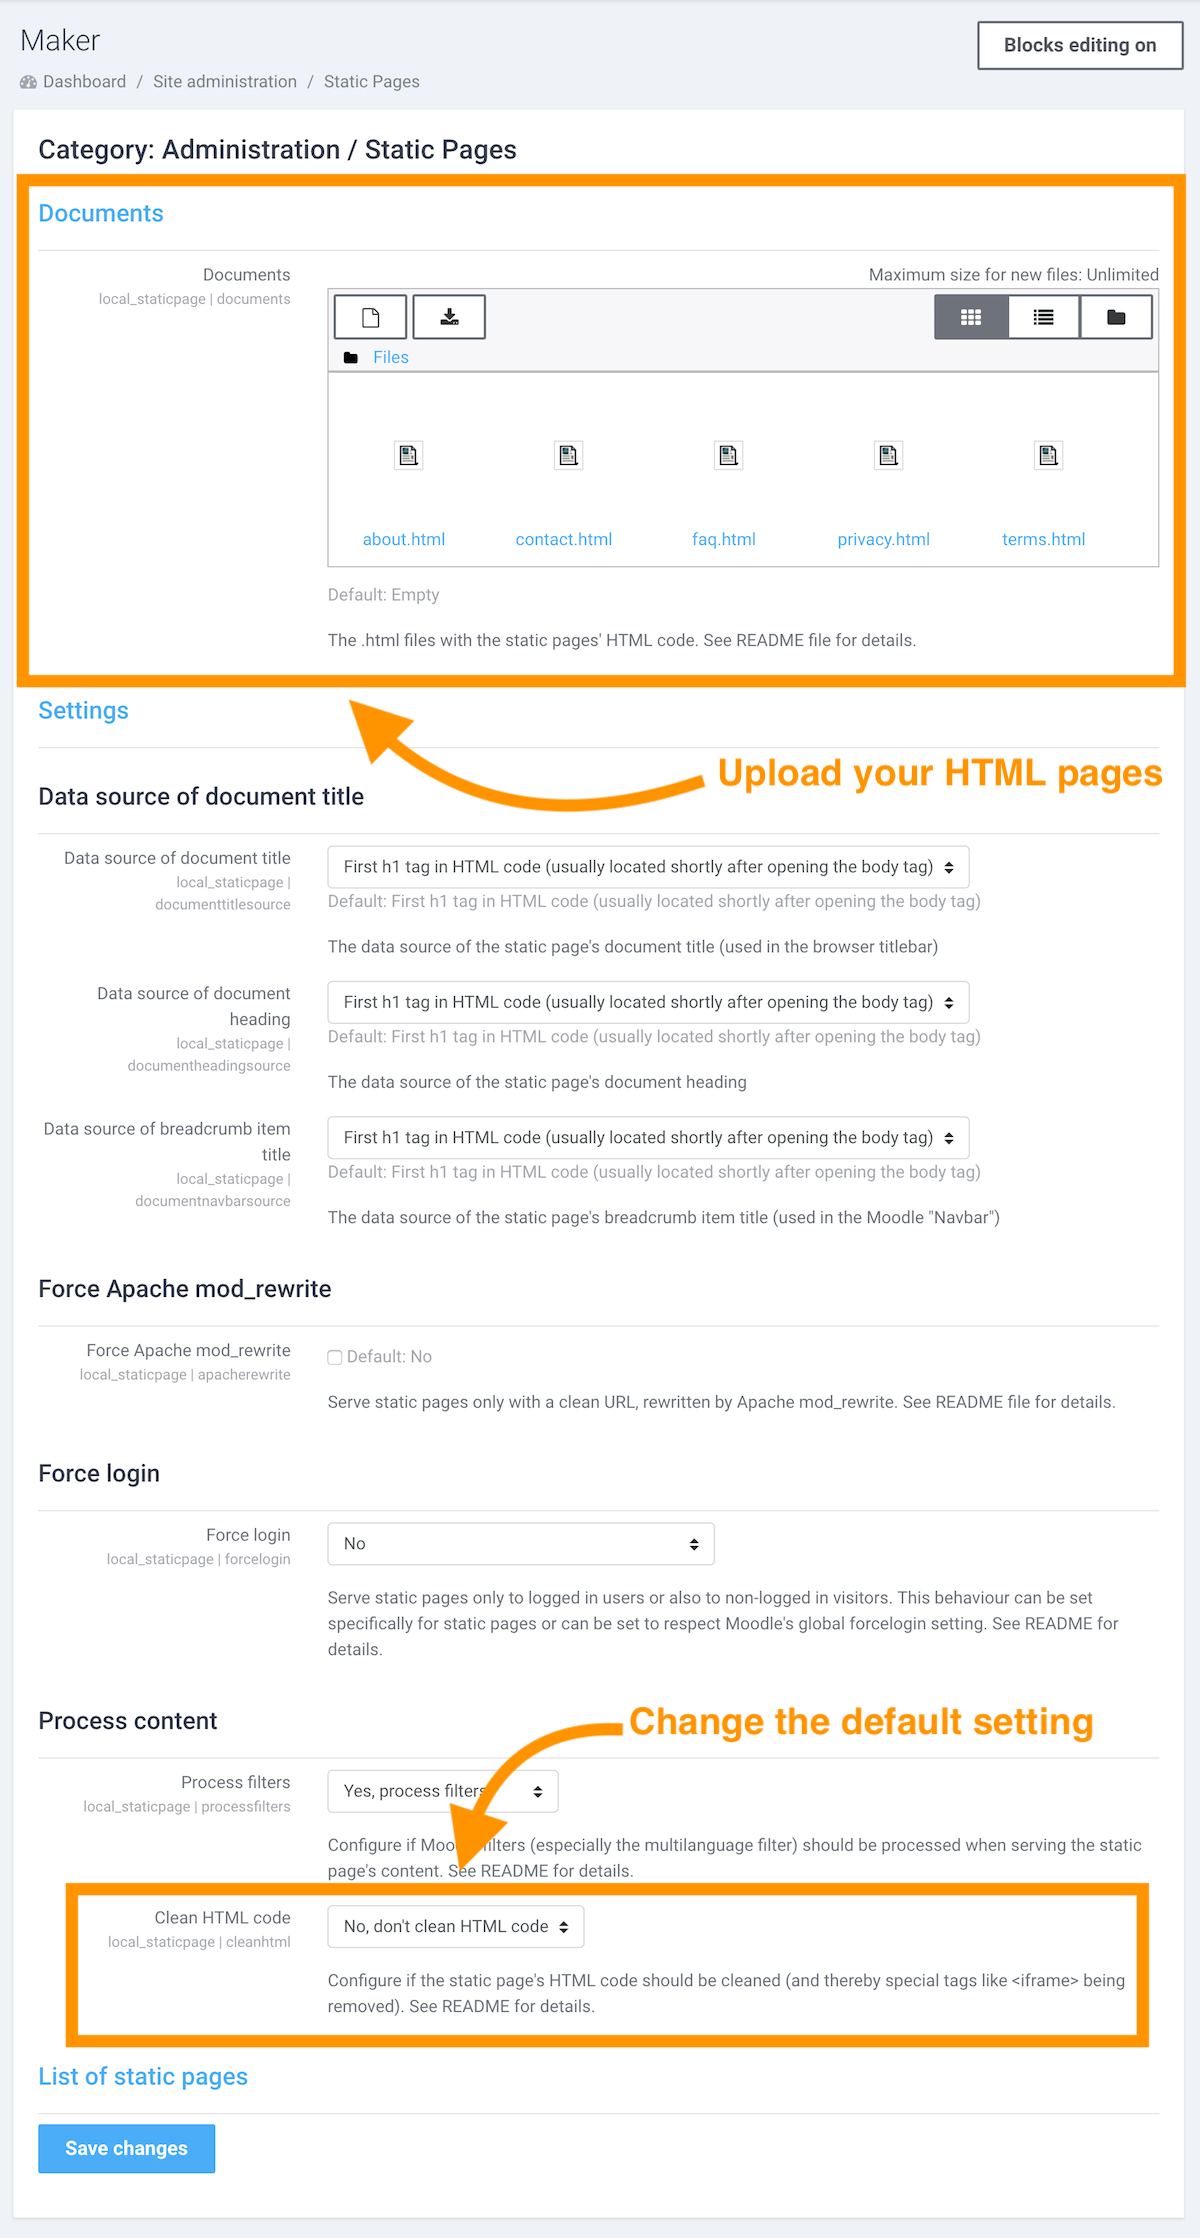
Click the “Static Pages” link and you will be able to upload your HTML files and configure the relevant settings. You can find detailed explanations of each setting from the plugin’s online documentation here.
For setting up our demo, we changed the “Clean HTML code” option from default “Yes, clean HTML code” to “No, don’t clean HTML code”. Make sure you do the same if you’d like to use our HTML templates and embed iframe content such as Youtube/Vimeo video and Google maps in your pages.
Step 3 – Upload Your HTML Pages
Upload your HTML pages to the documents input field and save the changes. To make your HTML pages you can reference the plugin documentation here.
Basic code structure:
<html>
<head>
        <meta http-equiv="Content-Type" content="text/html; charset=utf-8" />
        <title>Imprint</title>
</head>
<body>
        <h1>Imprint</h1>
        [Your content goes here]
</body>
</html>
Theme Styling
If you’re using our Moodle themes Maker, Edutor, or Lumo, there’s no need to style the pages yourself because all the necessary styling is already included in the themes.
If you are using a different Moodle theme you will need to add custom styling to the pages. You can either add your CSS to your theme’s Custom CSS option (if it has one) or include a <style> tag into the <head> section of your HTML document as shown below:
- Using our Moodle themes (Lumo, Edutor, or Maker)?
You don’t need to add any extra styling. These themes include built-in styles for static pages, so your content will look consistent with the rest of your site. - Using a different theme?
You may need to add custom styles. You can either:- Use your theme’s Custom CSS setting (if it has one), or
- Embed styles directly inside your HTML using a
<style>tag:
<html>
<head>
        <meta http-equiv="Content-Type" content="text/html; charset=utf-8" />
        <title>Imprint</title>
        <style>
        [Your custom css code goes here]
        </style>
</head>
<body>
        <h1>Imprint</h1>
        [Your content goes here]
</body>
</html>
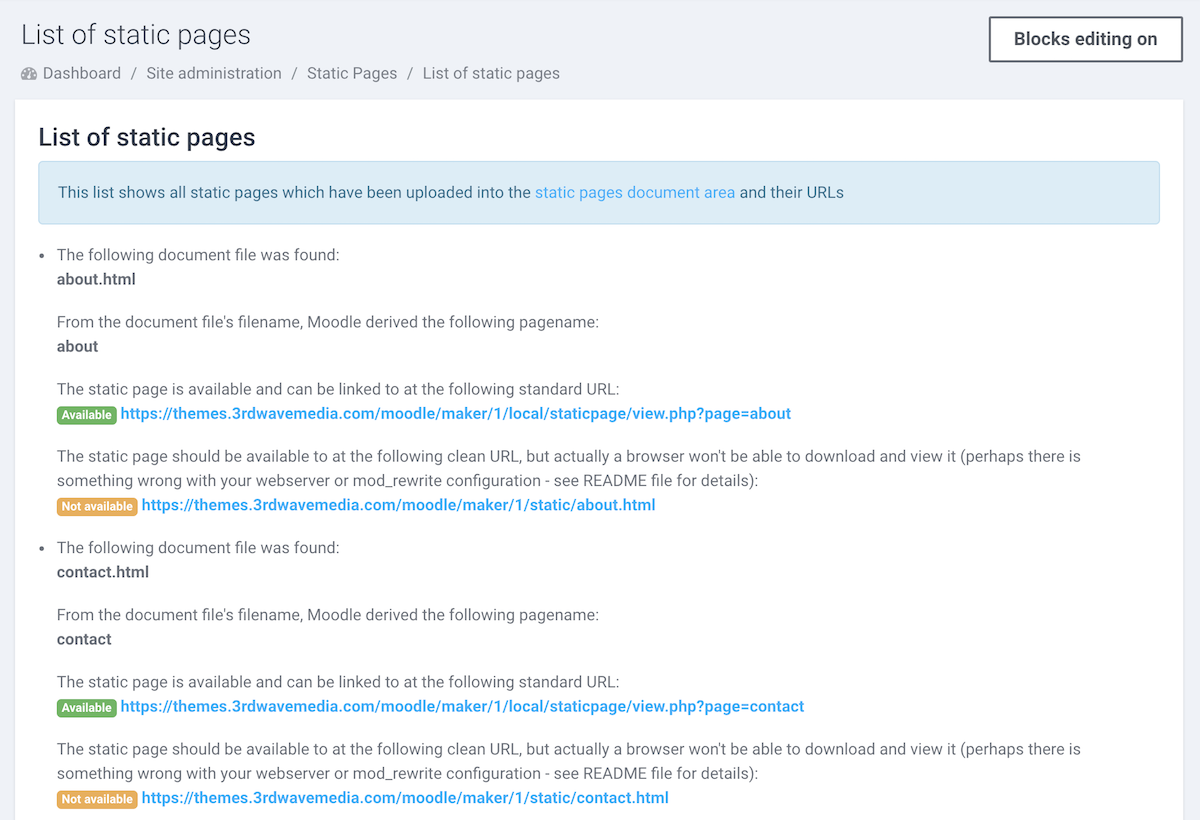
Step 4 – Link to Your Pages
After uploading your HTML files, go to Site administration > Plugins > Local plugins > Static Pages > List of static pages
to view the URLs of your pages.
In our demos, we used Moodle’s Custom Menu to link the pages (Learn how).
Demo Previews
Want to see the Static Pages plugin in action? Check out the demos for our Moodle themes:
Lumo Demo

Edutor Demo

Maker Demo
Download Free HTML Templates
You can download the HTML pages we used in our demo below and edit the page content to suit your own needs.
For Moodle 5.x Sites
Free Download (4067 downloads)For Moodle 4.x Sites
Free Download (21481 downloads)Final Tips
- Keep your HTML simple and clean
- Always test your pages on both desktop and mobile
- Don’t forget to switch off the “clean HTML” setting if you’re embedding rich media
The Static Pages plugin is a lightweight but powerful way to bring more flexibility and professionalism to your Moodle site – especially when paired with a well-designed theme.
Want to create course landing pages to promote your featured courses?
- Learn how to create a standard course landing page
- Learn how to create a Udemy-style course landing Page