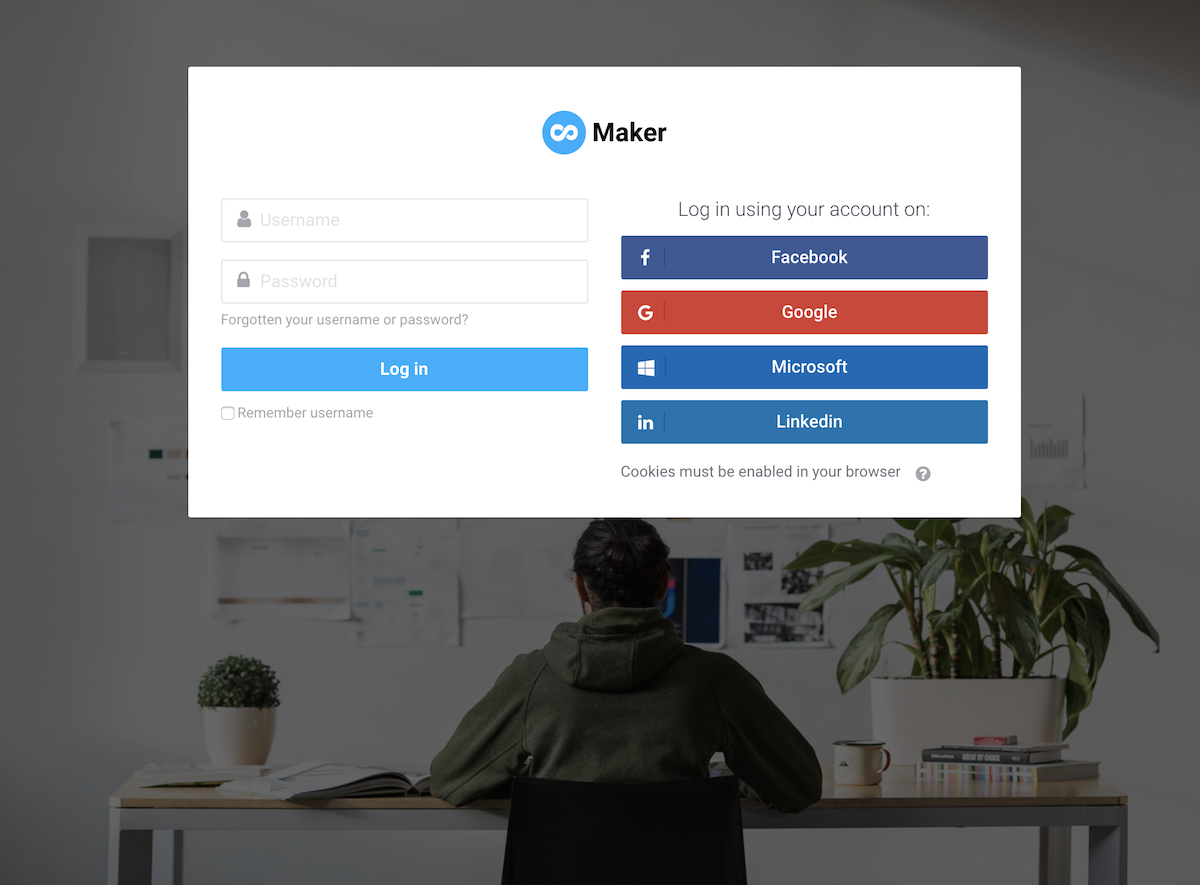
Want to make the signup/login process of your Moodle site simple, easy and fast for your users? In Moodle 3.4 you are able to add social login options (eg. Facebook/Google/Linkedin/Microsoft) to your Moodle’s login page. In this tutorial, we will walk you through how to do that.
We’ve set up a live demo using our latest Moodle theme Maker for this tutorial:
Step 1
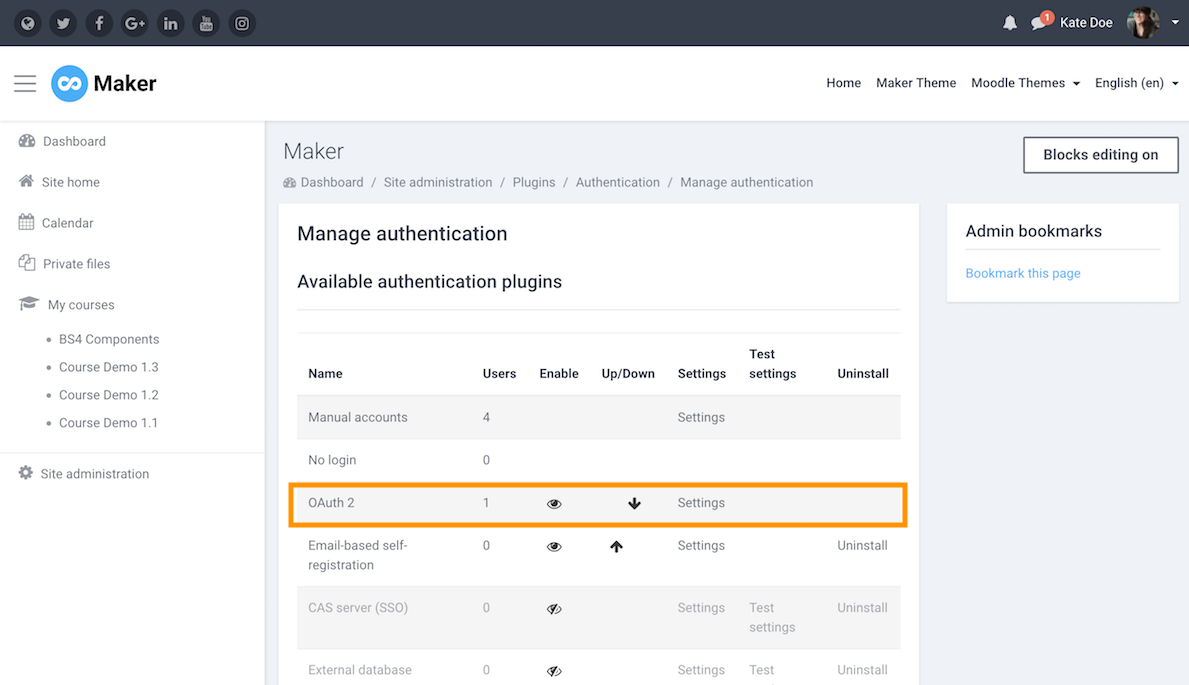
You need to enable social login (OAuth 2) as one of your site’s authentication methods.
Log into your Moodle site as an admin and navigate to the “Manage authentication” page: Site administration > Plugins > Authentication > Manage authentication
Find the “OAuth 2” option on the page and enable it by clicking the closed-eye icon.
Step 2
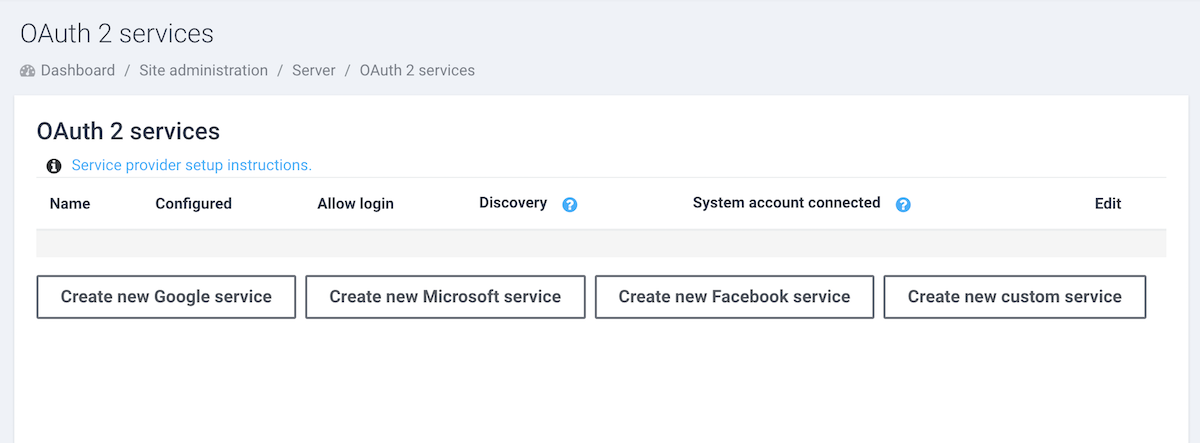
Navigate to the “OAuth 2 services” page to add your desired social logins: Site administration > Server > OAuth 2 services
1. Add Facebook Login
Click the “Create new Facebook service” button and enter your Client ID and Client secret on the settings page as shown in the figure below and save the changes.
You can follow the instructions here to obtain your Facebook Client ID and secret.
2. Add Google Login
Click the “Create new Google service” button and enter your Client ID and Client secret on the settings page as shown in the figure below and save the changes.
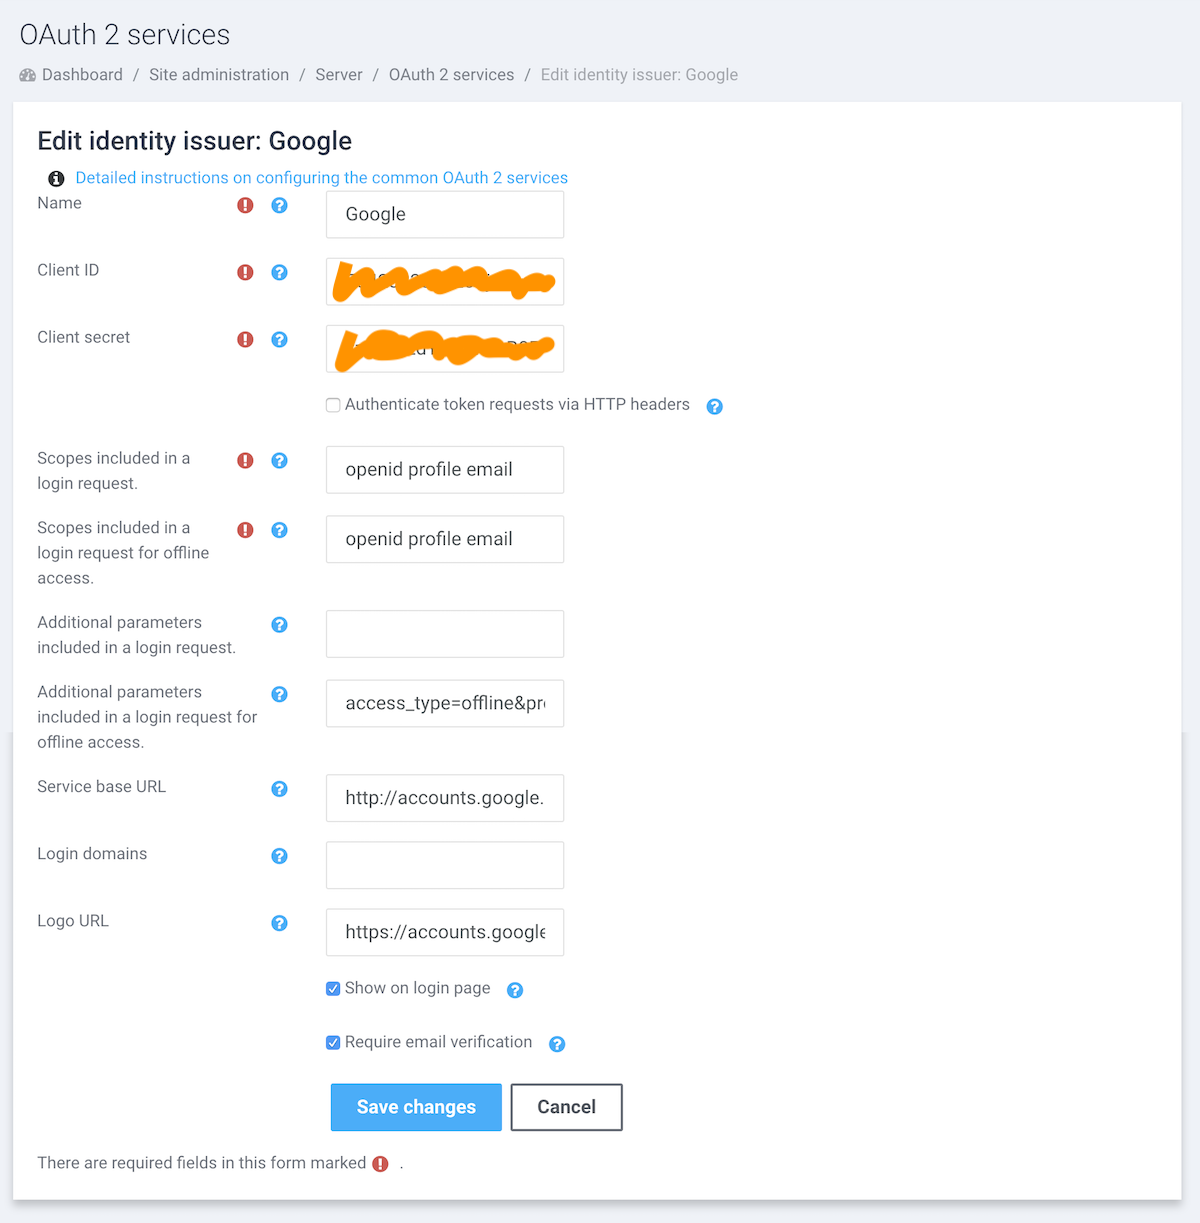
You can follow the instructions here to obtain your Google Client ID and secret.
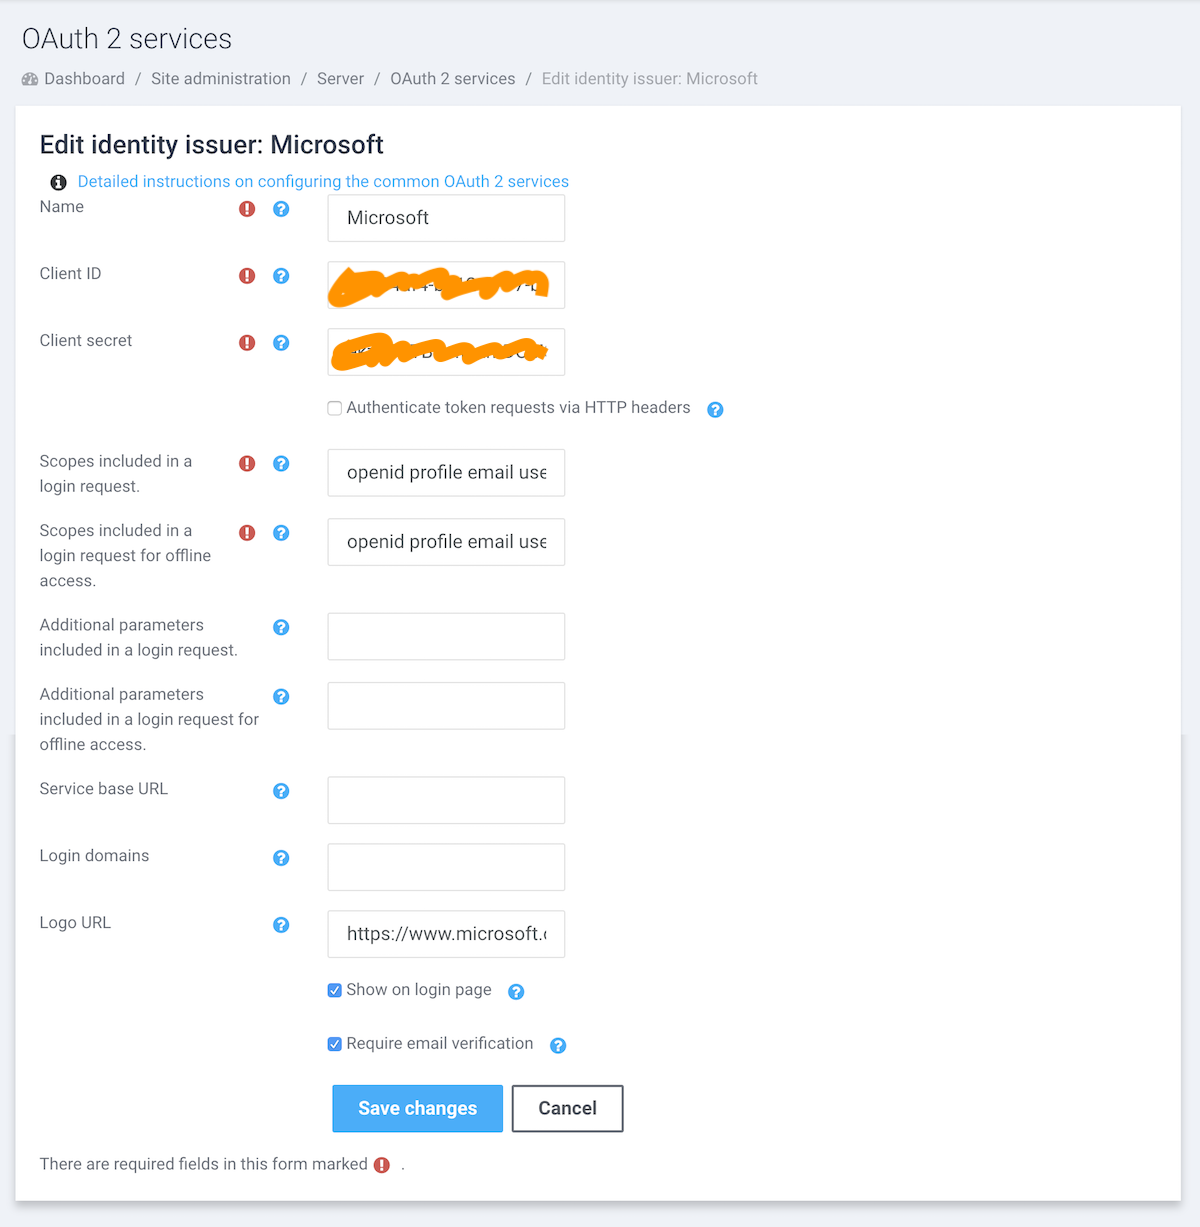
3. Add Microsoft Login
Click the “Create new Microsoft service” button and enter your Client ID and Client secret on the settings page as shown in the figure below and save the changes.
You can follow the instructions here to obtain your Microsoft Client ID and secret.
4. Add Linkedin Login
“Linkedin” is not in Moodle’s OAuth 2 service presets so you’ll need to add it as a custom service by clicking the “Create new custom service” button.
On the settings page you need to enter the following data:
Name: Linkedin
Client ID: (Your Linkedin Client ID)
Client secret: (Your Linkedin Client secret)
Scopes included in a login request: r_basicprofile r_emailaddress
Scopes included in a login request for offline access: r_basicprofile r_emailaddress
Logo URL: https://static.licdn.com/scds/common/u/images/logos/favicons/v1/favicon.ico
Show on login page: tick the check box
You can follow the instructions here to obtain your Linkedin Client ID and secret. Also you might find Linkedin’s doc quite helpful too.
Once you’ve added Linkedin to the Oauth 2 service list, you’ll need to configure its end points and user field mapping as shown in the figure below.
End points settings:
userinfo_endpoint https://api.linkedin.com/v1/people/~:(id,email-address,first-name,last-name,picture-url)?format=json authorization_endpoint https://www.linkedin.com/oauth/v2/authorization token_endpoint https://www.linkedin.com/oauth/v2/accessToken
User field mappings:
firstName firstname lastName lastname emailAddress email pictureUrl picture
That’s it. Now your site users should be able to log into your site using their existing social media accounts without going through the long signup form.
Want to master Moodle?
Moodle 3.0x Masterclass: Complete Educator's Guide to Moodle
Moodle Tutorial for Educators - Learn Moodle to create WORLD CLASS online courses. Leverage Moodle 3 like a BOSS!

Are you a Moodle admin?
Moodle Administration Tutorial: Beginner, Intermediate Guide
Learn World Class Moodle LMS Admin, Configure, Theme, Manage Courses, Users, Permissions, Roles, Security, Plugins...
