In our previous post we talked about how to add a contact form in a Moodle page. Do you know you can also add a contact form in a Moodle course? This is great for allowing your course students to easily send a quick question to their course teacher or tutor from inside a course. In this post we will show you how to add a Contact Tutor form in a specific Moodle course. There are two ways to do this and we will show you a simple way (with limitations) and an advanced way (requires basic HTML knowledge but gives you more control).
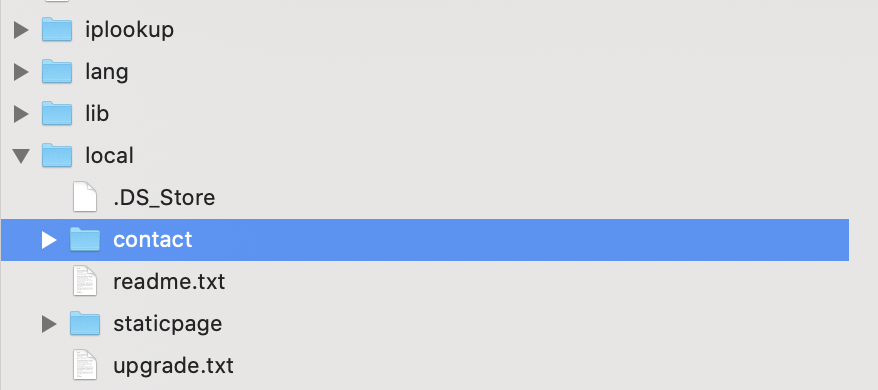
First things first, you need to download Moodle’s contact form plugin and install it by placing the downloaded plugin folders inside your Moodle site directory’s “local” folder.
1) The Simple Method
Pros:
- Quick and easy.
- Anyone can do it.
Cons:
- You need to install Moodle’s plugin FilterCodes.
- Your contact form’s recipient is fixed to be your Moodle site’s support contact.
- After submitting the contact form your user will land on your site’s front page instead of the course page.
Step 1
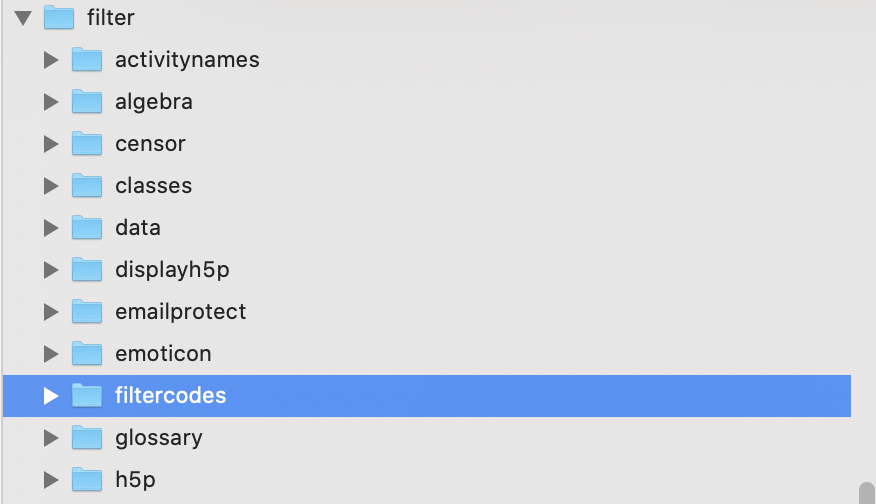
Install and enable the FilterCodes plugin on your Moodle site.
You can install the plugin by placing the downloaded plugin folder inside of your Moodle directory’s “filters” folder.
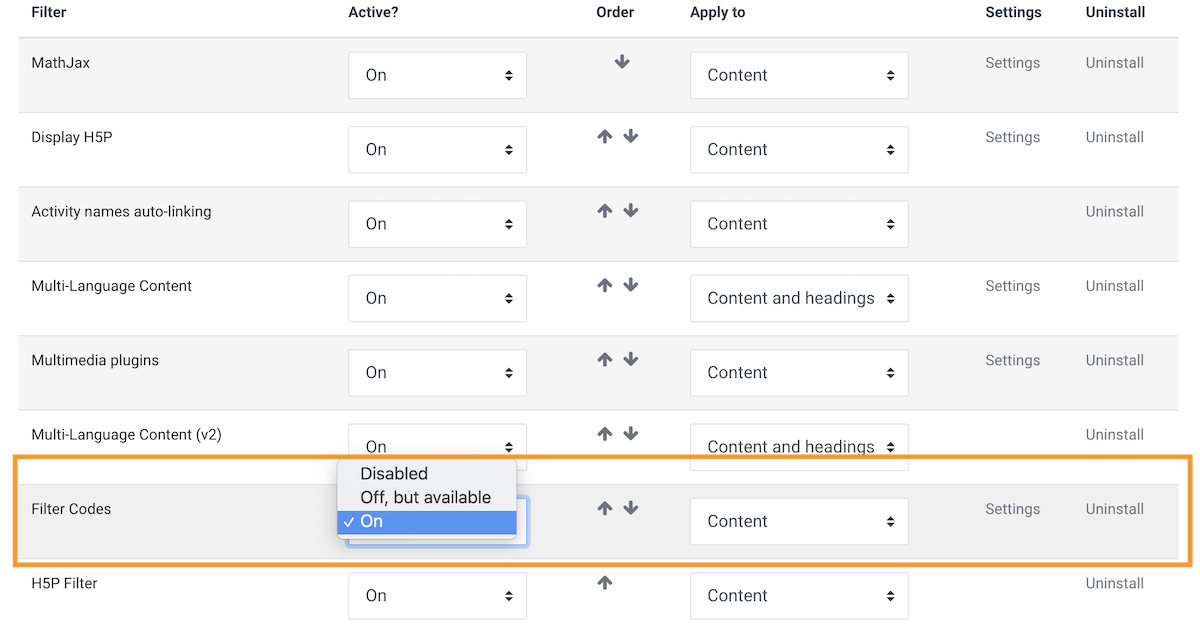
After installing you need to go to the filters management page and enable the plugin there:
Site administration > Plugins > Filters > Manage filters
Step 2
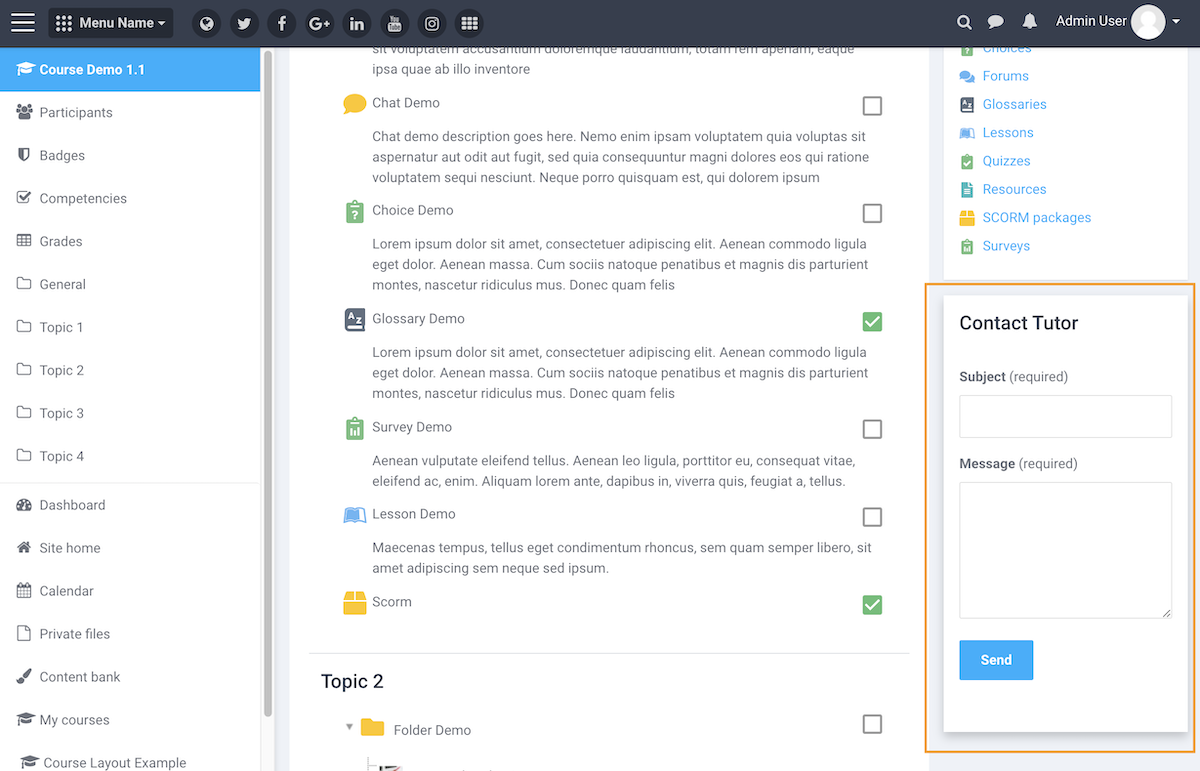
Go to your desired course and add a HTML block to your course. To add a block to your course you need to turn on editing first then find the “Add a block” option in the Moodle’s nav drawer.
Step 3
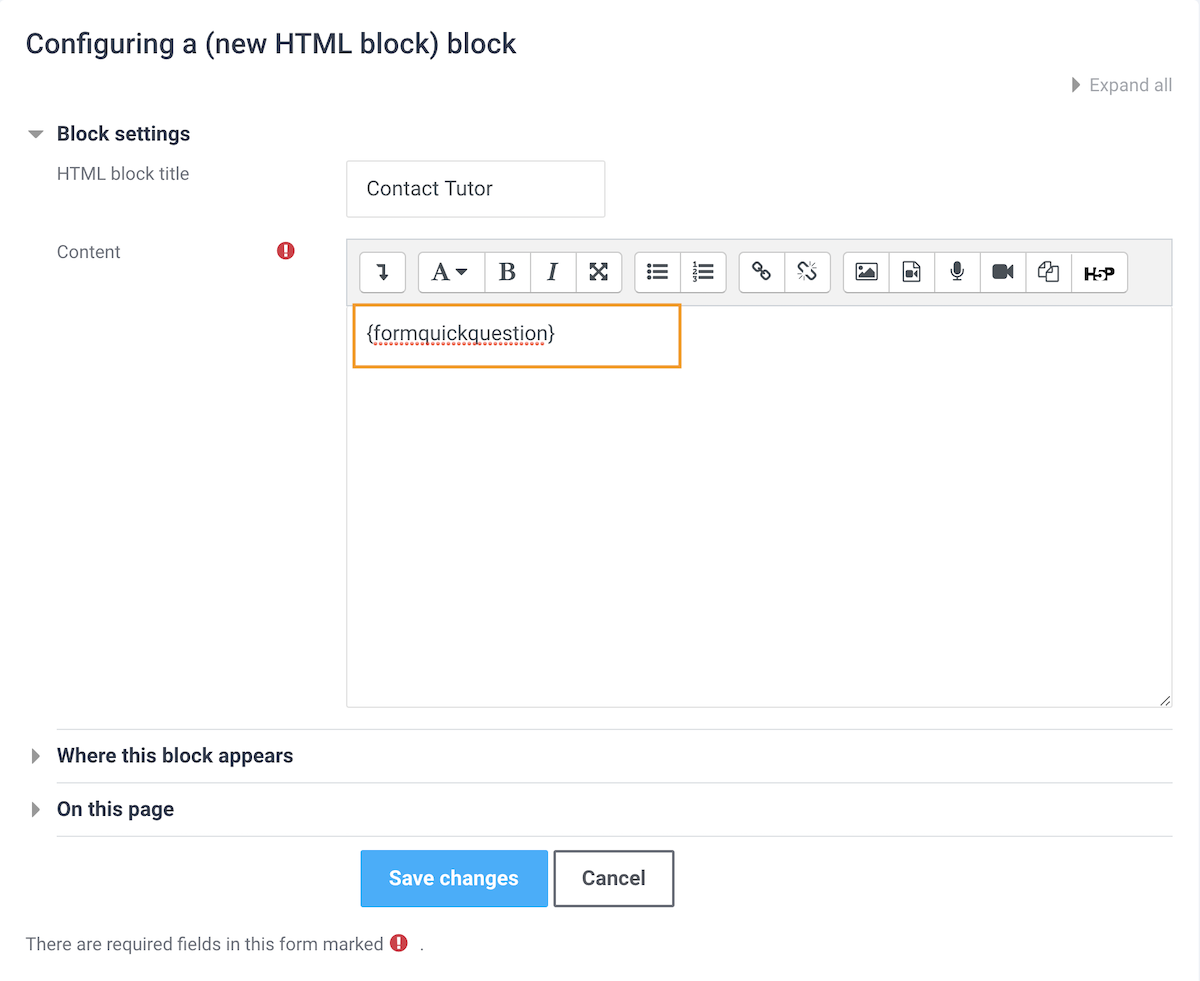
After adding the HTML block you can start configuring the block content by clicking the cog icon and selecting the “Configure block” option in the dropdown menu.
To add the contact form you just need to enter code {formquickquestion} into the content input field as shown in the figure below.
Save your changes and you have added a simple contact form to your Moodle course.
Advanced Method
Pros:
- You can define your contact form’s recipient.
- After submitting the contact form you can keep your users on the course page.
- You can customize the form based on your specific needs. For example, you can easily add/remove fields in the contact form.
Cons:
- Basic knowledge of HTML is required.
Step 1
Add a HTML block to your desired course.
Step 2
Enter your custom form HTML code into the block content input field as shown in the figure below.

Below is the form HTML code snippet we used for our demo. You can copy and paste the code to create a simple contact form in your Moodle course. The code below sets the form recipient as teacher and you need to define teacher’s email in step 3.
<div class="block-theme-widget container">
    <form class="contact-form" action="../local/contact/index.php" method="post">
        <p class="mb-3">Have any questions about the course? Use the form below to ask your tutor.</p>

        <div class="form-group">
            <label class="sr-only" for="subject">Subject</label>
            <input type="text" class="form-control" id="subject" name="subject" placeholder="Subject" required="required">
        </div>

        <div class="form-group">
            <label class="sr-only" for="message">Your message</label>
            <textarea class="form-control" id="message" name="message" placeholder="Enter your message" rows="5" required="required"></textarea>
        </div>
        <input type="hidden" id="sesskey" name="sesskey" value="">
        <input type="hidden" id="referrer" name="referrer" value="">
        <input type="hidden" name="recipient" id="recipient" value="teacher">
        <script>
            document.getElementById('sesskey').value = M.cfg.sesskey;
            document.getElementById('referrer').value = document.location.href;
        </script>

        <div class="form-group">
            <input type="submit" name="submit" id="submit" value="Send" class="btn btn-primary py-2">

        </div>

    </form>
    <!--//contact-form-->
</div>
Step 3
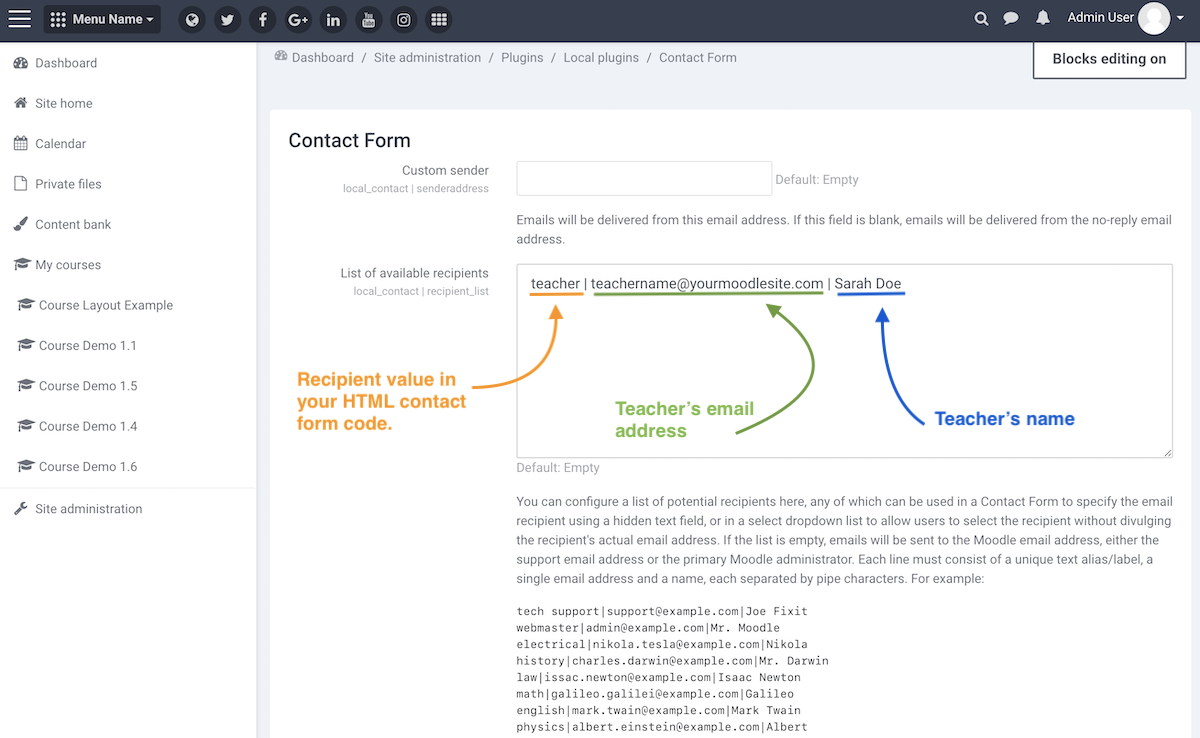
Now you should see a simple contact form appearing in your Moodle course but the contact form is not working yet. To make the form work you need to define the recipient’s email address. To do so you need to go to the Contact Form plugin settings page: Site administration > Plugins > Local plugins > Contact Form and set up your recipient as shown in the figure below.
That’s it. You have successfully added a custom contact tutor form in your course.One last thing to point out though is that the contact tutor form you just added only works for logged in users (not guests). If your course allows guests access you will need to add name and email input fields to your custom form so guests can send messages to the course teacher too.