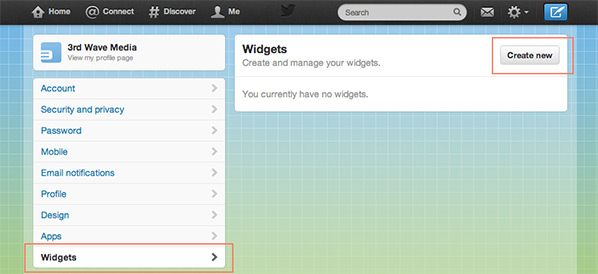
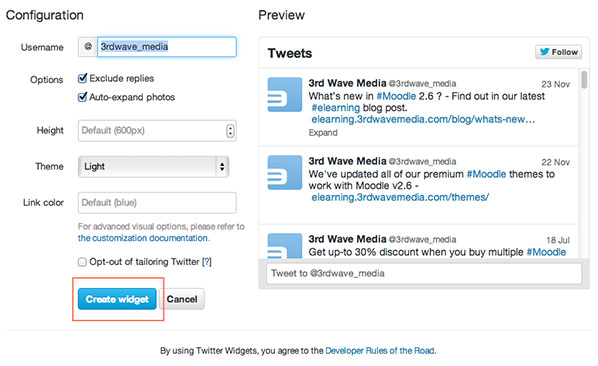
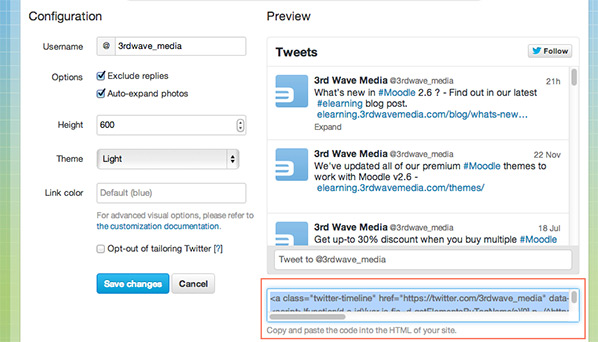
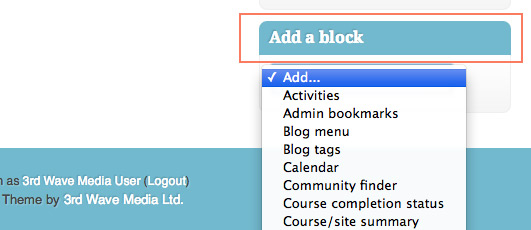
The products listed in this blog post are deprecated and no longer available.
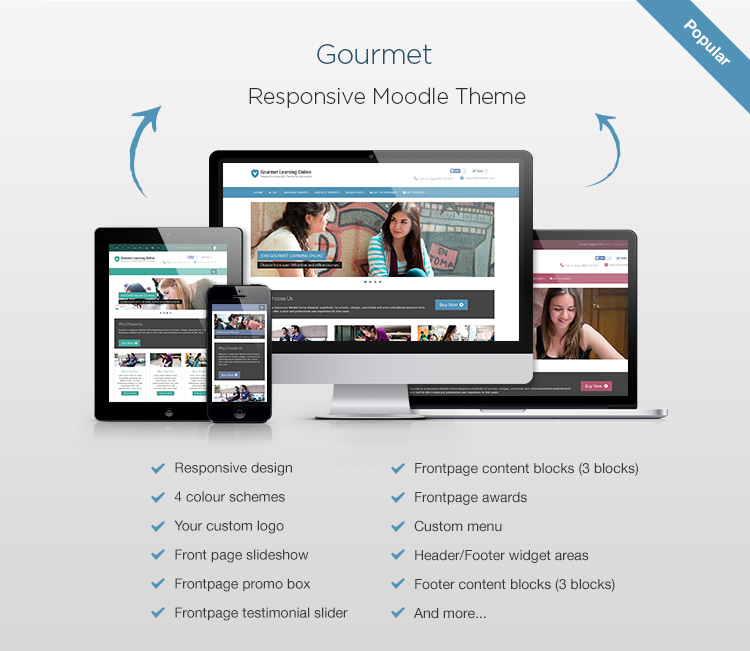
Looking for a Boost-based Moodle theme? Checkout our new products.Want to improve your Moodle course’s content design? We have updated our responsive Moodle theme Gourmet to support the useful Bootstrap 3 components so you can easily drop the relevant HTML code snippets into your Moodle courses to enhance design and user experience.
In this tutorial we will list all the code for the components you can use in our Gourmet theme.
Demo: Link
Level: Intermediate
Pre-requirement: Basic HTML/CSS knowledge
1) Slideshow

<div id="carousel-1" class="carousel slide" data-ride="carousel">
    <ol class="carousel-indicators">
        <li data-target="#carousel-1" data-slide-to="0" class="active"></li>
        <li data-target="#carousel-1" data-slide-to="1"></li>
        <li data-target="#carousel-1" data-slide-to="2"></li>
    </ol>
    <div class="carousel-inner">
        <div class="item active"><img src="http://3rdwavemedia.com/demo-images/slides/slide-3.jpg" alt="" /></div>
        <div class="item"><img src="http://3rdwavemedia.com/demo-images/slides/slide-2.jpg" alt="" /></div>
        <div class="item"><img src="http://3rdwavemedia.com/demo-images/slides/slide-1.jpg" alt="" /></div>
    </div>
    <a class="left carousel-control" href="#carousel-1" data-slide="prev"><span class="glyphicon glyphicon-chevron-left"></span></a>
    <a class="right carousel-control" href="#carousel-1" data-slide="next"> <span class="glyphicon glyphicon-chevron-right"></span> </a>
</div>
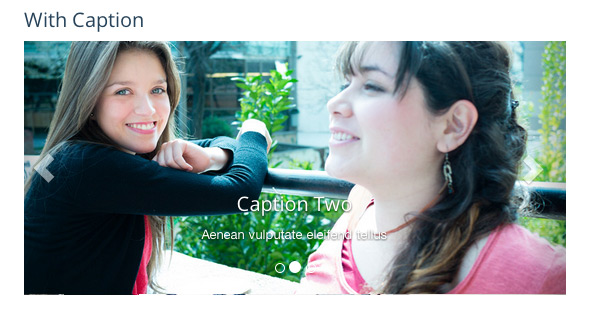
<div id="carousel-2" class="carousel slide" data-ride="carousel">
    <ol class="carousel-indicators">
        <li data-target="#carousel-2" data-slide-to="0" class="active"></li>
        <li data-target="#carousel-2" data-slide-to="1"></li>
        <li data-target="#carousel-2" data-slide-to="2"></li>
    </ol>
    <div class="carousel-inner">
        <div class="item active">
            <img src="http://3rdwavemedia.com/demo-images/slides/slide-1.jpg" alt="" />
            <div class="carousel-caption">
                <h3>Caption One</h3>
                <p>Lorem ipsum dolor sit amet</p>
            </div>
        </div>
        <div class="item">
            <img src="http://3rdwavemedia.com/demo-images/slides/slide-2.jpg" alt="" />
            <div class="carousel-caption">
                <h3>Caption Two</h3>
                <p>Aenean vulputate eleifend tellus</p>
            </div>
        </div>
        <div class="item">
            <img src="http://3rdwavemedia.com/demo-images/slides/slide-3.jpg" alt="" />
            <div class="carousel-caption">
                <h3>Caption Three</h3>
                <p>Maecenas nec odio et ante tincidunt</p>
            </div>
        </div>
    </div>
    <a class="left carousel-control" href="#carousel-2" data-slide="prev">
    <span class="glyphicon glyphicon-chevron-left"></span></a>
    <a class="right carousel-control" href="#carousel-2" data-slide="next"> <span class="glyphicon glyphicon-chevron-right"></span></a>
</div>
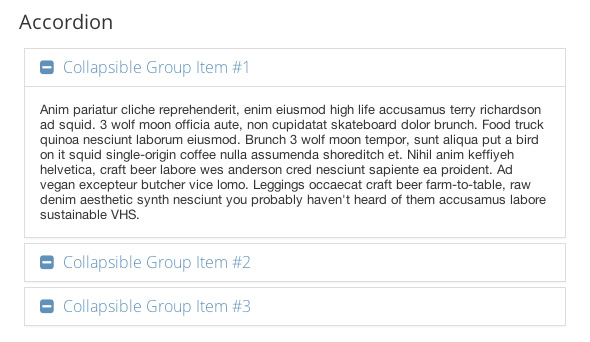
2) Accordion
<div class="panel-group" id="accordion">
    <div class="panel panel-default">
        <div class="panel-heading">
            <h4 class="panel-title"><a data-toggle="collapse" data-parent="#accordion" href="#collapseOne">Collapsible Group Item #1</a></h4>
        </div>

        <div id="collapseOne" class="panel-collapse collapse in">
            <div class="panel-body">
                Anim pariatur cliche reprehenderit, enim eiusmod high life accusamus terry richardson ad squid. 3 wolf moon officia aute, non cupidatat skateboard dolor brunch. Food truck quinoa nesciunt laborum eiusmod. Brunch 3 wolf moon tempor, sunt aliqua put a bird on it squid single-origin coffee nulla assumenda shoreditch et. Nihil anim keffiyeh helvetica, craft beer labore wes anderson cred nesciunt sapiente ea proident. Ad vegan excepteur butcher vice lomo. Leggings occaecat craft beer farm-to-table, raw denim aesthetic synth nesciunt you probably haven't heard of them accusamus labore sustainable VHS.
            </div>
        </div>
    </div>

    <div class="panel panel-default">
        <div class="panel-heading">
            <h4 class="panel-title"><a data-toggle="collapse" data-parent="#accordion" href="#collapseTwo">Collapsible Group Item #2</a></h4>
        </div>

        <div id="collapseTwo" class="panel-collapse collapse">
            <div class="panel-body">
                Anim pariatur cliche reprehenderit, enim eiusmod high life accusamus terry richardson ad squid. 3 wolf moon officia aute, non cupidatat skateboard dolor brunch. Food truck quinoa nesciunt laborum eiusmod. Brunch 3 wolf moon tempor, sunt aliqua put a bird on it squid single-origin coffee nulla assumenda shoreditch et. Nihil anim keffiyeh helvetica, craft beer labore wes anderson cred nesciunt sapiente ea proident. Ad vegan excepteur butcher vice lomo. Leggings occaecat craft beer farm-to-table, raw denim aesthetic synth nesciunt you probably haven't heard of them accusamus labore sustainable VHS.
            </div>
        </div>
    </div>

    <div class="panel panel-default">
        <div class="panel-heading">
            <h4 class="panel-title"><a data-toggle="collapse" data-parent="#accordion" href="#collapseThree">Collapsible Group Item #3</a></h4>
        </div>

        <div id="collapseThree" class="panel-collapse collapse">
            <div class="panel-body">
                Anim pariatur cliche reprehenderit, enim eiusmod high life accusamus terry richardson ad squid. 3 wolf moon officia aute, non cupidatat skateboard dolor brunch. Food truck quinoa nesciunt laborum eiusmod. Brunch 3 wolf moon tempor, sunt aliqua put a bird on it squid single-origin coffee nulla assumenda shoreditch et. Nihil anim keffiyeh helvetica, craft beer labore wes anderson cred nesciunt sapiente ea proident. Ad vegan excepteur butcher vice lomo. Leggings occaecat craft beer farm-to-table, raw denim aesthetic synth nesciunt you probably haven't heard of them accusamus labore sustainable VHS.
            </div>
        </div>
    </div>
</div>
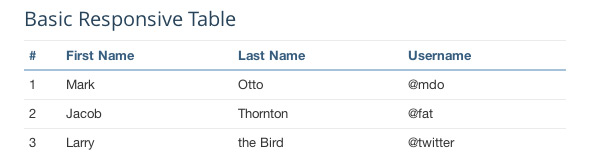
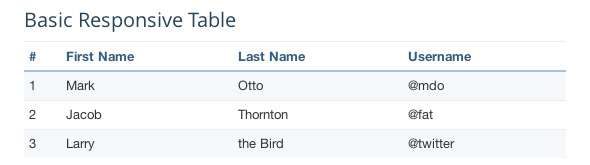
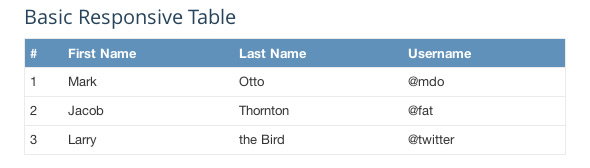
3) Tables
<div class="table-responsive">
    <table class="table">
        <thead>
            <tr>
                <th>#</th>

                <th>First Name</th>

                <th>Last Name</th>

                <th>Username</th>
            </tr>
        </thead>

        <tbody>
            <tr>
                <td>1</td>

                <td>Mark</td>

                <td>Otto</td>

                <td>@mdo</td>
            </tr>

            <tr>
                <td>2</td>

                <td>Jacob</td>

                <td>Thornton</td>

                <td>@fat</td>
            </tr>

            <tr>
                <td>3</td>

                <td>Larry</td>

                <td>the Bird</td>

                <td>@twitter</td>
            </tr>
        </tbody>
    </table>
</div>
<div class="table-responsive">
    <table class="table table-striped">
        <thead>
            <tr>
                <th>#</th>

                <th>First Name</th>

                <th>Last Name</th>

                <th>Username</th>
            </tr>
        </thead>

        <tbody>
            <tr>
                <td>1</td>

                <td>Mark</td>

                <td>Otto</td>

                <td>@mdo</td>
            </tr>

            <tr>
                <td>2</td>

                <td>Jacob</td>

                <td>Thornton</td>

                <td>@fat</td>
            </tr>

            <tr>
                <td>3</td>

                <td>Larry</td>

                <td>the Bird</td>

                <td>@twitter</td>
            </tr>
        </tbody>
    </table>
</div>
<div class="table-responsive">
    <table class="table table-boxed">
        <thead>
            <tr>
                <th>#</th>

                <th>First Name</th>

                <th>Last Name</th>

                <th>Username</th>
            </tr>
        </thead>

        <tbody>
            <tr>
                <td>1</td>

                <td>Mark</td>

                <td>Otto</td>

                <td>@mdo</td>
            </tr>

            <tr>
                <td>2</td>

                <td>Jacob</td>

                <td>Thornton</td>

                <td>@fat</td>
            </tr>

            <tr>
                <td>3</td>

                <td>Larry</td>

                <td>the Bird</td>

                <td>@twitter</td>
            </tr>
        </tbody>
    </table>
</div>
4) Buttons
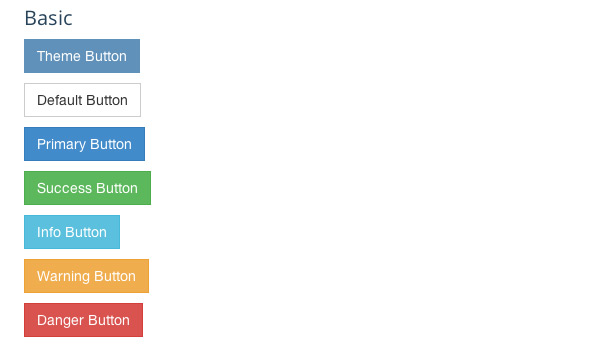
<p><a class="btn btn-theme" href="http://elearning.3rdwavemedia.com/themes/gourmet/">Theme Button</a></p>
<p><a class="btn btn-default" href="#link">Default Button</a></p>
<p><a class="btn btn-primary" href="#link">Primary Button</a></p>
<p><a class="btn btn-success" href="#link">Success Button</a></p>
<p><a class="btn btn-info" href="#link">Info Button</a></p>
<p><a class="btn btn-warning" href="#link">Warning Button</a></p>
<p><a class="btn btn-danger" href="#link">Danger Button</a></p>
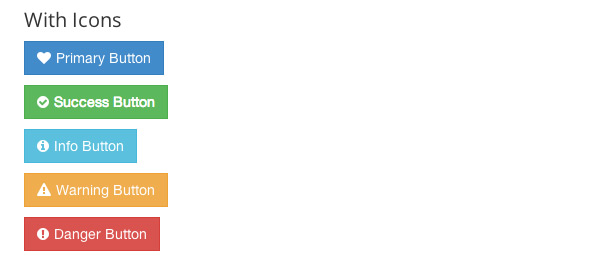
<p><a href="#link" class="btn btn-primary"><i class="fa fa-heart"></i>Primary Button</a></p>
<p><a href="#link" class="btn btn-success"><i class="fa fa-check-circle"></i>Success Button</a></p>
<p><a href="#link" class="btn btn-info"><i class="fa fa-info-circle"></i>Info Button</a></p>
<p><a href="#link" class="btn btn-warning"><i class="fa fa-warning"></i>Warning Button</a></p>
<p><a href="#link" class="btn btn-danger"><i class="fa fa-exclamation-circle"></i>Danger Button</a></p>
You can change the icons in the buttons to any of the 300+ FontAwsome icons available

<p><a href="#link" class="btn btn-cta"><i class="fa fa-play-circle"></i>Apply Now</a></p>
<p><a href="#link" class="btn btn-cta"><i class="fa fa-play-circle"></i>Purchase Now</a></p>
<p><a href="#link" class="btn btn-cta"><i class="fa fa-play-circle"></i>Join Now</a></p>
5) Alerts
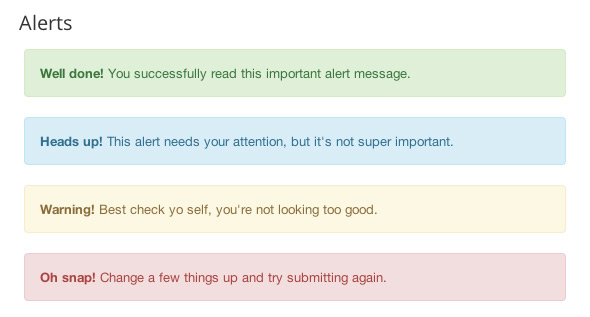
<div class="alert alert-success"><strong>Well done!</strong> You successfully read this important alert message.</div>
<div class="alert alert-info"><strong>Heads up!</strong> This alert needs your attention, but it's not super important.</div>
<div class="alert alert-warning"><strong>Warning!</strong> Best check yo self, you're not looking too good.</div>
<div class="alert alert-danger"><strong>Oh snap!</strong> Change a few things up and try submitting again.</div>
6) Quote
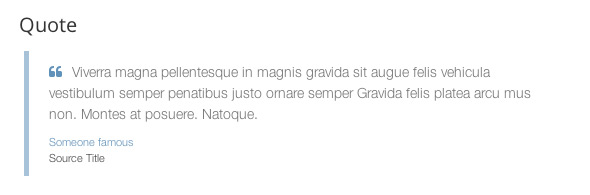
<blockquote class="custom-quote">
    <p><i class="fa fa-quote-left"></i>Viverra magna pellentesque in magnis gravida sit augue felis vehicula vestibulum semper penatibus justo ornare semper Gravida felis platea arcu mus non. Montes at posuere. Natoque.</p>
    <p class="people"><span class="name">Someone famous</span><br /><span class="title">Source Title</span></p>
</blockquote>
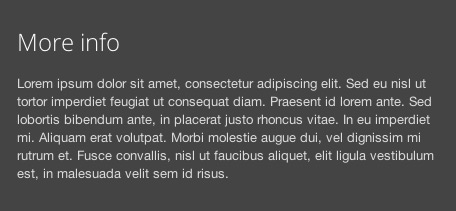
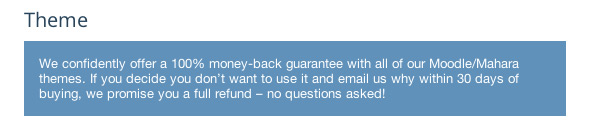
7) Boxes
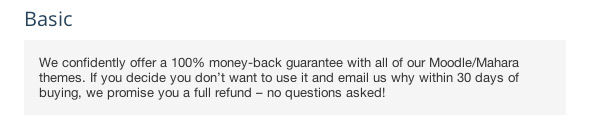
<div class="box box-default">We confidently offer a 100% money-back guarantee with all of our Moodle/Mahara themes. If you decide you don’t want to use it and email us why within 30 days of buying, we promise you a full refund – no questions asked!</div>
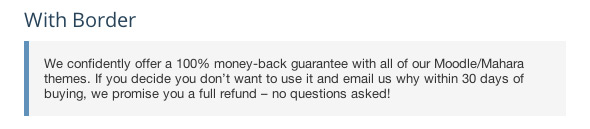
<div class="box box-border">We confidently offer a 100% money-back guarantee with all of our Moodle/Mahara themes. If you decide you don’t want to use it and email us why within 30 days of buying, we promise you a full refund – no questions asked!</div>
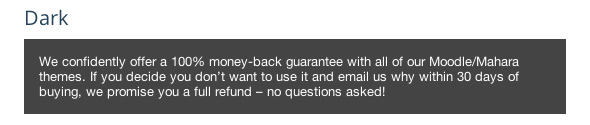
<div class="box box-dark">We confidently offer a 100% money-back guarantee with all of our Moodle/Mahara themes. If you decide you don’t want to use it and email us why within 30 days of buying, we promise you a full refund – no questions asked!</div>
<div class="box box-theme">We confidently offer a 100% money-back guarantee with all of our Moodle/Mahara themes. If you decide you don’t want to use it and email us why within 30 days of buying, we promise you a full refund – no questions asked!</div>
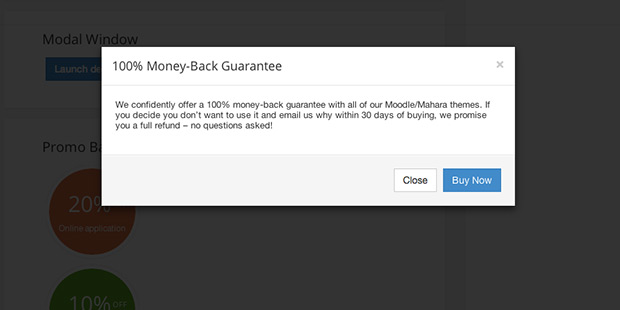
8) Modal Window

<!-- Button trigger modal -->
<p><button class="btn btn-primary" data-toggle="modal" data-target="#myModal"> Launch demo modal </button></p>

<!-- Modal -->
<div class="modal fade" id="myModal" tabindex="-1" role="dialog" aria-labelledby="myModalLabel" aria-hidden="true" style="width: auto">
    <div class="modal-dialog">
        <div class="modal-content">
            <div class="modal-header">
                <button type="button" class="close" data-dismiss="modal" aria-hidden="true">×</button>
                <h4 class="modal-title" id="myModalLabel">100% Money-Back Guarantee</h4>
            </div>
            <div class="modal-body">We confidently offer a 100% money-back guarantee with all of our Moodle/Mahara themes. If you decide you don’t want to use it and email us why within 30 days of buying, we promise you a full refund – no questions asked!</div>
            <div class="modal-footer"><button type="button" class="btn btn-default" data-dismiss="modal">Close</button> <a href="http://elearning.3rdwavemedia.com/themes/gourmet/" class="btn btn-primary">Buy Now</a>
            </div>
        </div>
    </div>
</div>
9) Promo Badges
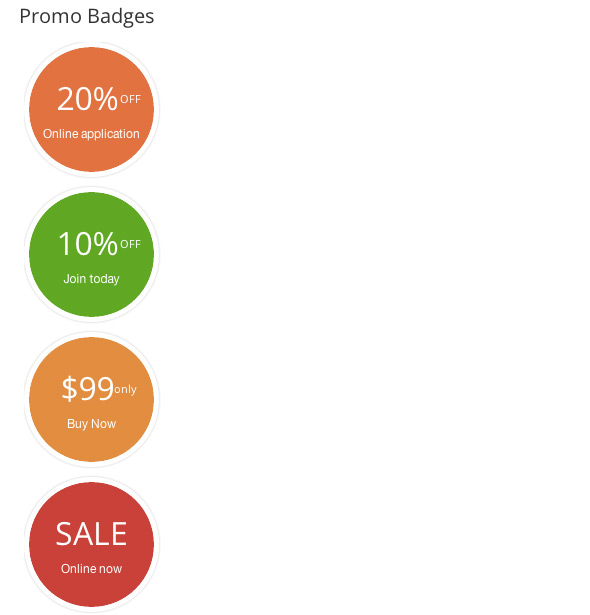
<p class="promo-badge"><a class="RedDamask" href="#"> <span class="percentage">20% <span class="off">OFF</span></span> <br /> <span class="desc">Online application</span> </a></p>
</div>
<div>
<p class="promo-badge"><a class="OliveDrab" href="#"> <span class="percentage">10% <span class="off">OFF</span></span> <br /> <span class="desc">Join today</span> </a></p>
</div>
<div>
<p class="promo-badge"><a class="FireBush" href="#"> <span class="percentage">$99 <span class="off">only</span></span> <br /> <span class="desc">Buy Now</span> </a></p>
</div>
<div>
<p class="promo-badge"><a class="Mojo" href="#"> <span class="percentage">SALE</span><br /> <span class="desc">Online now</span> </a></p>
10) Labels
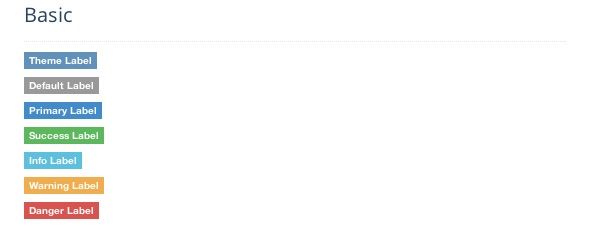
<p><span class="label label-theme">Theme Label</span></p>
<p><span class="label label-default">Default Label</span></p>
<p><span class="label label-primary">Primary Label</span></p>
<p><span class="label label-success">Success Label</span></p>
<p><span class="label label-info">Info Label</span></p>
<p><span class="label label-warning">Warning Label</span></p>
<p><span class="label label-danger">Danger Label</span></p>
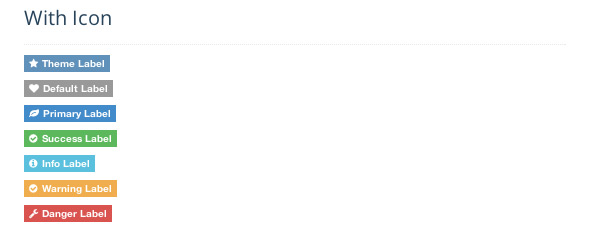
<p><span class="label label-theme"><i class="fa fa-star"></i>Theme Label</span></p>
<p><span class="label label-default"><i class="fa fa-heart"></i>Default Label</span></p>
<p><span class="label label-primary"><i class="fa fa-leaf"></i>Primary Label</span></p>
<p><span class="label label-success"><i class="fa fa-check-circle"></i>Success Label</span></p>
<p><span class="label label-info"><i class="fa fa-info-circle"></i>Info Label</span></p>
<p><span class="label label-warning"><i class="fa fa-check-circle"></i>Warning Label</span></p>
<p><span class="label label-danger"><i class="fa fa-wrench"></i>Danger Label</span></p>
You can change the icons in the labels to any of the 300+ FontAwsome icons available