Do you want to sell your courses online and take payment via Stripe or PayPal? Moodle could be the perfect learning platform for you to set up and manage your paid courses.
In this tutorial we will show you how to set up a paid Moodle course. You have the option to configure your course’s payment gateway using Stripe or PayPal.
Set up a course with Stripe enrolment
Step 1 – Install the Moodle Stripe Plugin
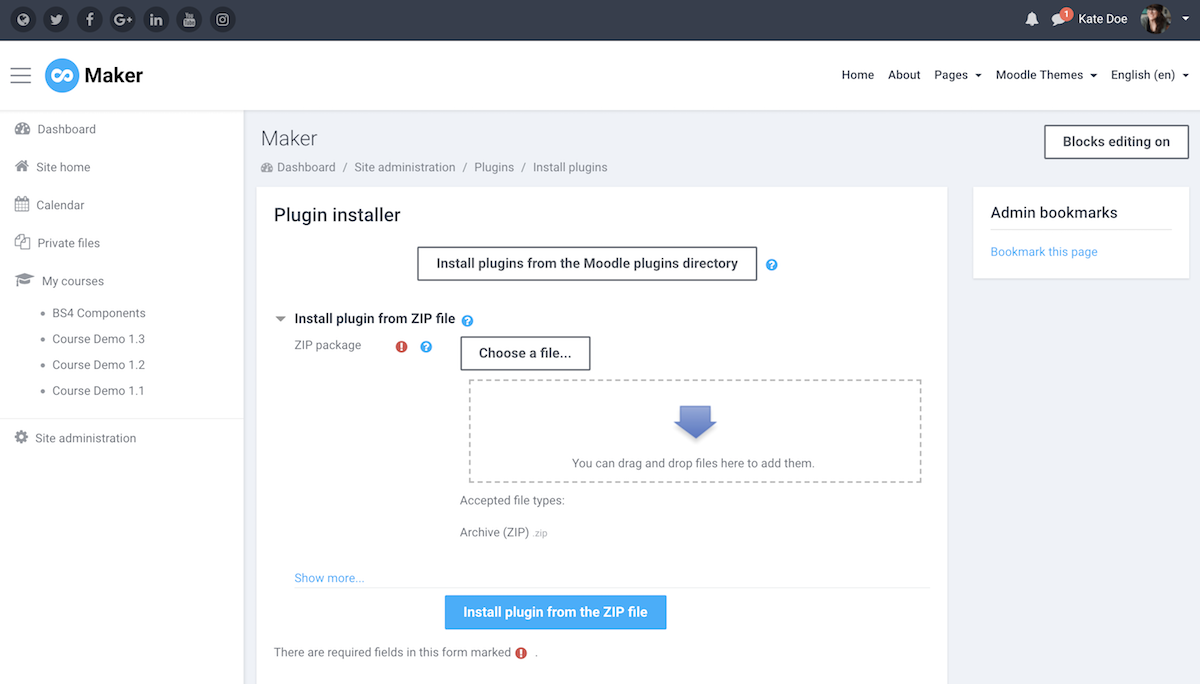
Download the Stripe plugin here and upload the downloaded zip file to your Moodle site via the Install plugins page: Site Administration > Plugins > Install plugins. You need to be a site admin to install and use the plugin.
Step 2 – Enable and configure the plugin
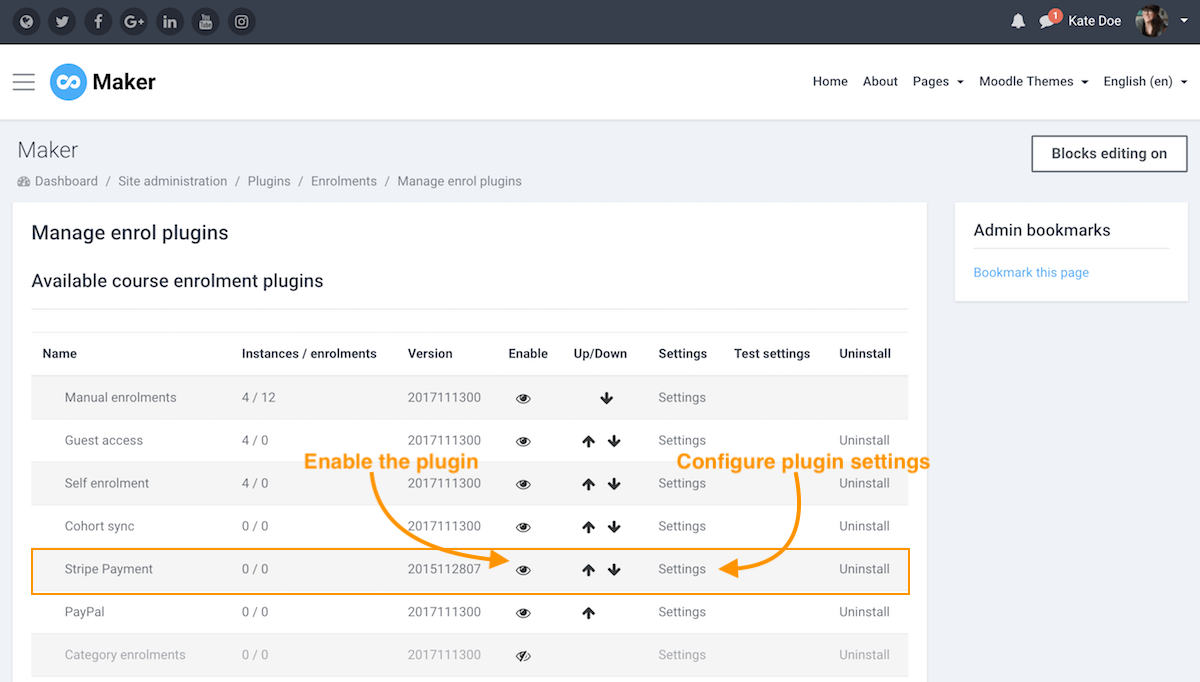
Once installed, go to the plugin management page to enable and set up the plugin: Site Administration > Plugins > Enrolments > Manage enrol plugins
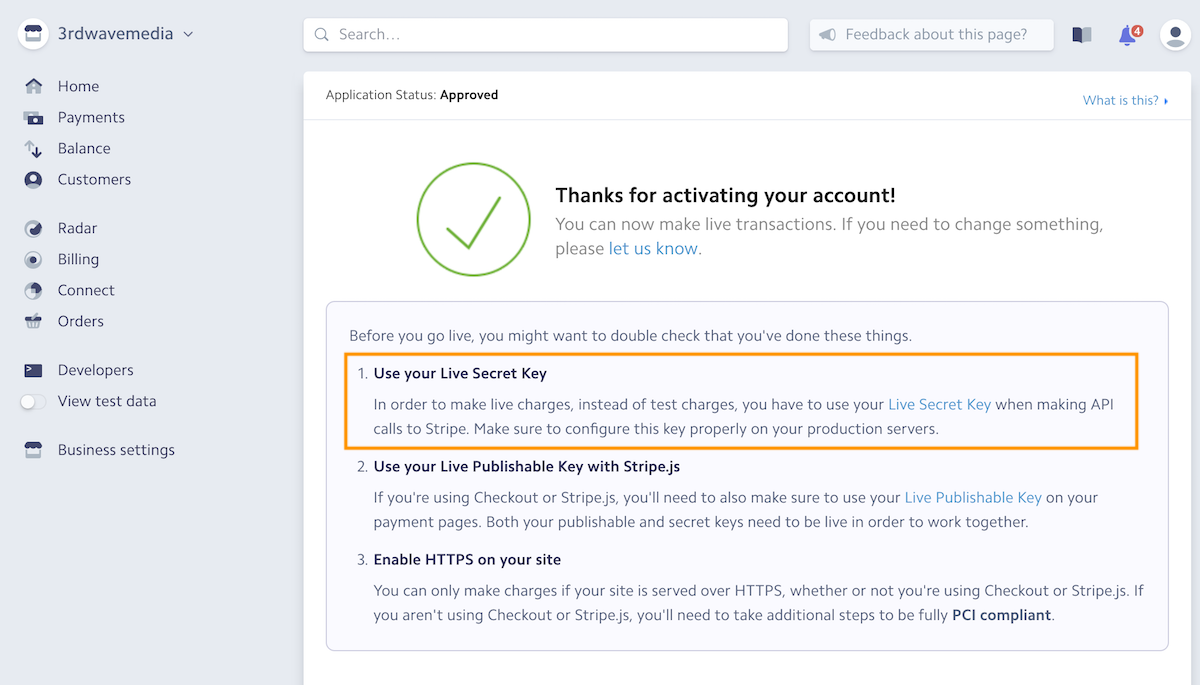
You need to create an account with Stripe and get the required secret key and publishers key. Please note: you’ll need to verify and activate your Stripe account before you can get the live API keys.
For more information about setting up your Stripe account please see the plugin documentation.
Step 3 – Enable Stripe as the course enrolment method
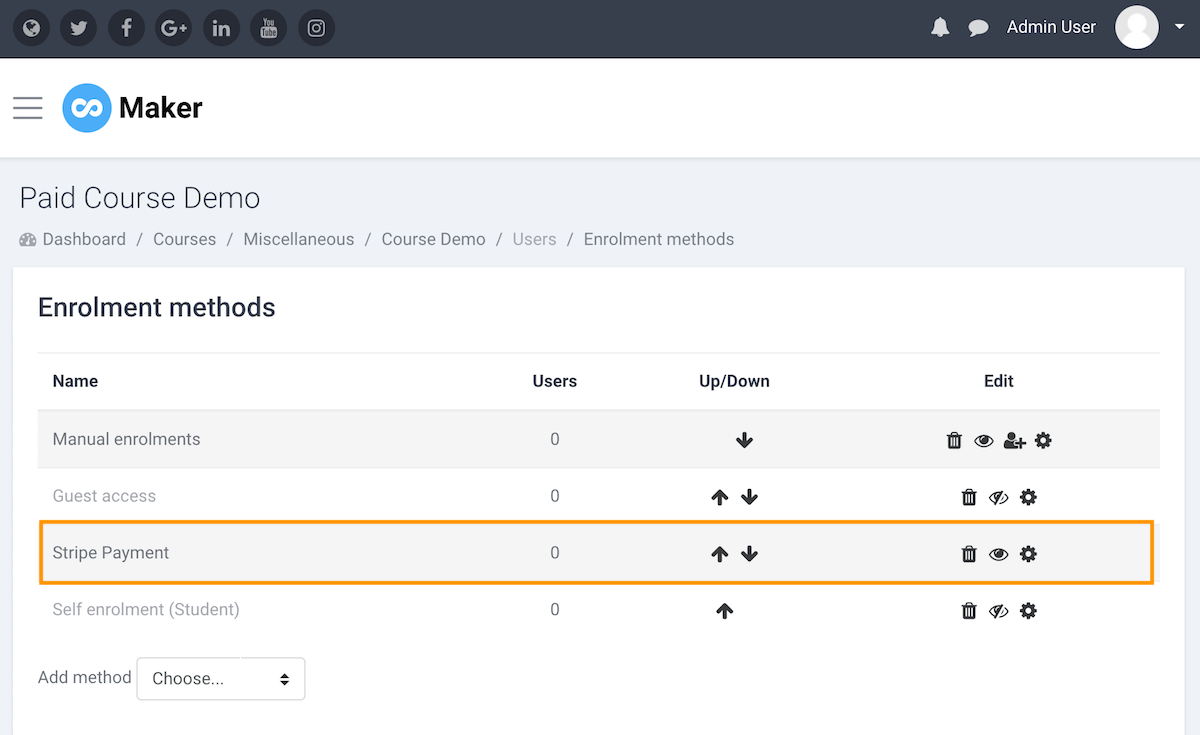
Go to your desired course as an admin and add “Stripe Payment” as the enrolment method for that course and enable it by clicking the eye icon.
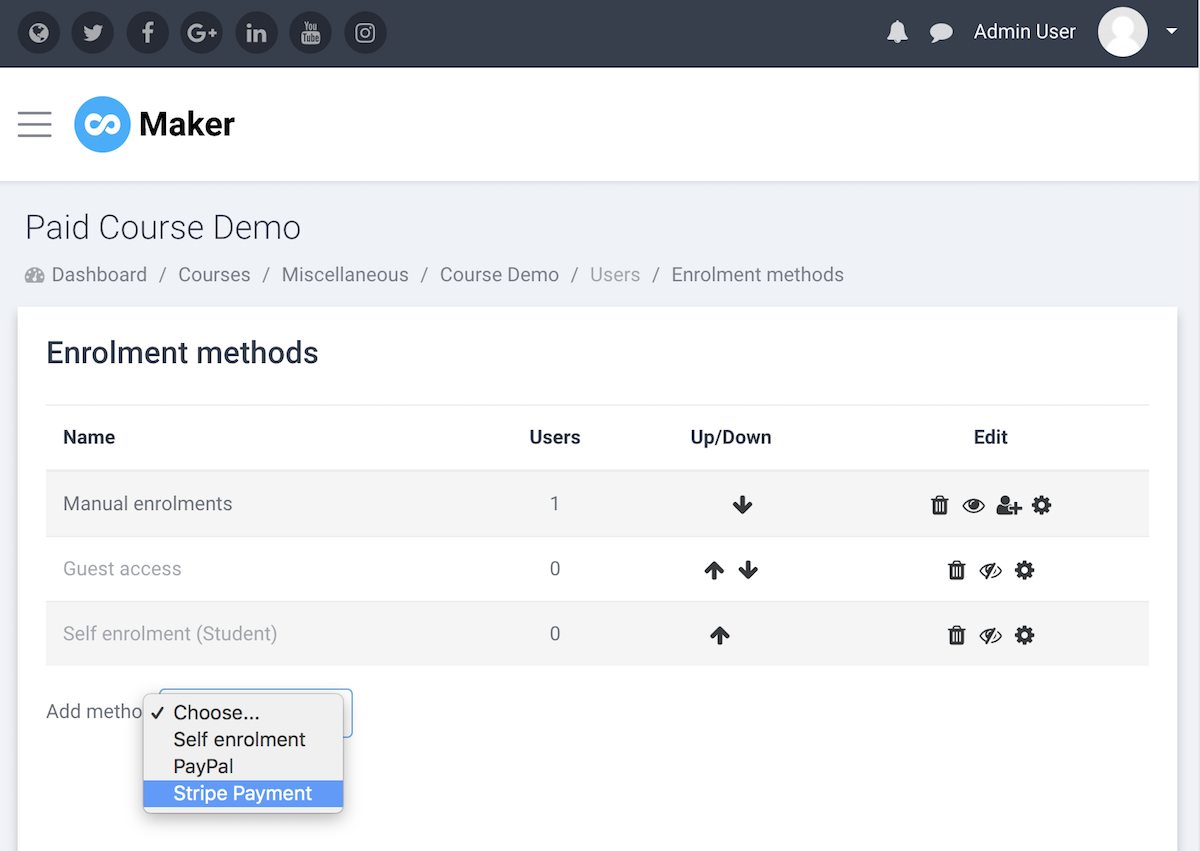
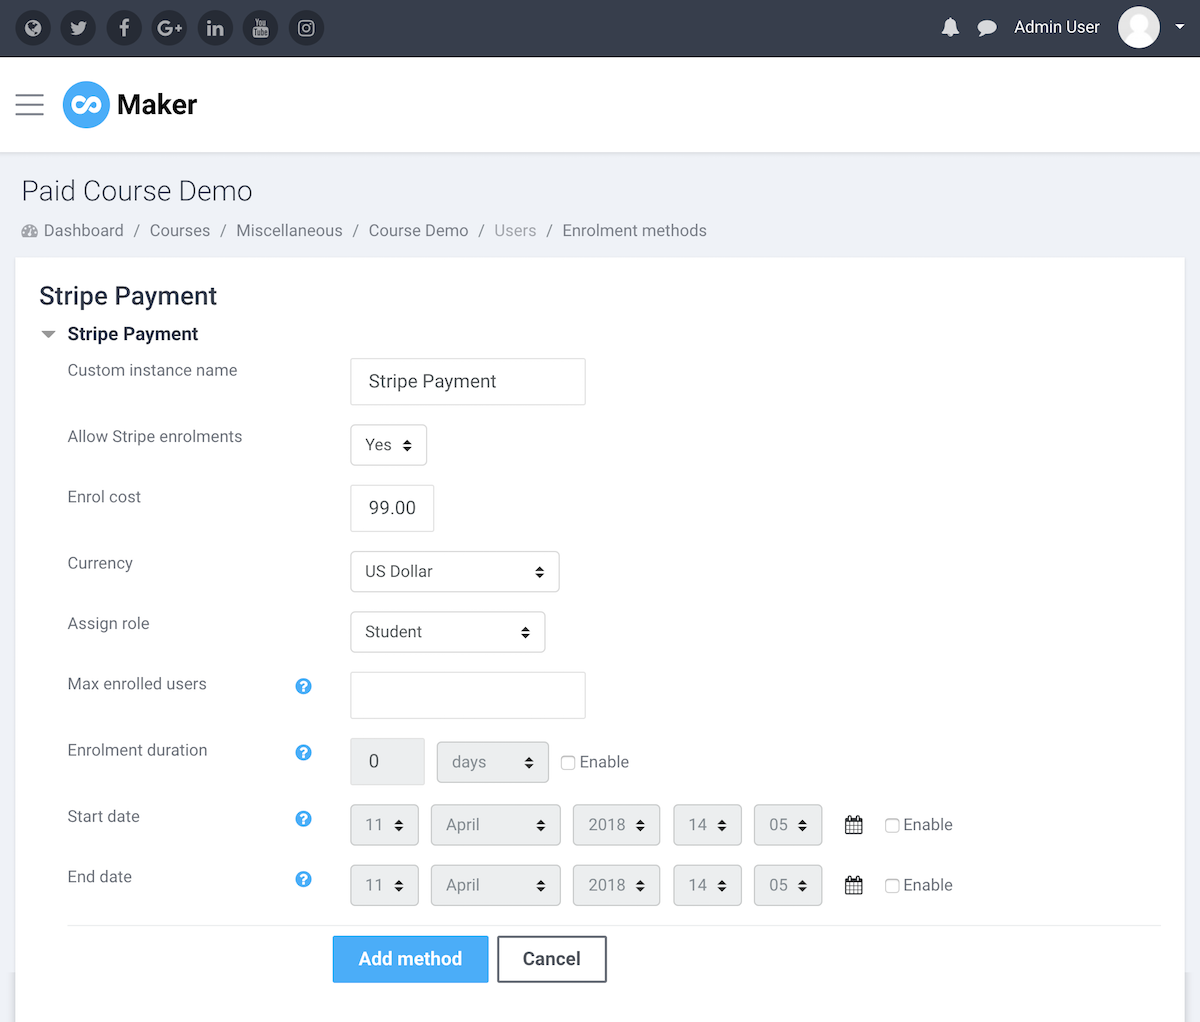
You can set the course price etc via the Stripe Payment settings page in that course.
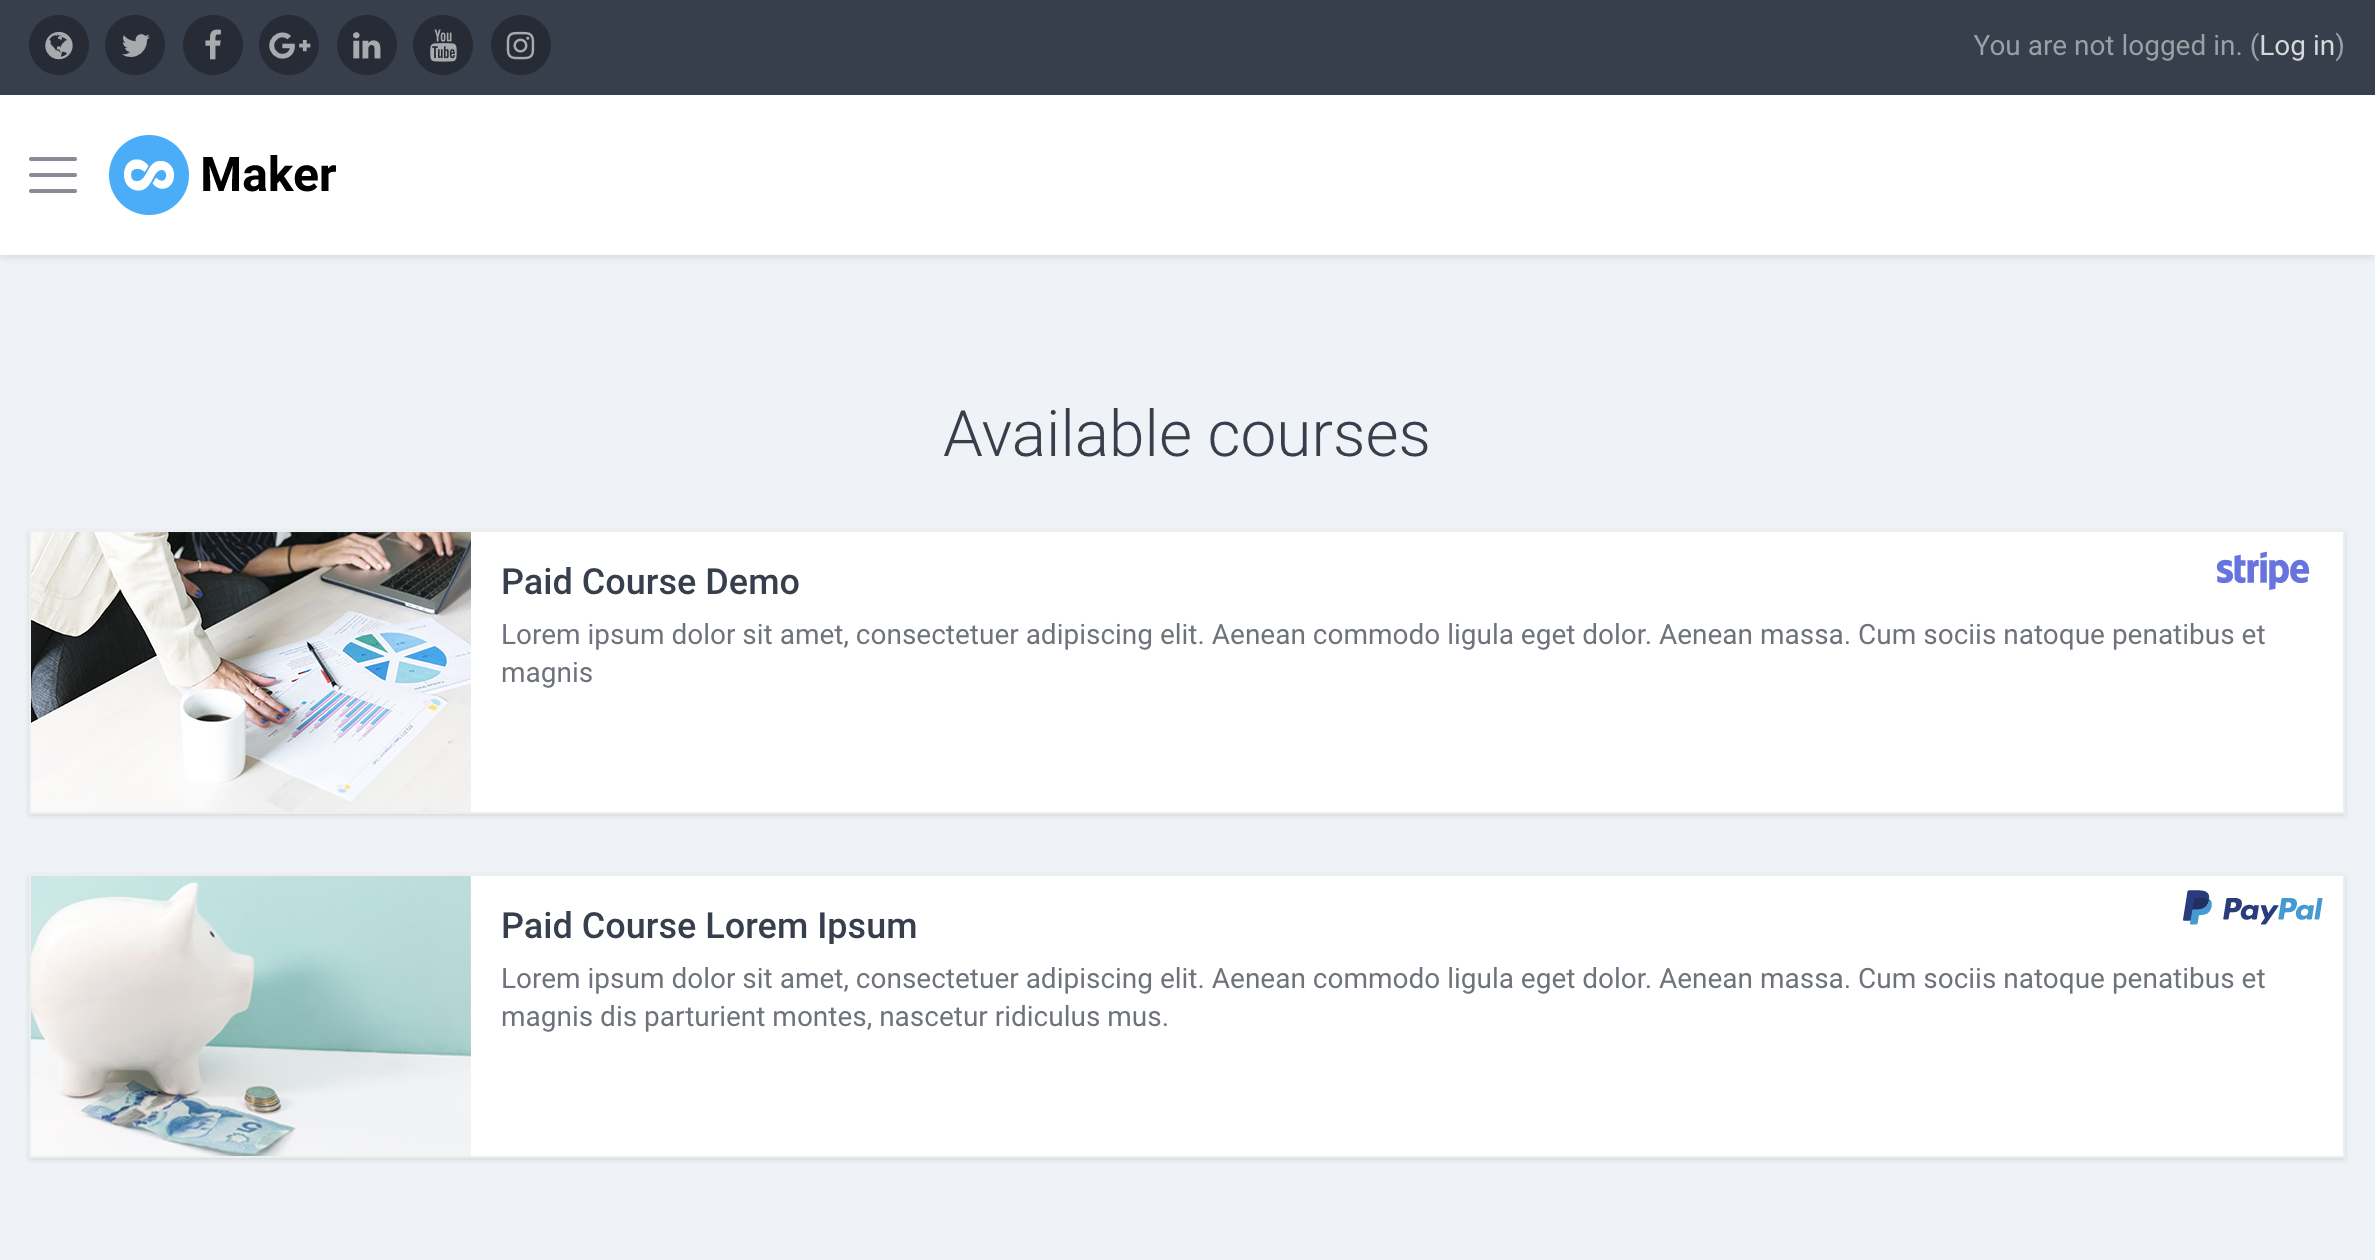
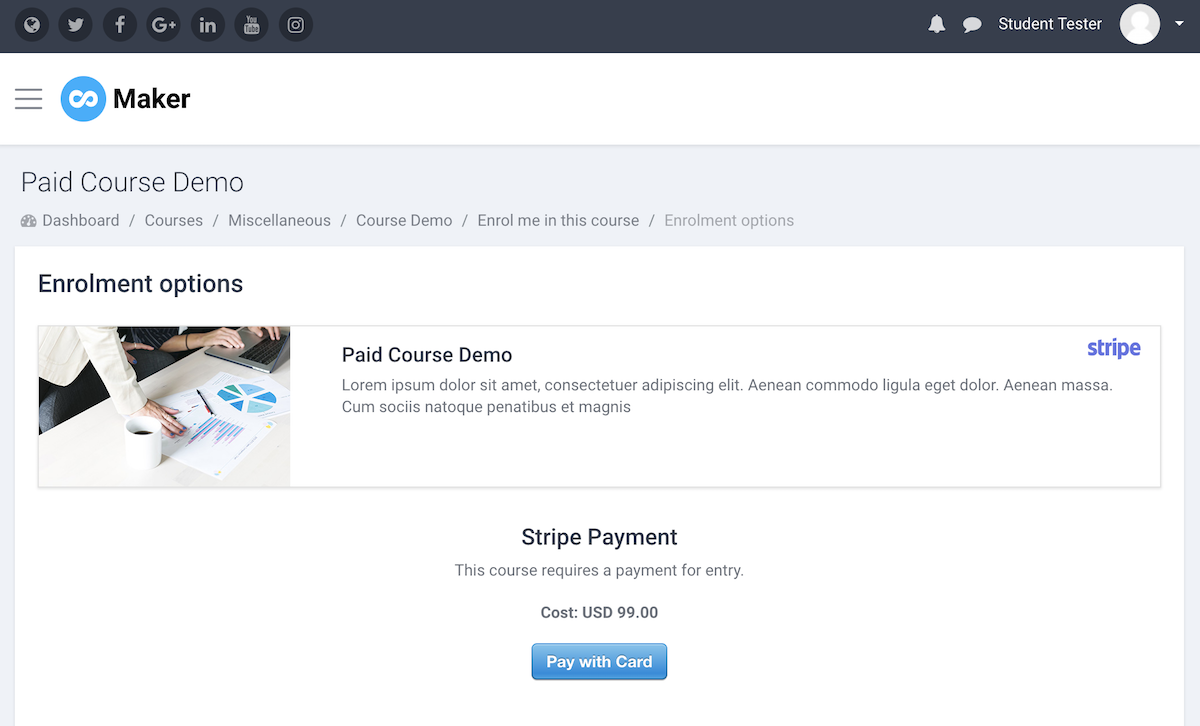
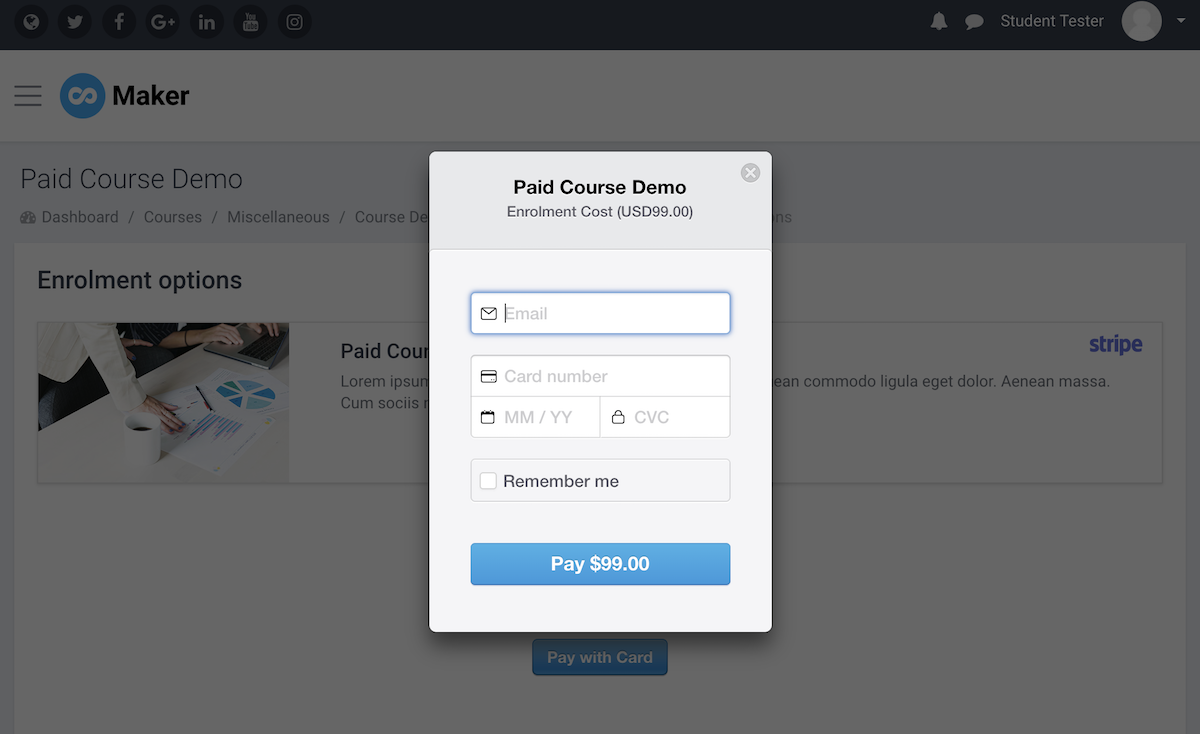
Now you’ve successfully set up Stripe as the course payment gateway. When a new student visits the course he/she will be asked to make the payment before entering the course as shown in the screenshots below:
Set up a course with PayPal enrolment
Step 1 – Create and Configure PayPal Account
You need to create a PayPal account first. As a course seller it’s recommended to upgrade your account to “Premier” status and get your account “Verified”.
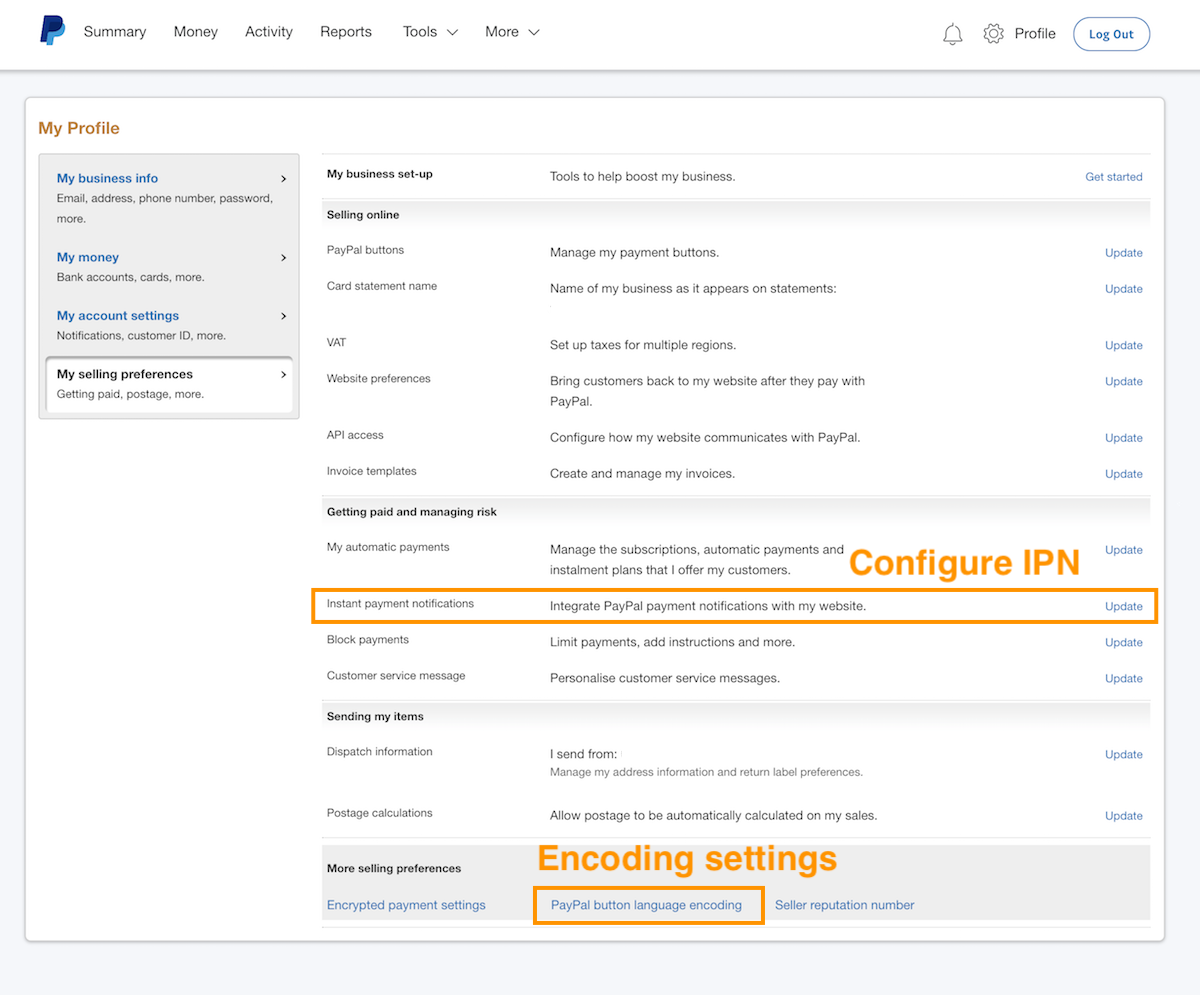
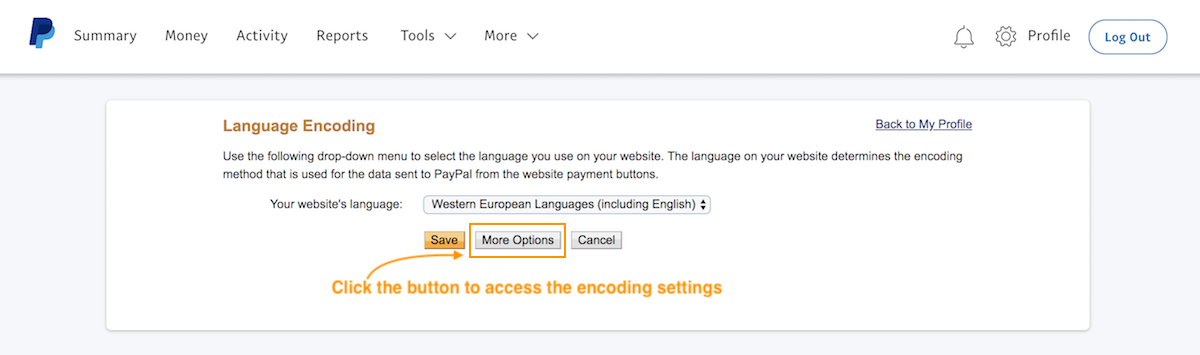
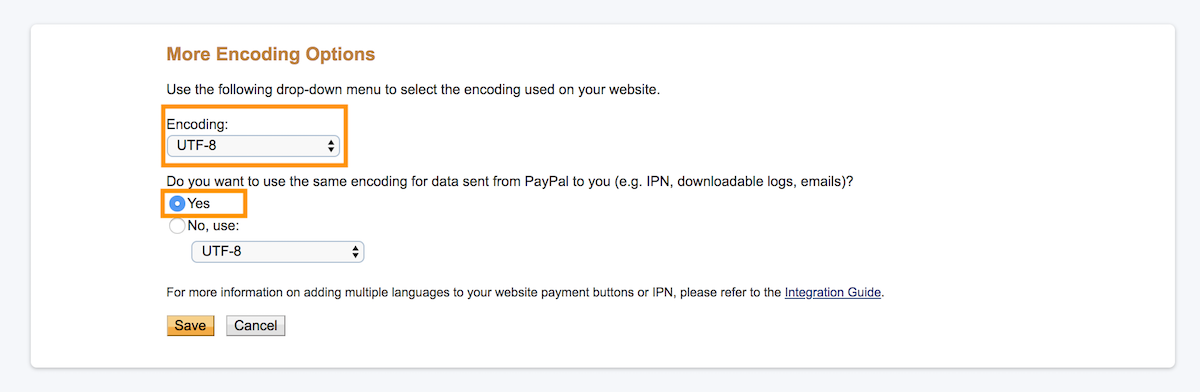
In your PayPal account please make sure the PayPal button language encoding is set to UTF-8.
You can optionally turn on IPN in PayPal to interact with your Moodle site:
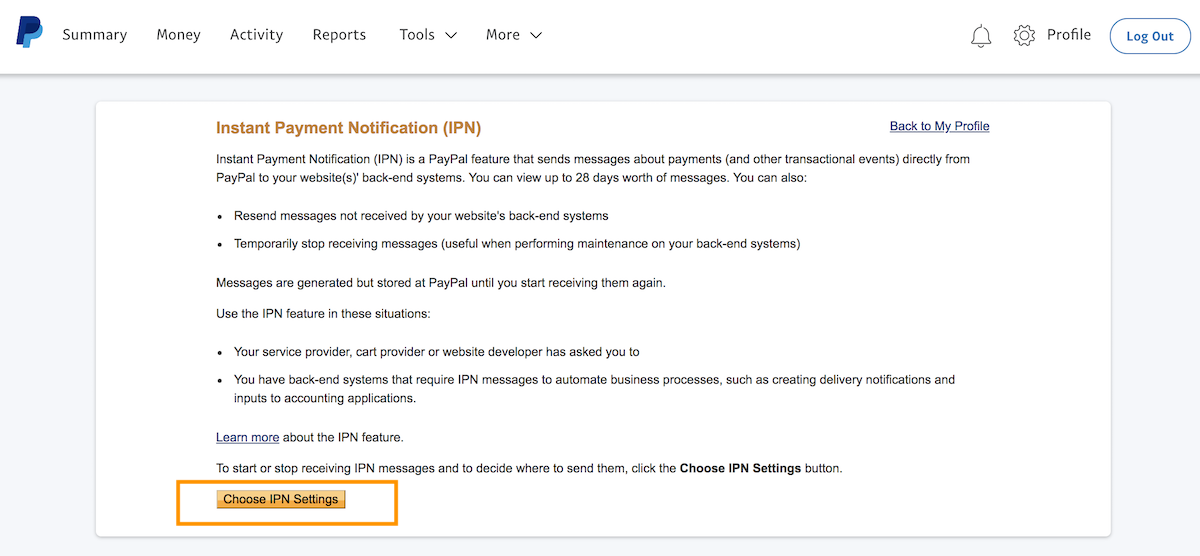
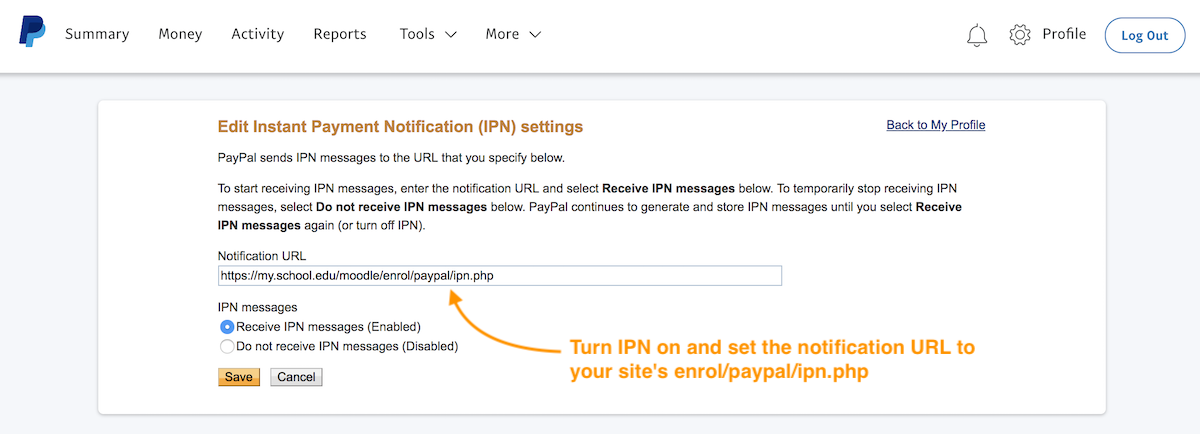
For more info you can reference Moodle’s official documentation.
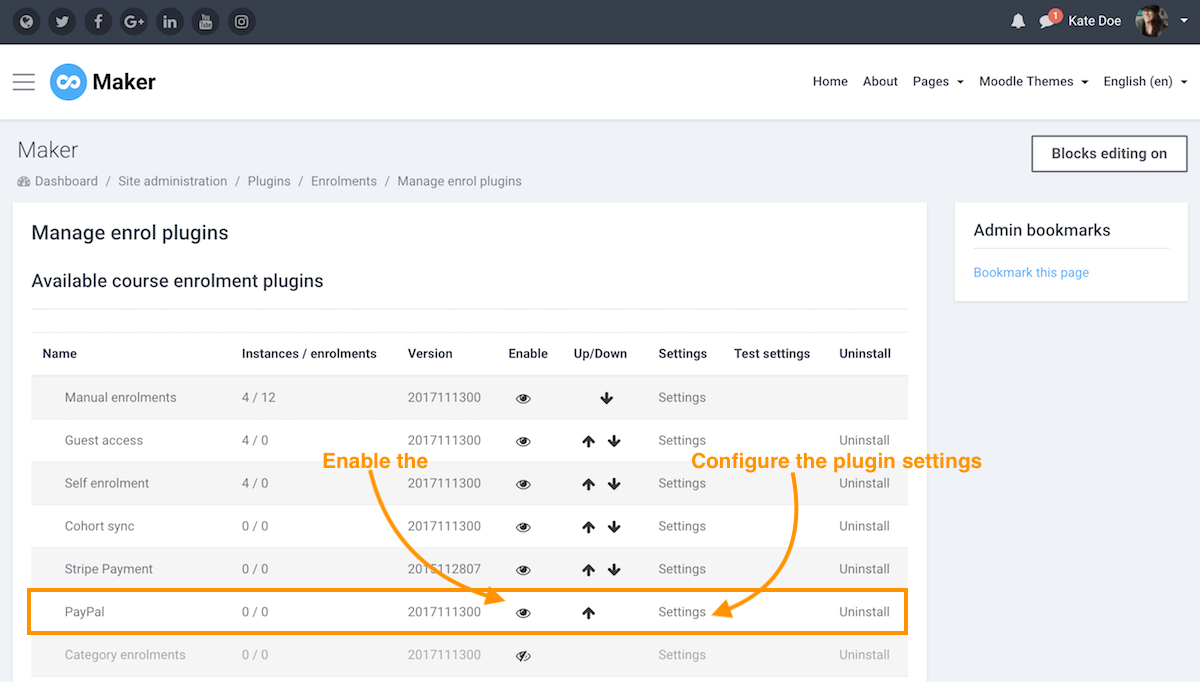
Step 2 – Enable the PayPal plugin in Moodle
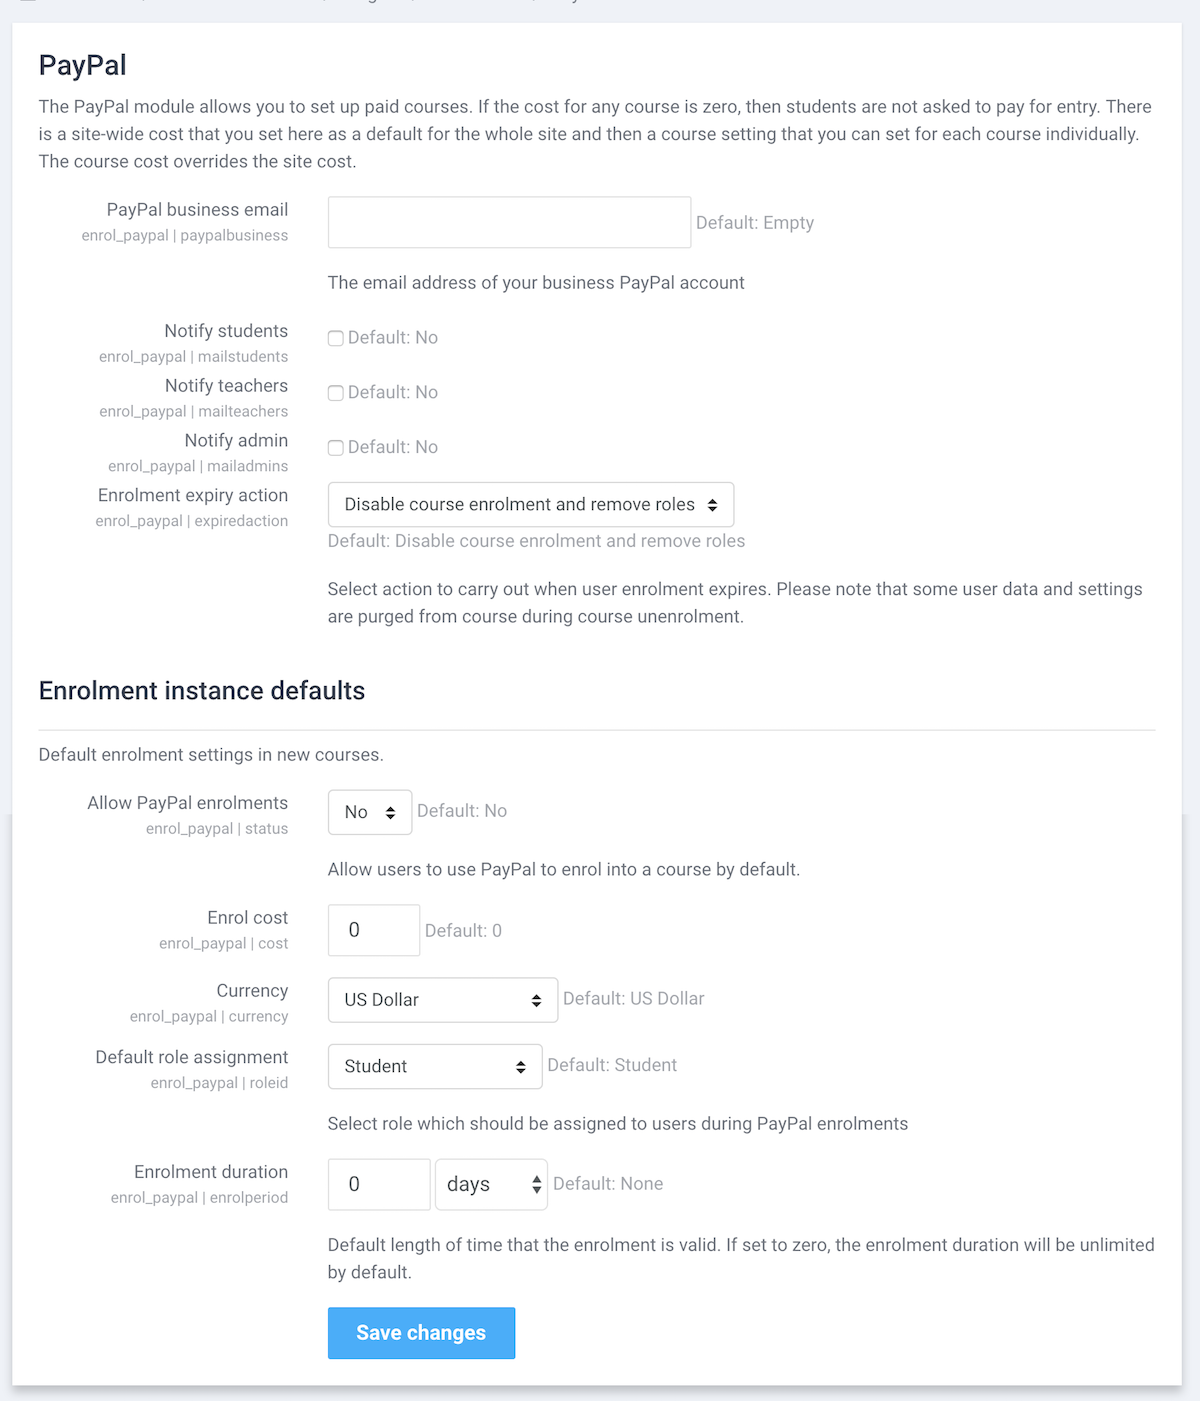
The PayPal plugin comes with Moodle so there is no need to install it. You can just go to the enrolment plugin management page to enable it and configure its settings accordingly.
Please note: For PayPal to work you must make sure the Manual enrolment is enabled too.
Step 3 – Enable PayPal as the course enrolment method
Go to your desired course as an admin and add “PayPal” as the enrolment method for that course.
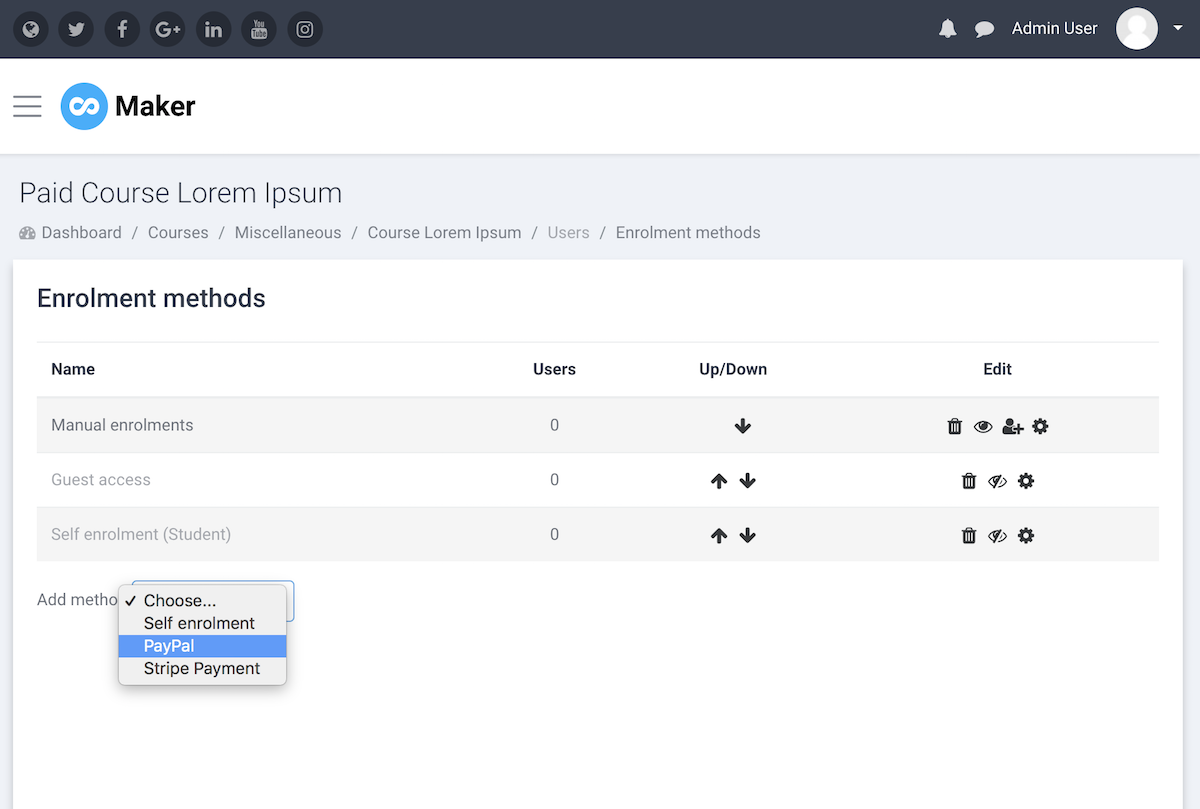
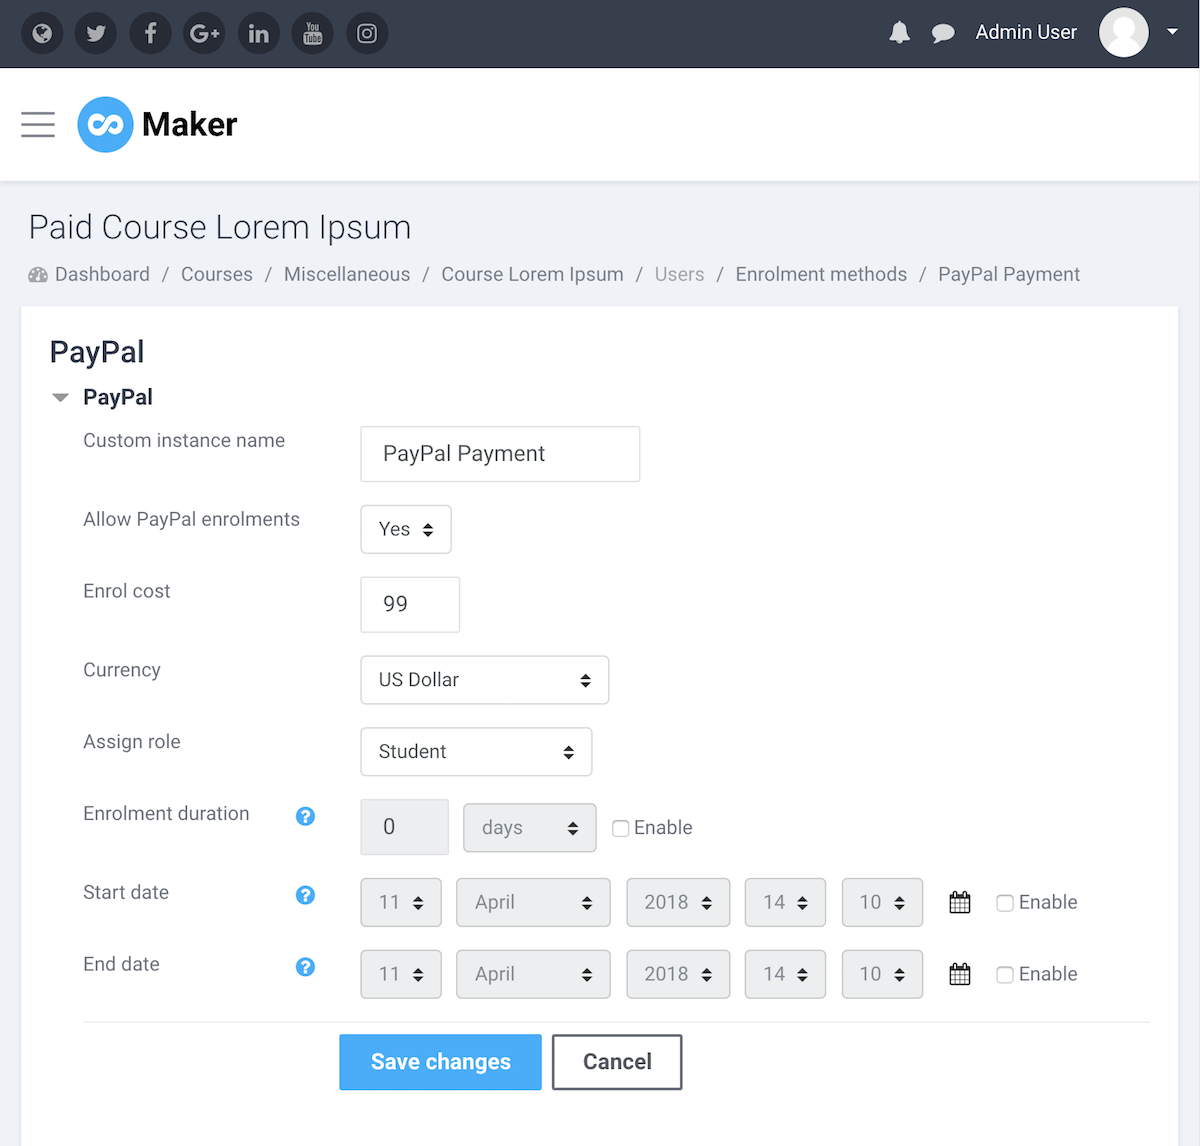
You can set the course price etc via the PayPal Payment settings page in that course.
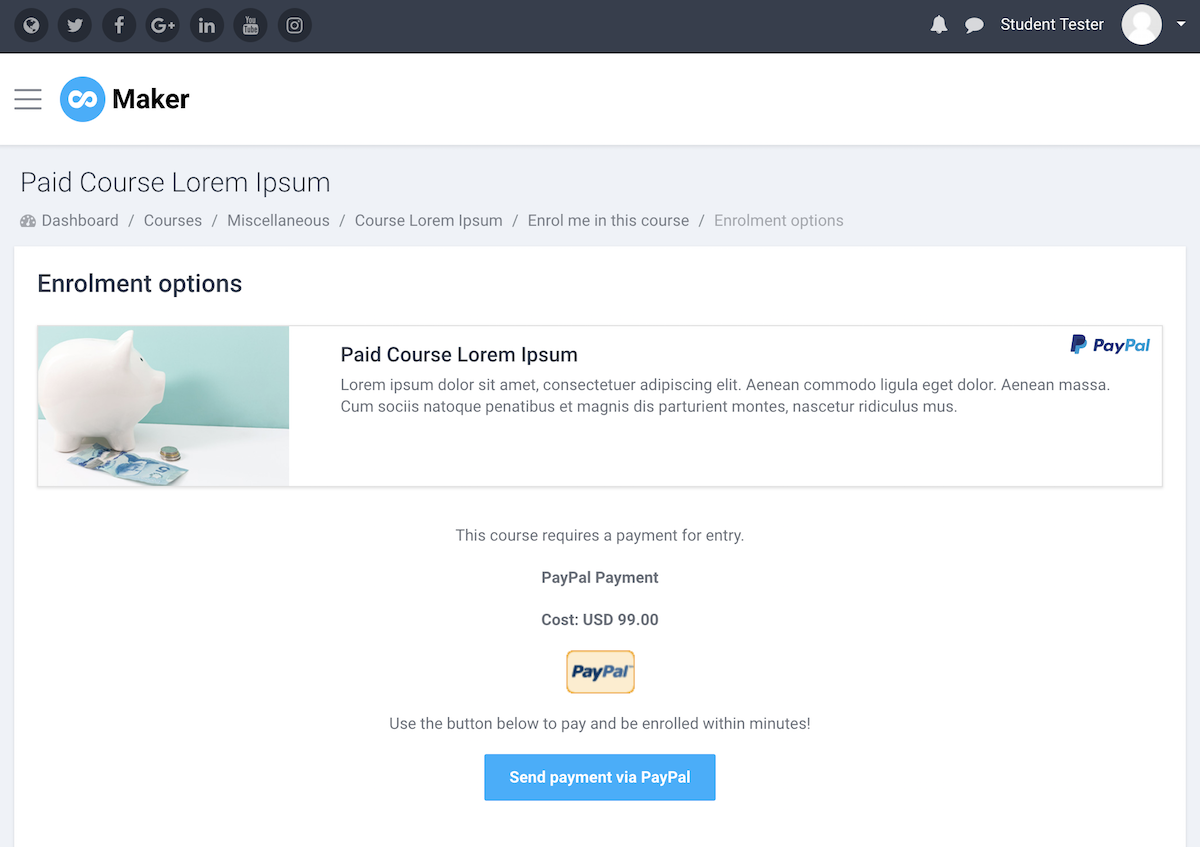
Now you’ve successfully set up PayPal as the course payment gateway. When a new student visits the course he/she will be asked to make the payment before entering the course as shown in the screenshots below:
Want to promote your courses and sign up paid users?
Check out our latest responsive Moodle theme Maker (all of the screenshots in this tutorial were taken from Maker), it has everything you need to set up a beautiful and user friendly Moodle site to start selling your courses.