Want to provide predefined and preformatted course layout/component templates such as tables, cards, badges and buttons for your teachers to easily drop into courses they are creating? We’ve found the perfect solution for you – you can install a Moodle plugin called “Templates” to achieve that. This could be a great way to empower your teachers to create engaging courses with beautiful layouts and useful components. You can even use this to make fully-fledged course templates for teachers to choose from.
In this tutorial we will walk you through the whole process of making a template available for your teachers to use in Moodle’s text editor.
Step 1 – Install Plugin
Download the “Templates” plugin from Moodle’s plugins directory and upload the downloaded zip file to your Moodle’s plugins page: Site administration > Plugins > Install plugins
Step 2 – Create Templates
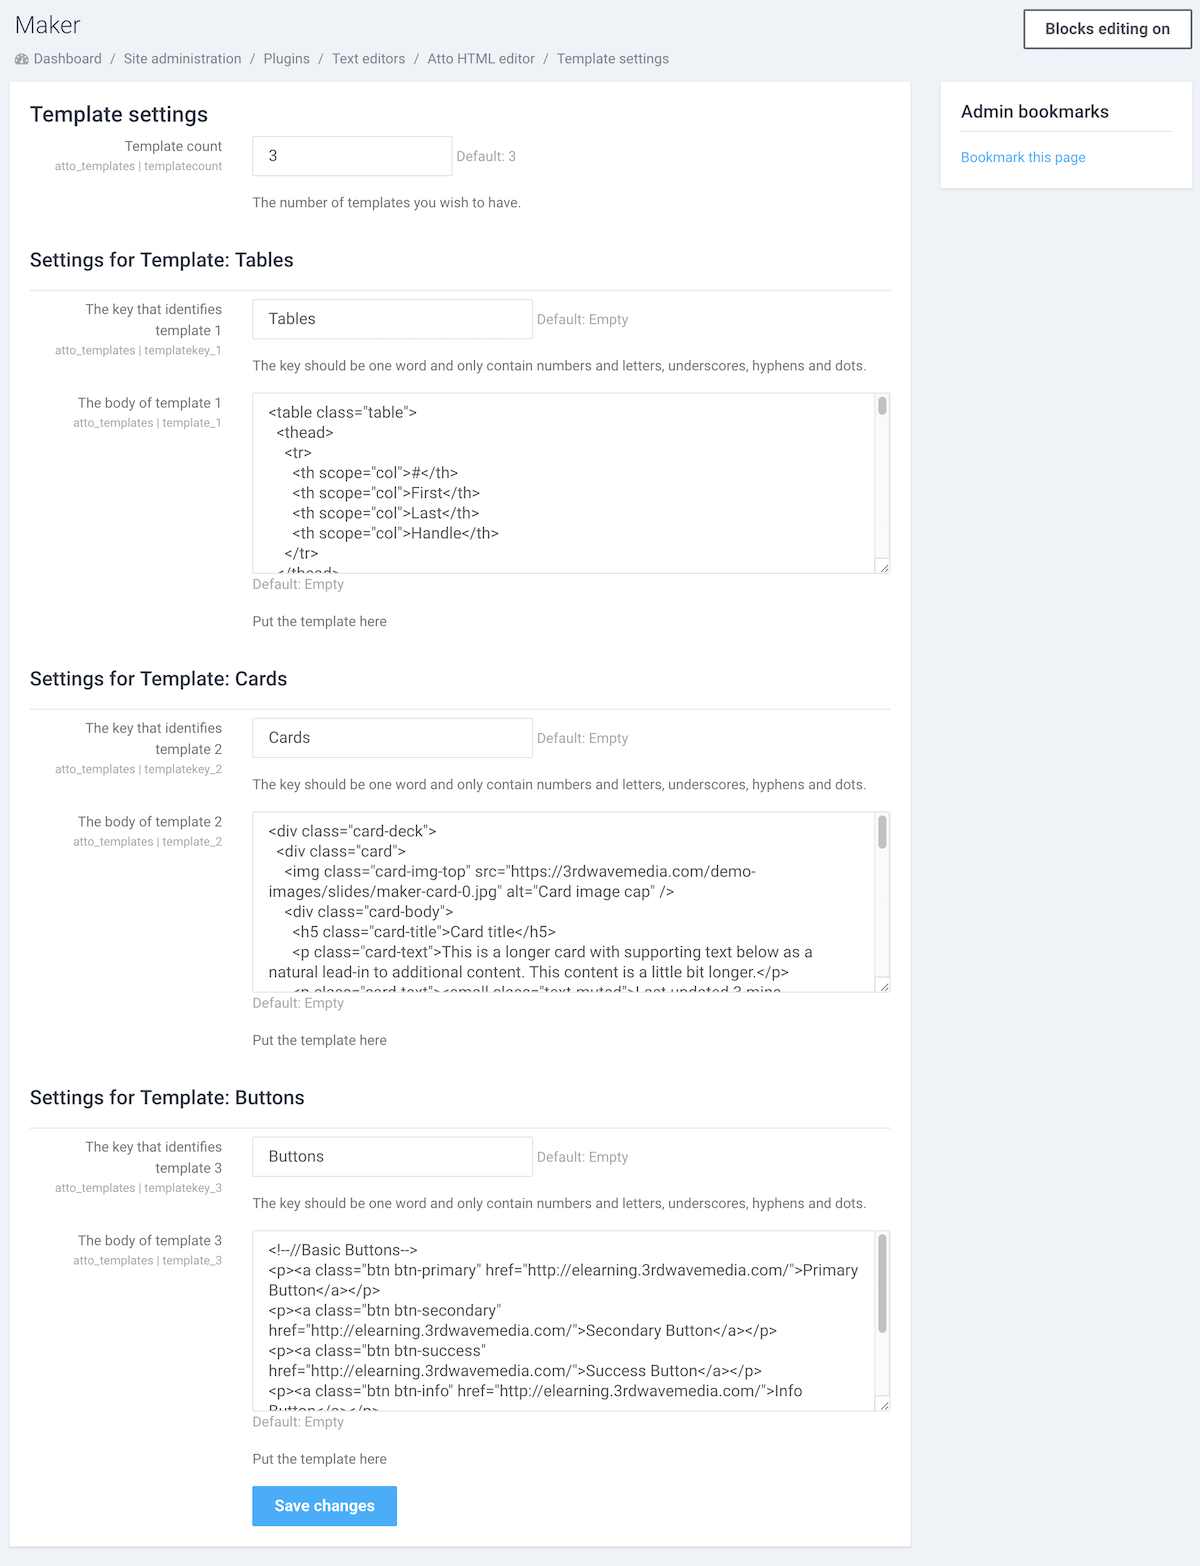
Go to the plugins’ settings page to add your templates:
Site administration > Plugins > Text editors > Atto HTML editor > Template settings
By default, you can add 3 templates but you can add as many templates as you want by increasing the number in the “Template count” field.
To define a template, you need to enter the template name (plain text) and content (raw HTML code). For this tutorial, we created three templates called “tables”, “cards” and “buttons”. The HTML code used in the templates was taken from the built-in Bootstrap components in our Moodle theme Maker (Maker is the theme used for the demo site)
If you are using our premium Moodle themes, there are lots of built-in Bootstrap components you can utilise to create your templates. You might find the tutorials below useful:
Maker Theme: Tutorial
Labland/Impression/Herald/Gourmet/Element Theme: Tutorial 1 | Tutorial 2
Step 3 – Add “Templates” to the Moodle text editor’s toolbar
After creating your templates, you also need to add the “templates” utility to the Moodle text editor’s toolbar so your users can access the templates.
Go to the text editor’s settings page to configure:
Site administration>Plugins>Text editors>Atto HTML editor
Now your teachers should be able to access all of the available templates in the text editor by clicking the “templates” icon in the text editor:
![]()
Tip: When working with templates it’s very helpful to make the text editor go fullscreen so there is plenty of screen space for previewing and editing the inserted templates.
Below are some screen captures to show you how to insert the templates to your desired course:
Add a label to a course so you can add content to the course:
Insert “Tables”:
Insert “Cards:
Insert “Buttons”