Like Youtube is known as a great online video repository, the Yahoo-owned service Flickr has gained it’s popularity as a great online image repository. It is reported that there are now 6 billion images hosted on Flickr and the number is still growing.
And again, just like Youtube videos, Flickr images can be used to enrich your teaching / training material. In this tutorial, I’m going to show you how to use Flickr as your Moodle site’s image repository. This tutorial has three parts – Part One is about things you need to do in Flickr; Part Two contains all the Moodle-related steps; In Part Three, a test is carried out to check everything is working as it should.
Part One : Flickr
Step 1
If you don’t already have a free Flickr account, you need to sign up for one.
Step 2
Make sure you are logged into Flickr, and follow the link here to get a Flickr API key for your Moodle site.
Step 3
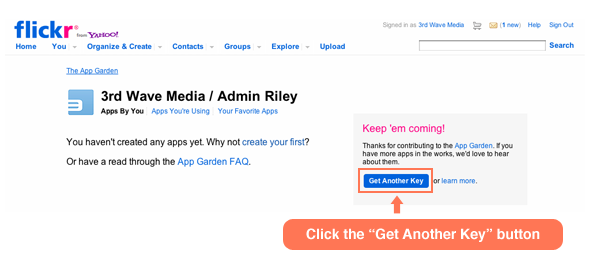
Once you click the link provided above, you should see a screen like the one shown below. Click the “Get Another Key” button to proceed.
Step 4
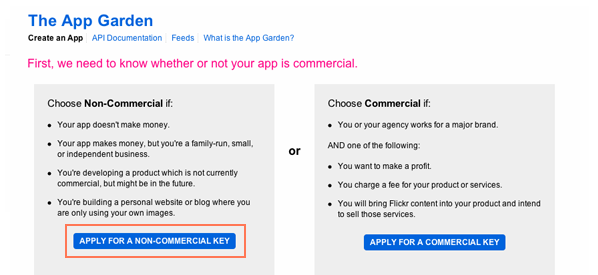
Now you should arrive at the “App Garden” page, and you need to click the “APPLY FOR A NON-COMMERCIAL KEY” button.
Step 5
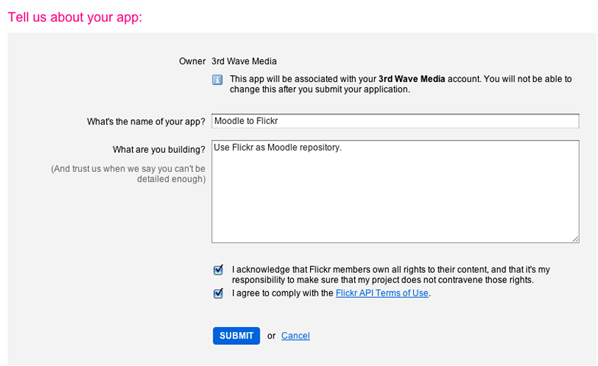
On the “Tell us about your app” page, fill in the form and submit.
Step 6
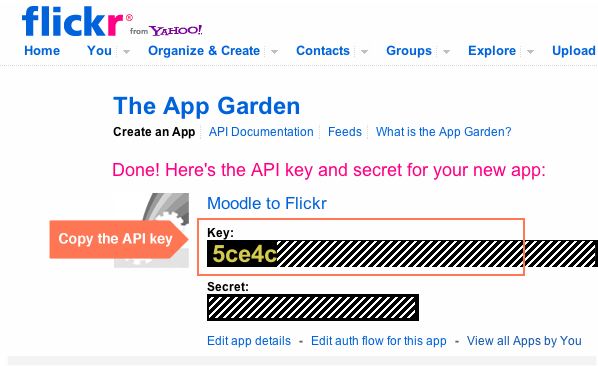
Ok, now the API key is generated for you! Copy the key. (Ctrl+C on PC or Cmd+C on Mac)
Part Two: Moodle
Step 1
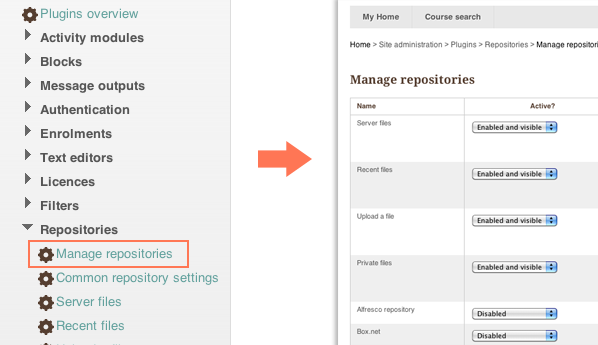
Log into your Moodle site as an admin user, and navigate to the “Manage repositories” option:
Settings > Site administration > Plugins > Repositories > Manage repositories
Step 2
On the “Manage repositories” page, find “Flickr public” (NOT “Flickr”) and choose “Enable and Visible” from it’s options drop-down list.

Step 3
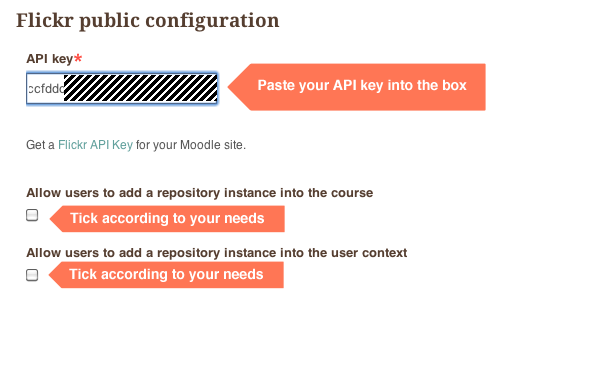
On the “Flickr public configuration” page, paste the API key into the relevant box as shown below. Save and you are all good to go.
Part Three: Testing
Congratulations, you have just set Flickr up as your Moodle site’s image repository! Now let’s test it out by adding a Flickr image to a course.
Step 1
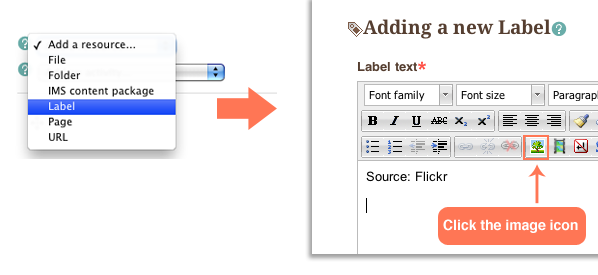
Go to a course and turn editing on. Choose “Label” from the “Add a resource…” drop-down list.Click the image icon on the editor menu bar like shown below.
Step 2
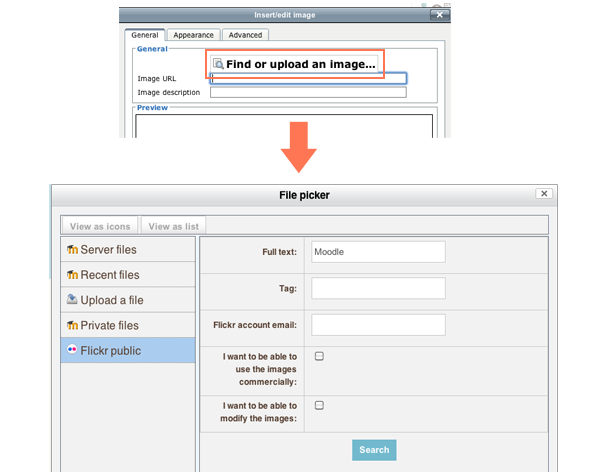
After clicking the “Find or upload an image…” button, another popup window called “File picker” will appear where you will see “Flickr public” as a repository option. Click the “Flickr public” button and you can start searching the images using the search form on the right-hand side pane.
Step 3
I’ve done a search for “Moodle” and I got 126 pages of related images!
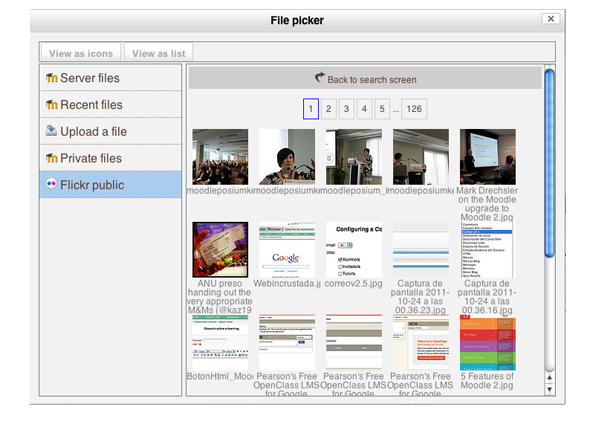
Step 4
I decided to pick a poster about new features in Moodle 2.0. By default, when you save the image, the image will be stored in your Moodle site. However, if you have limited server space or bandwidth you might want to check the “Link external” option and let Flickr host the image. The drawback of the latter method is that if the image is deleted from Flickr by the user, it will also disappear from your Moodle site as you are only providing a shortcut pointing to the image on Flickr, so if the actual image gets deleted/moved the shortcut would no longer work.
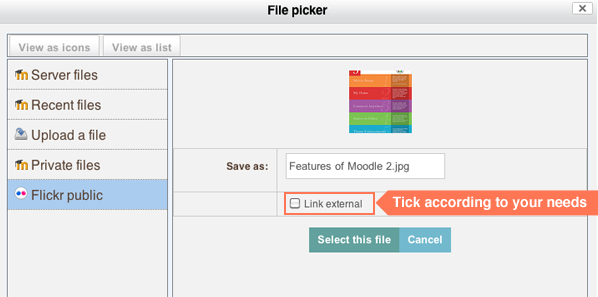
Step 5
Click the “Select this file” button and the image should be inserted into the editor. Save and return to the course and you will see the Flickr image has been inserted into the course.
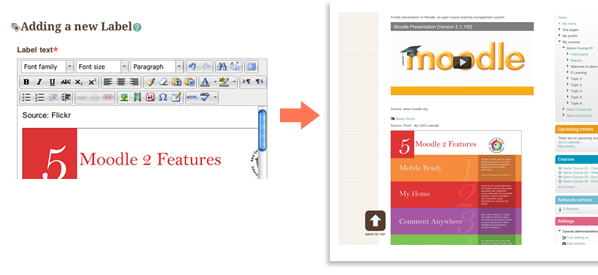
And that’s it. Now you know how to use Flickr as your image repository for Moodle – we hope you enjoyed our tutorial.
