Adding a blog page to your Moodle site is a great way to connect learners with helpful content hosted on your external blog. Whether you are running a WordPress blog or another platform, guiding users from Moodle to your blog can boost engagement and support your learning community with fresh insights and updates.
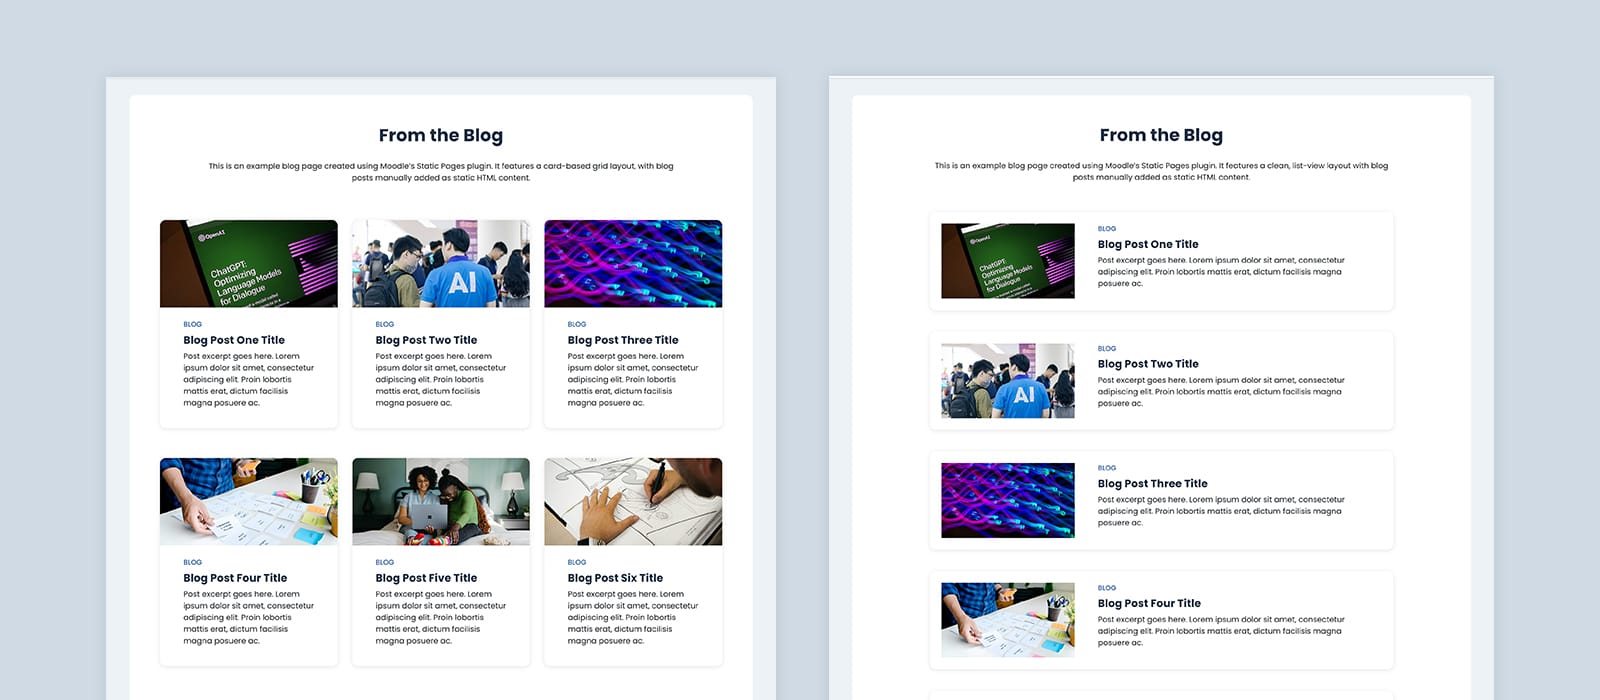
In this tutorial, we will show you how to add a custom blog page to your Moodle 5 site using Moodle’s free Static Pages plugin. We have also included a free downloadable HTML template that works with Boost-based Moodle themes. The download contains two HTML files: one with a grid view layout and another with a list view layout, so you can choose the design that best suits your Moodle site. If you are using one of our premium Moodle themes, the template will match your site perfectly thanks to the built-in styling. It is fully compatible with Lumo for Moodle 5, as well as Edutor and Maker for Moodle 5 and 4.5.
- Blog Page – Grid View Layout (Lumo Demo | Edutor Demo | Maker Demo)
- Blog Page – List View Layout (Lumo Demo | Edutor Demo | Maker Demo)
Let’s get started.
Step 1 – Install the Static Pages Plugin
To begin, install the Static Pages plugin on your Moodle site. This plugin allows you to create standalone pages such as About, Contact, or in this case, a Blog page.
If you are not familiar with installing or using the plugin, check out our step-by-step guide here: How to Add Pages to Moodle Using the Static Pages Plugin
Step 2 – Download and Customize the Blog Page Template
Download our free blog page HTML template using the link below. This template is designed to work seamlessly with our Moodle themes. It is ready-styled for Lumo (Moodle 5) and also supports Edutor and Maker for Moodle 5 and 4.5.
The template will also work with Boost and other Boost-based Moodle themes. However, if you are using a different theme, you may want to add your own custom styling to match your site’s design. For guidance on how to customize the default styling of a Boost-based theme, check out our blog post: How to Customize the Default Styling of a Boost-Based Moodle Theme
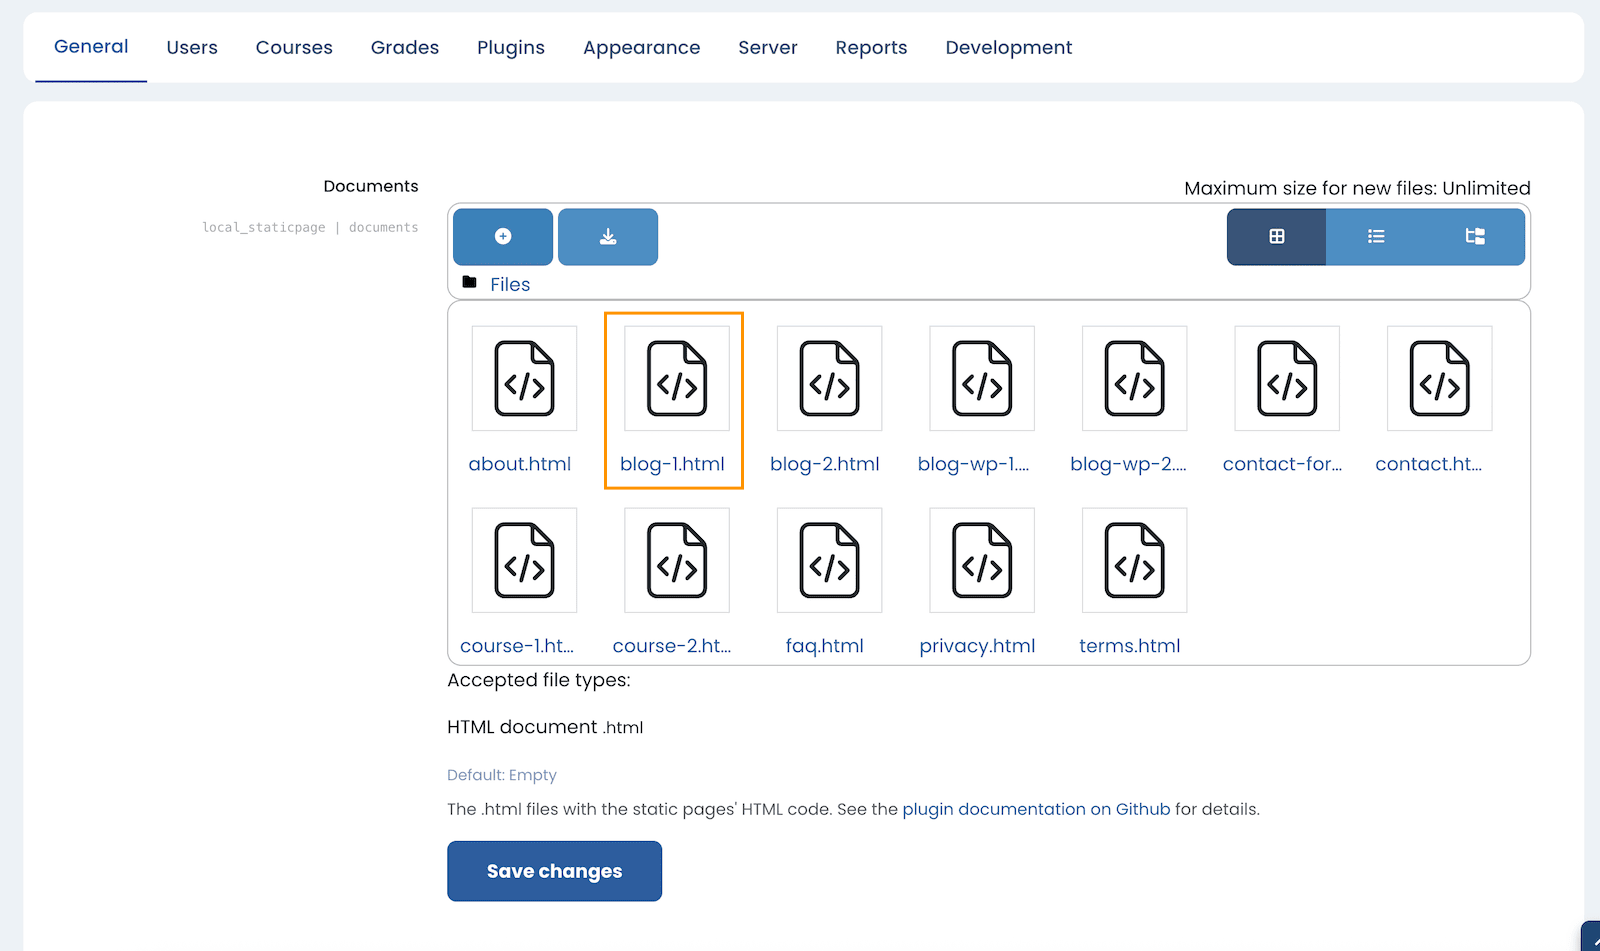
What’s in the download:
blog-1.html: A grid view layoutblog-2.html: A list view layout
Open the HTML file in a text editor to make your changes. You can use Notepad (Windows), TextEdit (Mac), or free code editors like Notepad++ (Windows) and Sublime Text (Mac). Make sure to save the file as plain text and keep all HTML tags and class names intact. This will ensure that the styling from Lumo, Edutor, or Maker is applied correctly.
Free Download (2787 downloads)Step 3 – Upload the Blog Page and Add the Link to Your Site
Once you’ve finished editing the HTML file, upload it using the Static Pages plugin. Go to Static Pages > Documents in your Moodle admin page and upload your file there.
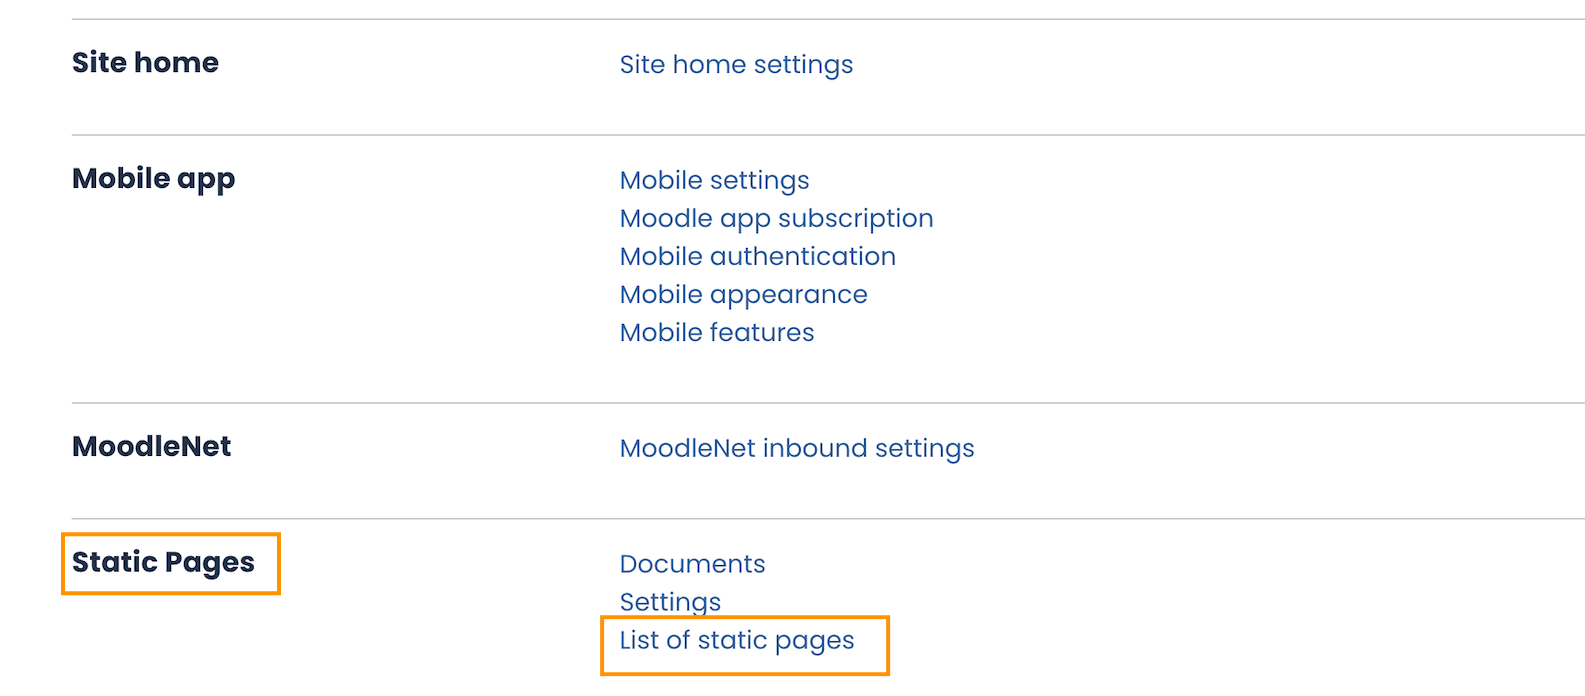
After uploading, navigate to the “List of static pages” section in the plugin settings. From there, you can find the URL for your new blog page.
You can then add this link to your site’s custom menu or anywhere else you’d like users to access the blog.
Adding a blog page to Moodle is an easy way to enrich your site with fresh and useful content. With Moodle’s Static Pages plugin and our free HTML templates, you can set up a blog page quickly and easily. For the best results, use it with one of our premium Moodle themes. Lumo, Edutor, and Maker are all designed to give your Moodle site a clean and modern look with minimal setup required.