Adding users one by one in Mahara can be a tedious admin job. Luckily, Mahara actually provides a quick and easy way for adding multiple users at one go. All you need to do is – first, create a CSV (comma-separated values) file with all users’ login details, and then upload the file to Mahara.
Step 1
Create a CSV file using using Microsoft Excel or OpenOffice Spreadsheet.
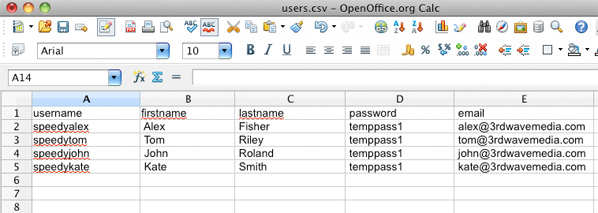
Here I’m using OpenOffice. You need to create a table as shown in the figure below and the first row must include “username”, “firstname”, “lastname”,”password” and “email”, as by default, those four elements are compulsory for creating a user account in Mahara.

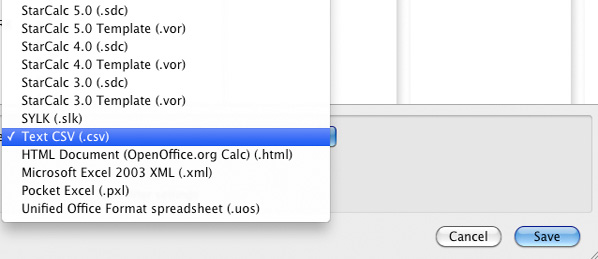
Make sure you save as the file type “CSV”.

Tip: If your organisation has already got a user information management system in place, such as SIMS, you can probably export information of all/selected users as a CSV file. Some editing to make the exported CSV comply with Mahara’s requirements may be needed (such as the fact that Mahara requires passwords to be at least six characters long and contain at lease one digit and two letters).
Step 2
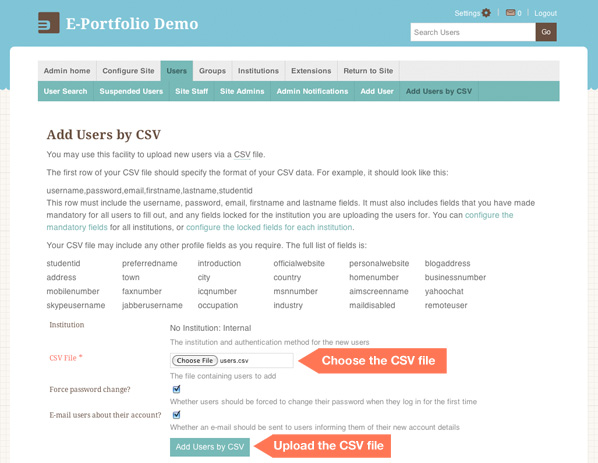
Log into your Mahara site as an admin user. Navigate to the “Add Users by CSV” page and upload the CSV file.
Site Administration>Users>Add Users by CSV

Step 3
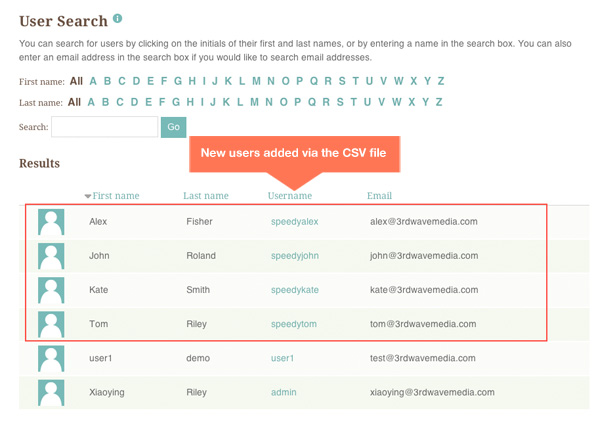
Now, if you go back to the User Search page you should see the new users have been added to your Mahara site.

