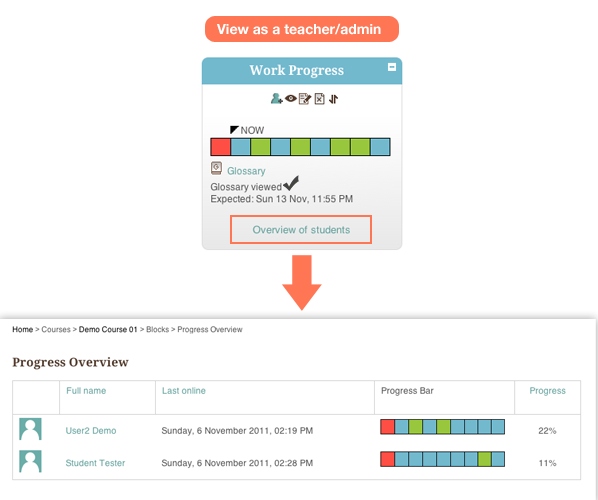
Recently, I was asked if there is a way for students and teachers to track the progress in a Moodle course. After some looking around on Moodle.org, I discovered a wonderful third party plugin called “Progress Bar” which does exactly just that, and even better, the progress data is visualized so it is very intuitive for users. This plugin is contributed by Michael de Raadt and he has made a great video demonstration about the plugin as well.
I’ve installed the plugin on our Moodle demo site, so if you are interested you can log into Demo Course 01 to have a look (Username: user2 Password: user2demo).
The progress bar on our Moodle demo site looks slightly different from the original one, as I tweaked the plugin so it fits in better with our Moodle site’s style.
Below are the steps you can take to make the progress bar work for your Moodle site:
Step 1
Download the plugin and install. You can follow the instruction on the Moodle official website page for this plugin.
Step 2
Log in as an admin user. Go to a course you’d like to track progress, and turn on editing.
Step 3
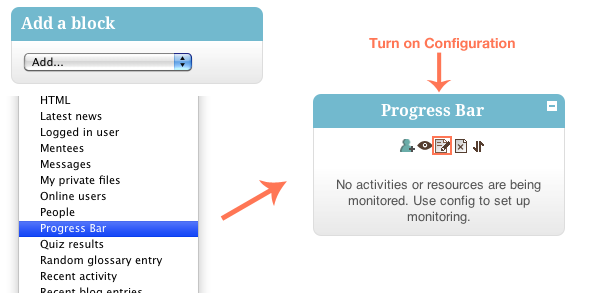
Once editing is on, you should see a block called “Add a block”. Choose “Progress Bar” from the drop down list, and the block will be added. Click the configuration button.
Step 4
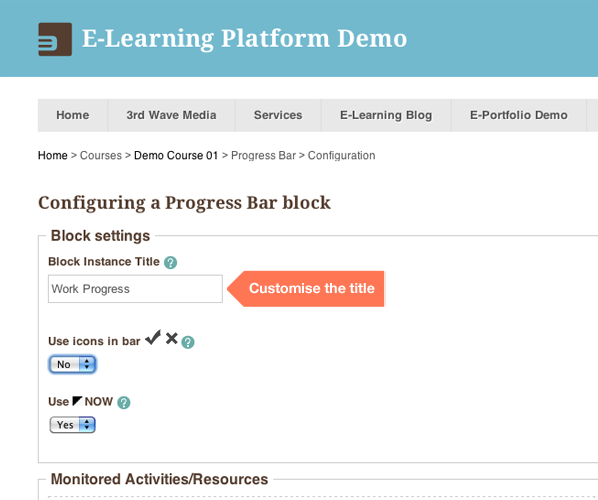
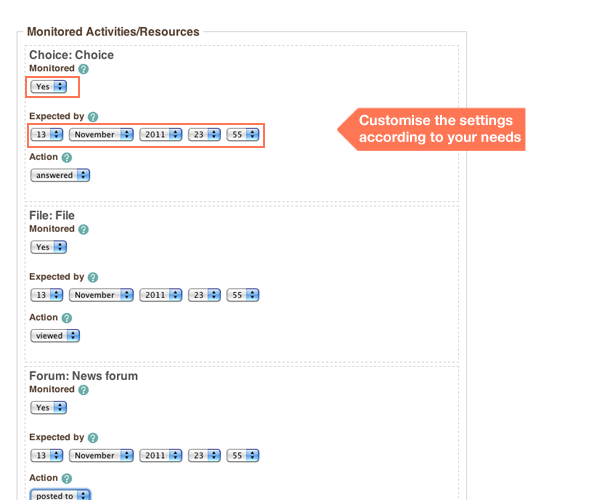
Now you should see the configuration page for the Progress Bar block, where you can customise the settings according to your needs. The settings are pretty much self-explanatory, but if in doubt you can always click the (?) help icons to get more instructions.
Step 5
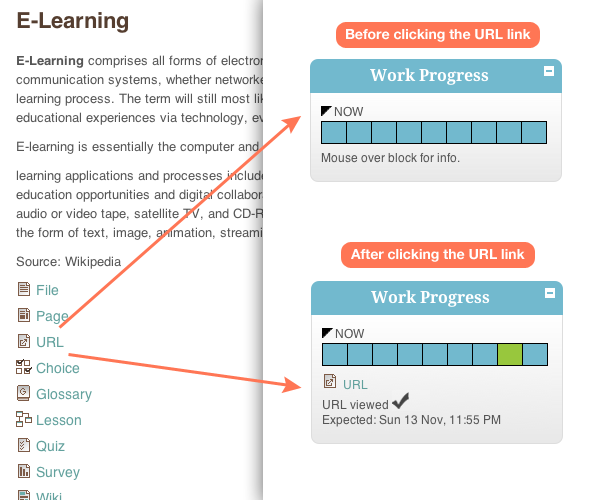
Save the configuration and logout. Log in again as a student who is enrolled on the course. The figure below shows you what happens to the progress bar before and after the student interacting with one of the course resources/activities.
Step 6
Log in as the site admin or the course teacher, you can also check all of your students’ progress by clicking the “Overview of students” link in the Progress Bar block as shown below.
