Google Docs is another wonderful free online service provided by Google. It can be used as an online office suite where you can easily create or edit documents, spreadsheets and presentations. It can also be used as an online file repository, which enables you to access your docs from any computer with an internet connection.
In this tutorial, I am going to show you how to use Google Docs as your Moodle file repository.
Important: If you are using a Moodle 2.1.1 installation, the Google Docs repository may not work due to a known bug which affects this version. To be safe, it is recommended to upgrade your Moodle to the latest version. There is a forum post on the official Moodle site about this where you can find out more about this issue for Moodle 2.1.1.
Step 1
You need to have an account with Google to be able to use Google Docs, so sign up for one, if you don’t already have a Google account.
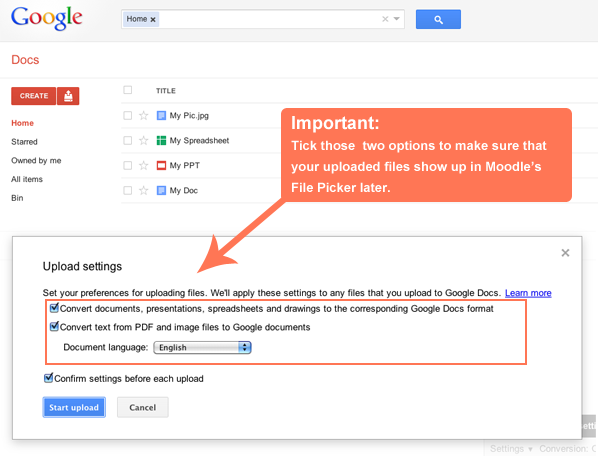
Since only files in Google Docs format will show up in Moodle’s File Picker later, you need to make sure all the uploaded files (eg. Word, PowerPoint, PDF) are converted to Google Docs format. Google Docs will do the conversion for you when you are uploading the files, as long as you remember to tick the two options as shown in the figure below.
Step 2
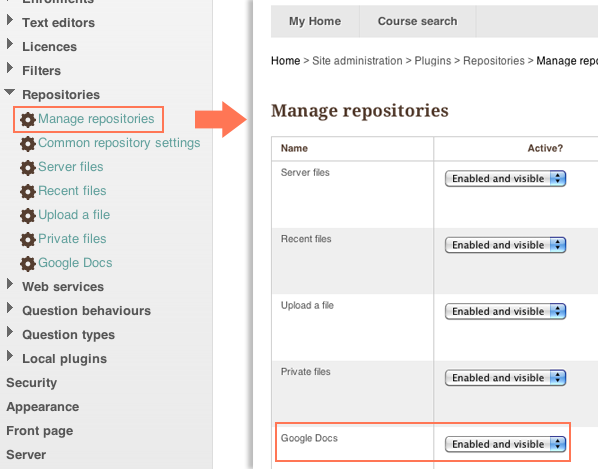
Log in to Moodle as an administrator and navigate to the “Manage repositories” option and enable Google Docs.
Site administration > Plugins > Repositories > Manage repositories
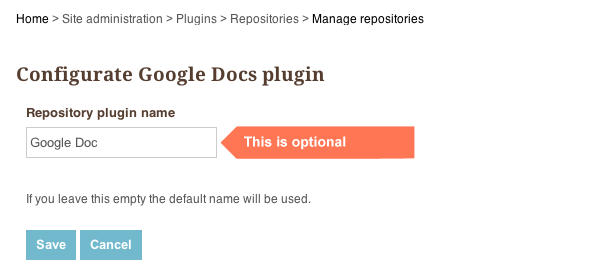
Once Google Docs is enabled, you will be directed to the configuration page where you can enter a new name for the repository.
Step 3
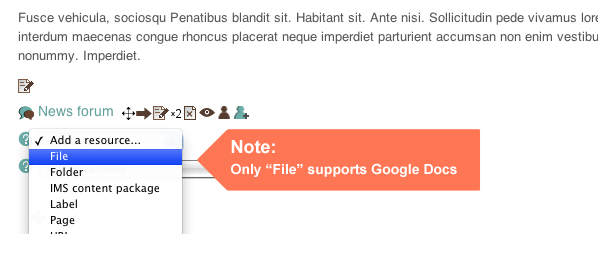
Go to a course and turn editing on. Select “File” from the “Add a resource” drop-down list.
Note: Only “File” supports Google Docs.
Step 4
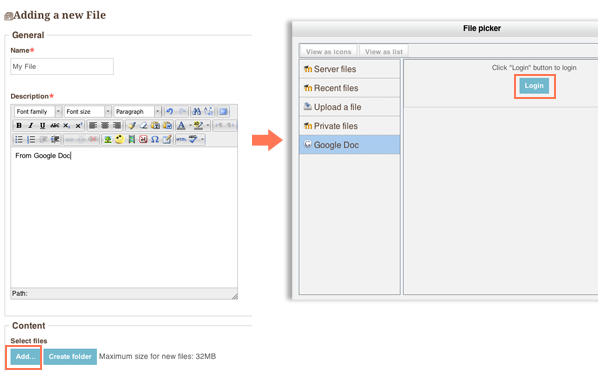
On the “Adding a new File” page, click the “Add…” button. A Moodle File Picker will appear and Google Docs should be listed as one of the available repositories. Select Google Docs as the repository and click the “Login” button to log into your Google account.
Step 5
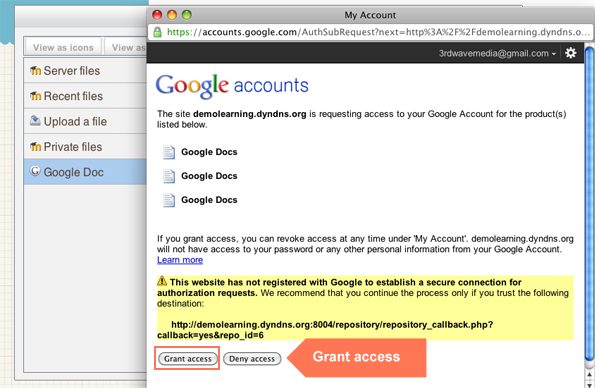
You will need to grant Moodle access to your Google account by clicking the “Grant access” button.
Step 6
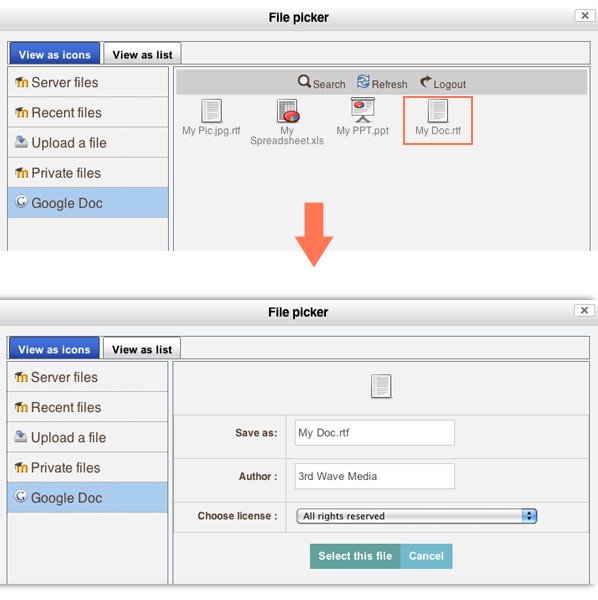
Now you should see all your Google docs as shown in the figure below, and you can select any file you like for using in the course.
