Note: The method described in this tutorial is no longer working as Twitter retired its API v1 in June 2013. Check out our new blog post for the latest method.
Twitter has become ubiquitous on the web nowadays. Displaying your organization’s Twitter Feed on your website is an effective way to inform your site visitors or users about your latest news and events.
Is it possible to do this in a Moodle site and how? Some of you may wonder. Yes, it is indeed possible and I’m going to show you all the steps to achieve this.
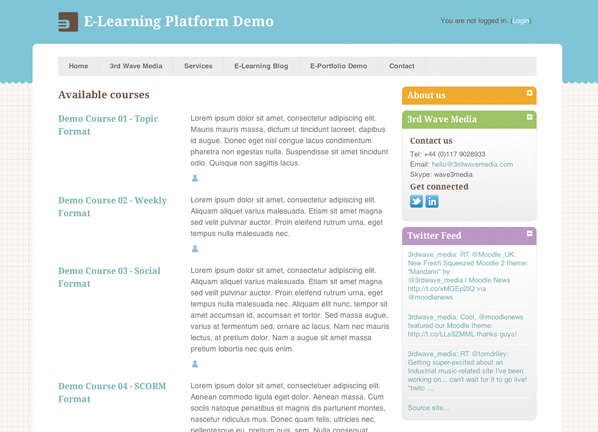
I’m using our Moodle demo site for this tutorial. To find out more about the demo, you can visit the demo page here.
Step 1
Log into your Moodle site as an admin user, and turn on editing.
Step 2
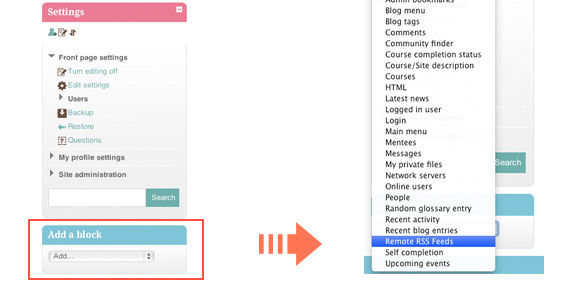
You should see a block called “Add a block” once the editing mode is on . Choose “Remote RSS Feeds” from the drop down list.
Step 3
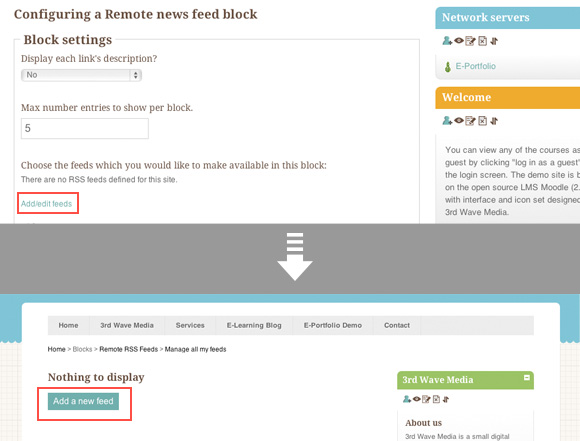
A block called “Remote news feed” should be added to your site by now. Click the configuration button as shown in the figure below. (Note: We have customized our demo’s Moodle icon set so they will look different from the generic Moodle icons.)

Step 4
Let’s add the Twitter Feed first before doing any configuration work. So click the “Add/edit feeds” link and then on the next page click the “Add a new feed” button.
Step 5
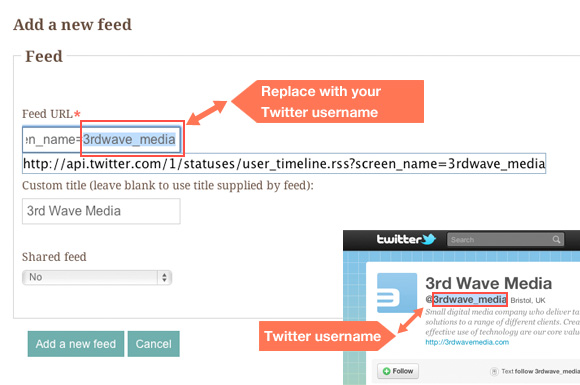
Enter your Twitter Feed code into the Feed URL text field:
(You need to replace the **** with your twitter name)
http://api.twitter.com/1/statuses/user_timeline.rss?screen_name=****
Here I’m using our company’s Twitter Feed as an example:
Step 6
Click the “Add a new feed” button, and your Twitter Feed will be added to the Feed list.
Step 7
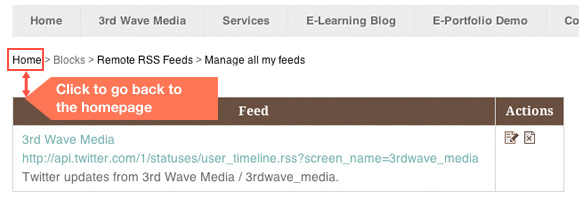
Now we have added the Twitter Feed, but we still need to tell Moodle to display the feed by configuring the feed settings. To do so, first of all, you need to navigate back to the homepage by clicking the “Home” link in the breadcrumb. Secondly, in order to get back to the configuration page, you need to repeat Step 1 to Step 4 as explained above.
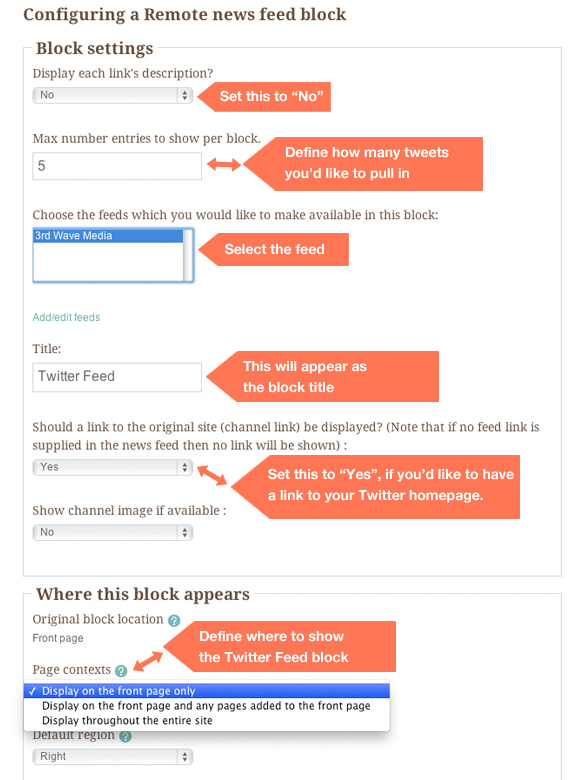
The figure below explains the main parameters you can define/change depending on your needs.
Step 8
Once you are happy with the configuration, you can click the “Save Changes” button, and the desired Twitter Feed should appear on your Moodle site.
Tip: Remember to actually select the Twitter Feed as shown on the figure above, otherwise your feed won’t appear! You can view the result in action on our Moodle demo

