Video-first courses are becoming increasingly common across higher education, workplace training, and independent online learning. Most learners now expect more than a plain embedded video sitting in the middle of a Moodle course page.
In this tutorial, we’ll show you how we built a simple interactive Moodle micro-course using the Interactive Video plugin. The goal isn’t to recreate Udemy feature-for-feature. Instead, this demo shows how a few lightweight interactions can create a more engaging learning experience inside Moodle without creating a complicated course setup.
We kept this tutorial beginner-friendly so you can easily experiment with it yourself.
Download the Demo Course
If you’d like to explore the finished setup yourself, you can download the Moodle course backup used in this tutorial and import it into your own Moodle site.
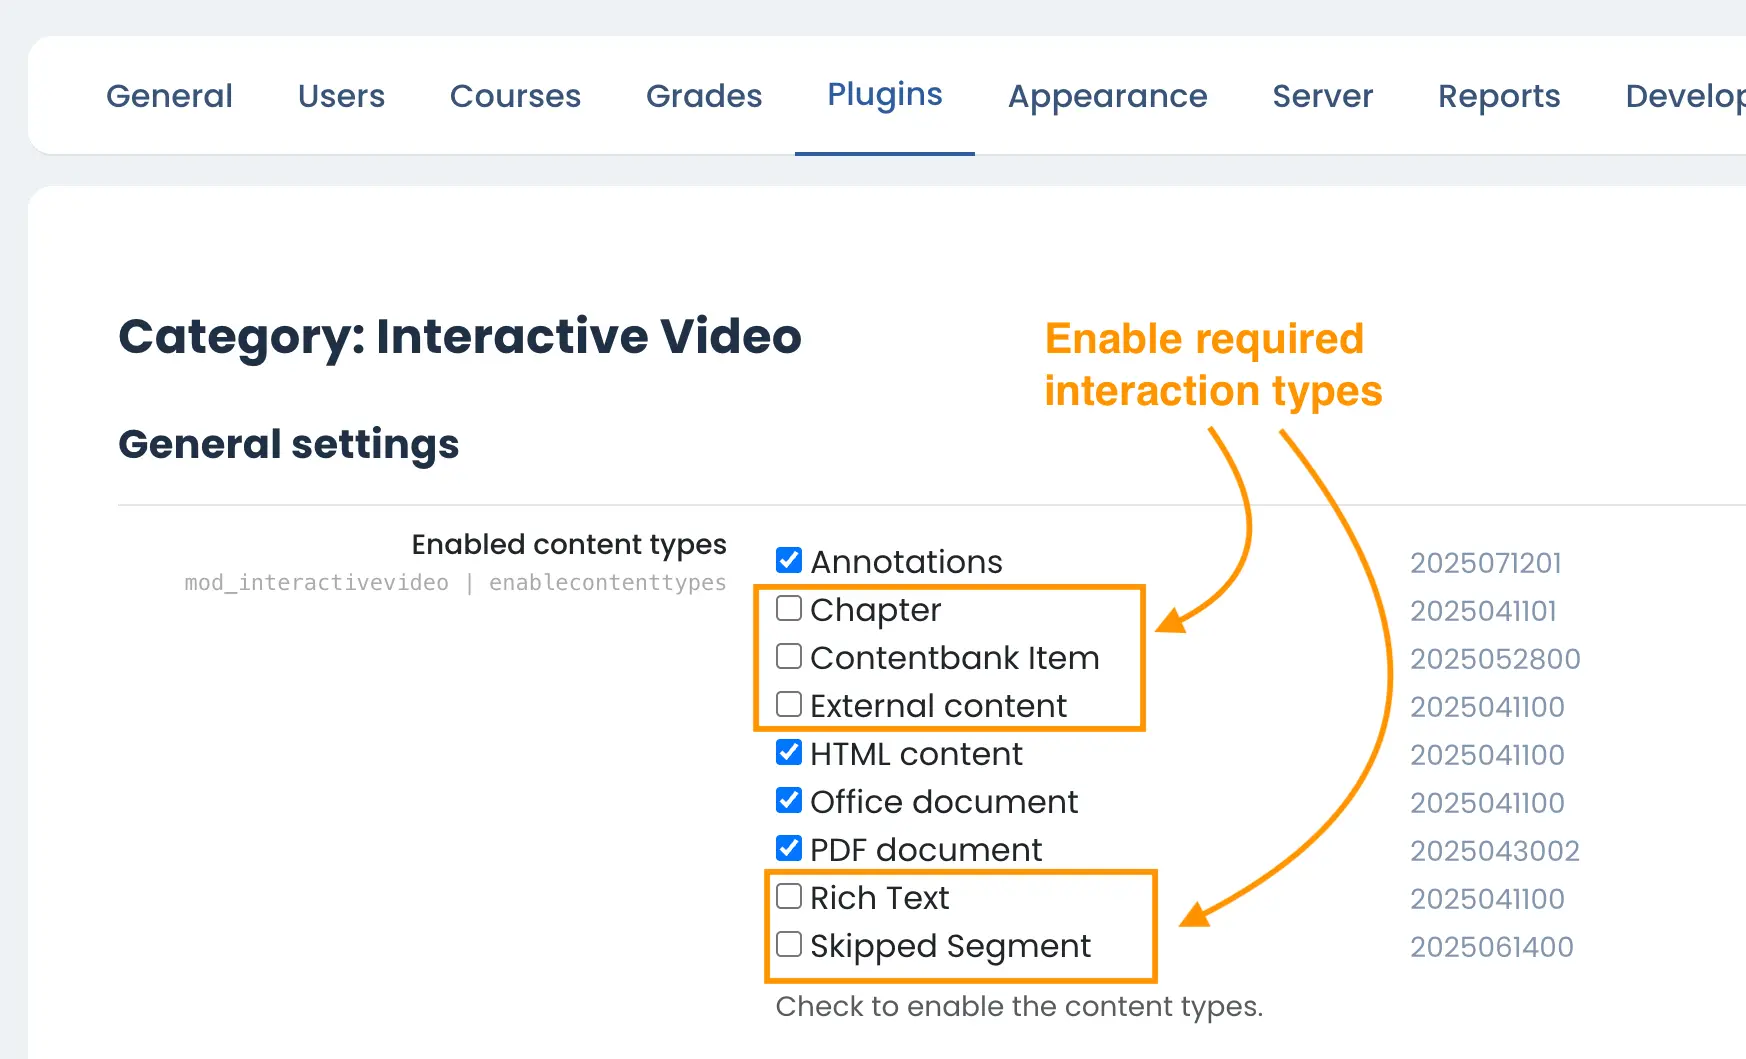
Required plugins
Before restoring the course, make sure the following plugin and interaction types are installed and enabled:
The demo course was created on a Moodle 5 site, but it should also work on Moodle 4.5 as long as the Interactive Video plugin and required interaction types are installed.
Free Download (397 downloads)Page Index
- What you’ll build in this tutorial
- Why simple interactions improve engagement
- What you need before you start
- Step 1 – Set up your Moodle course
- Step 2 – Add your interactive video lesson
- Step 3 – Add interactive learning elements
- Final thoughts
- Troubleshooting
What You’ll Build in This Tutorial
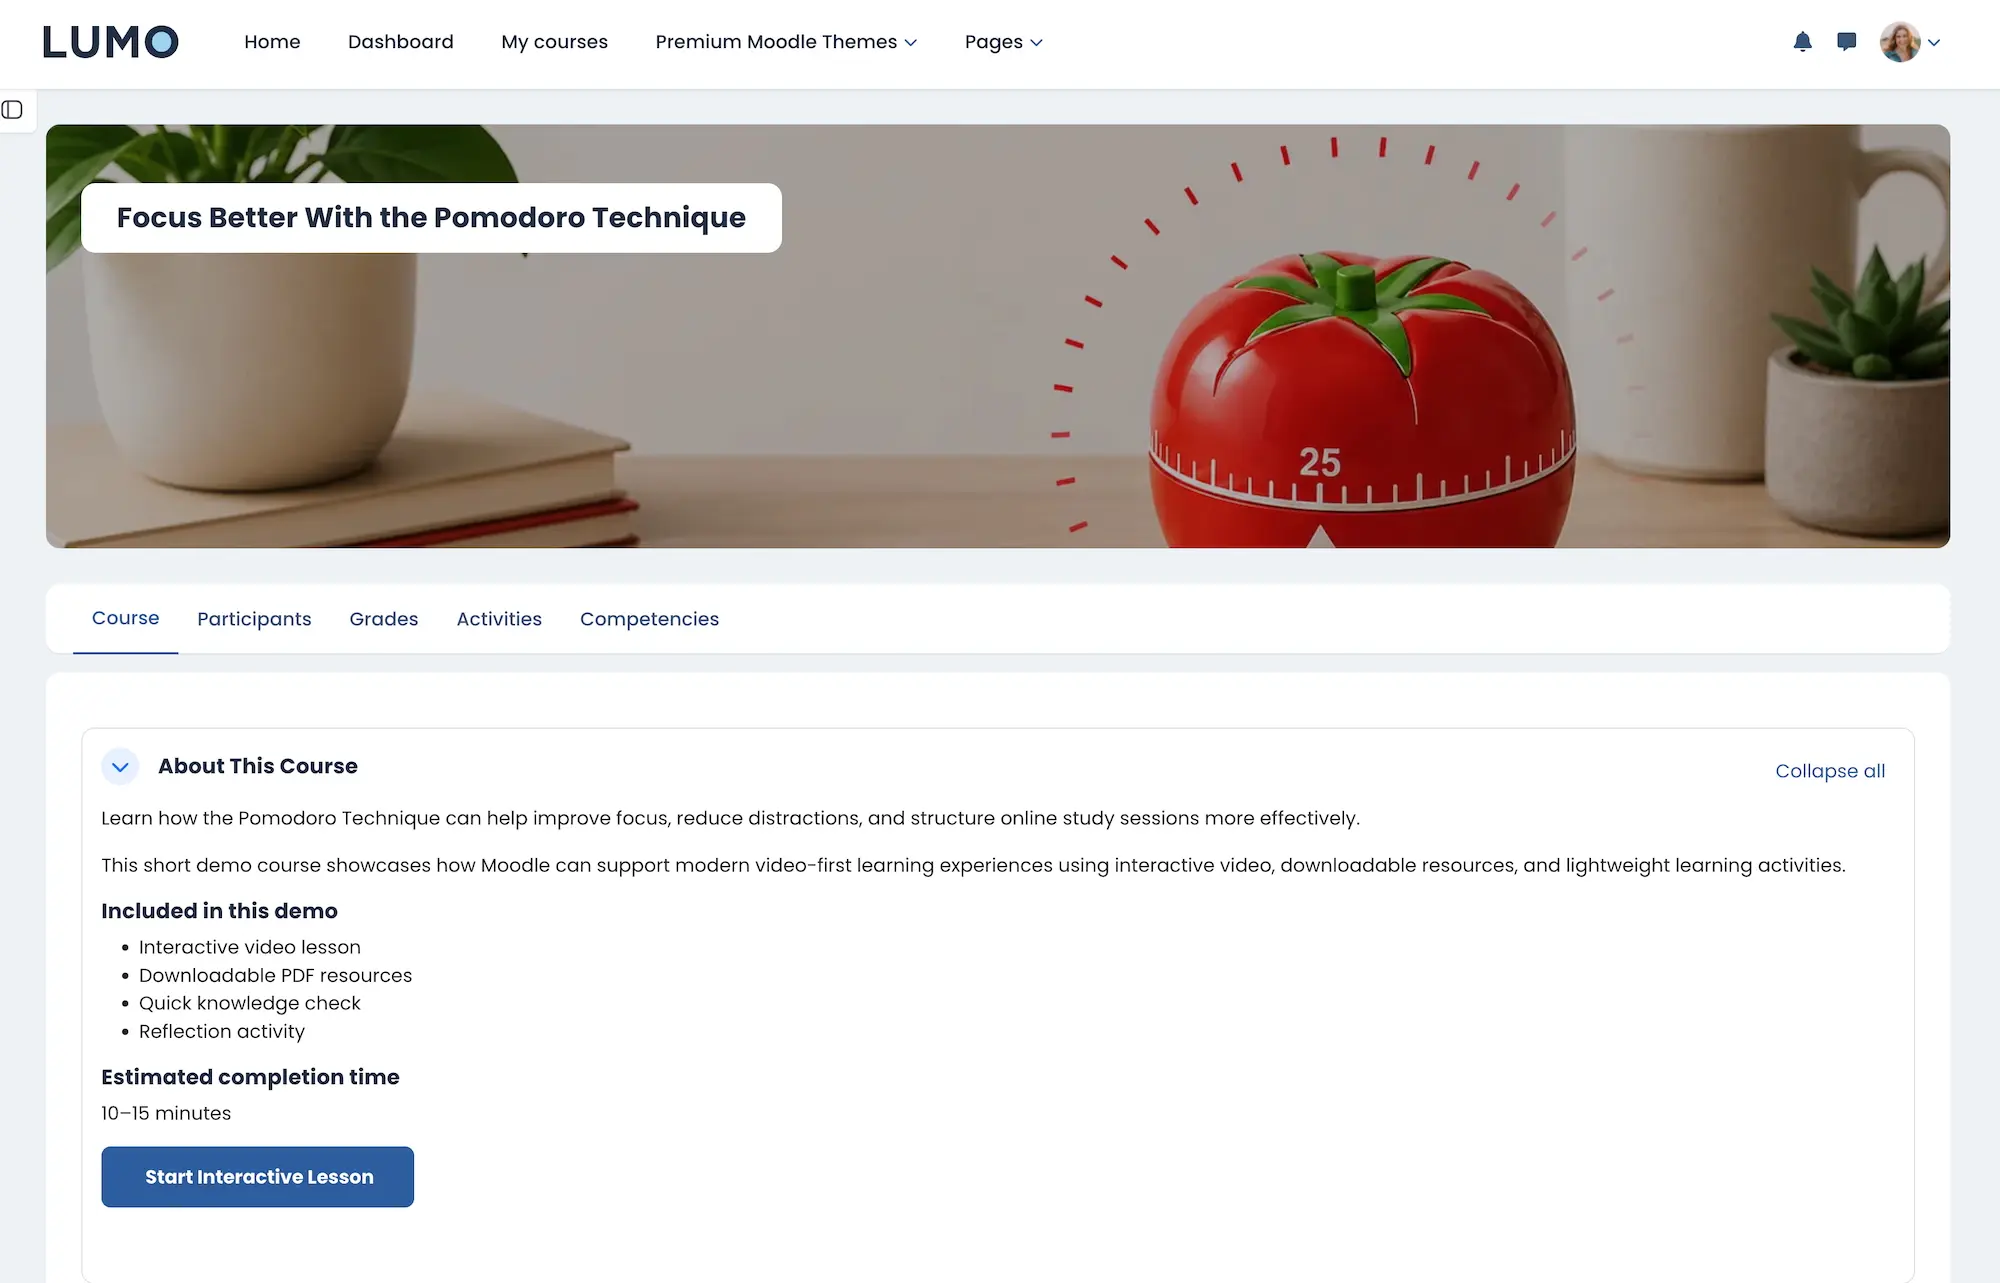
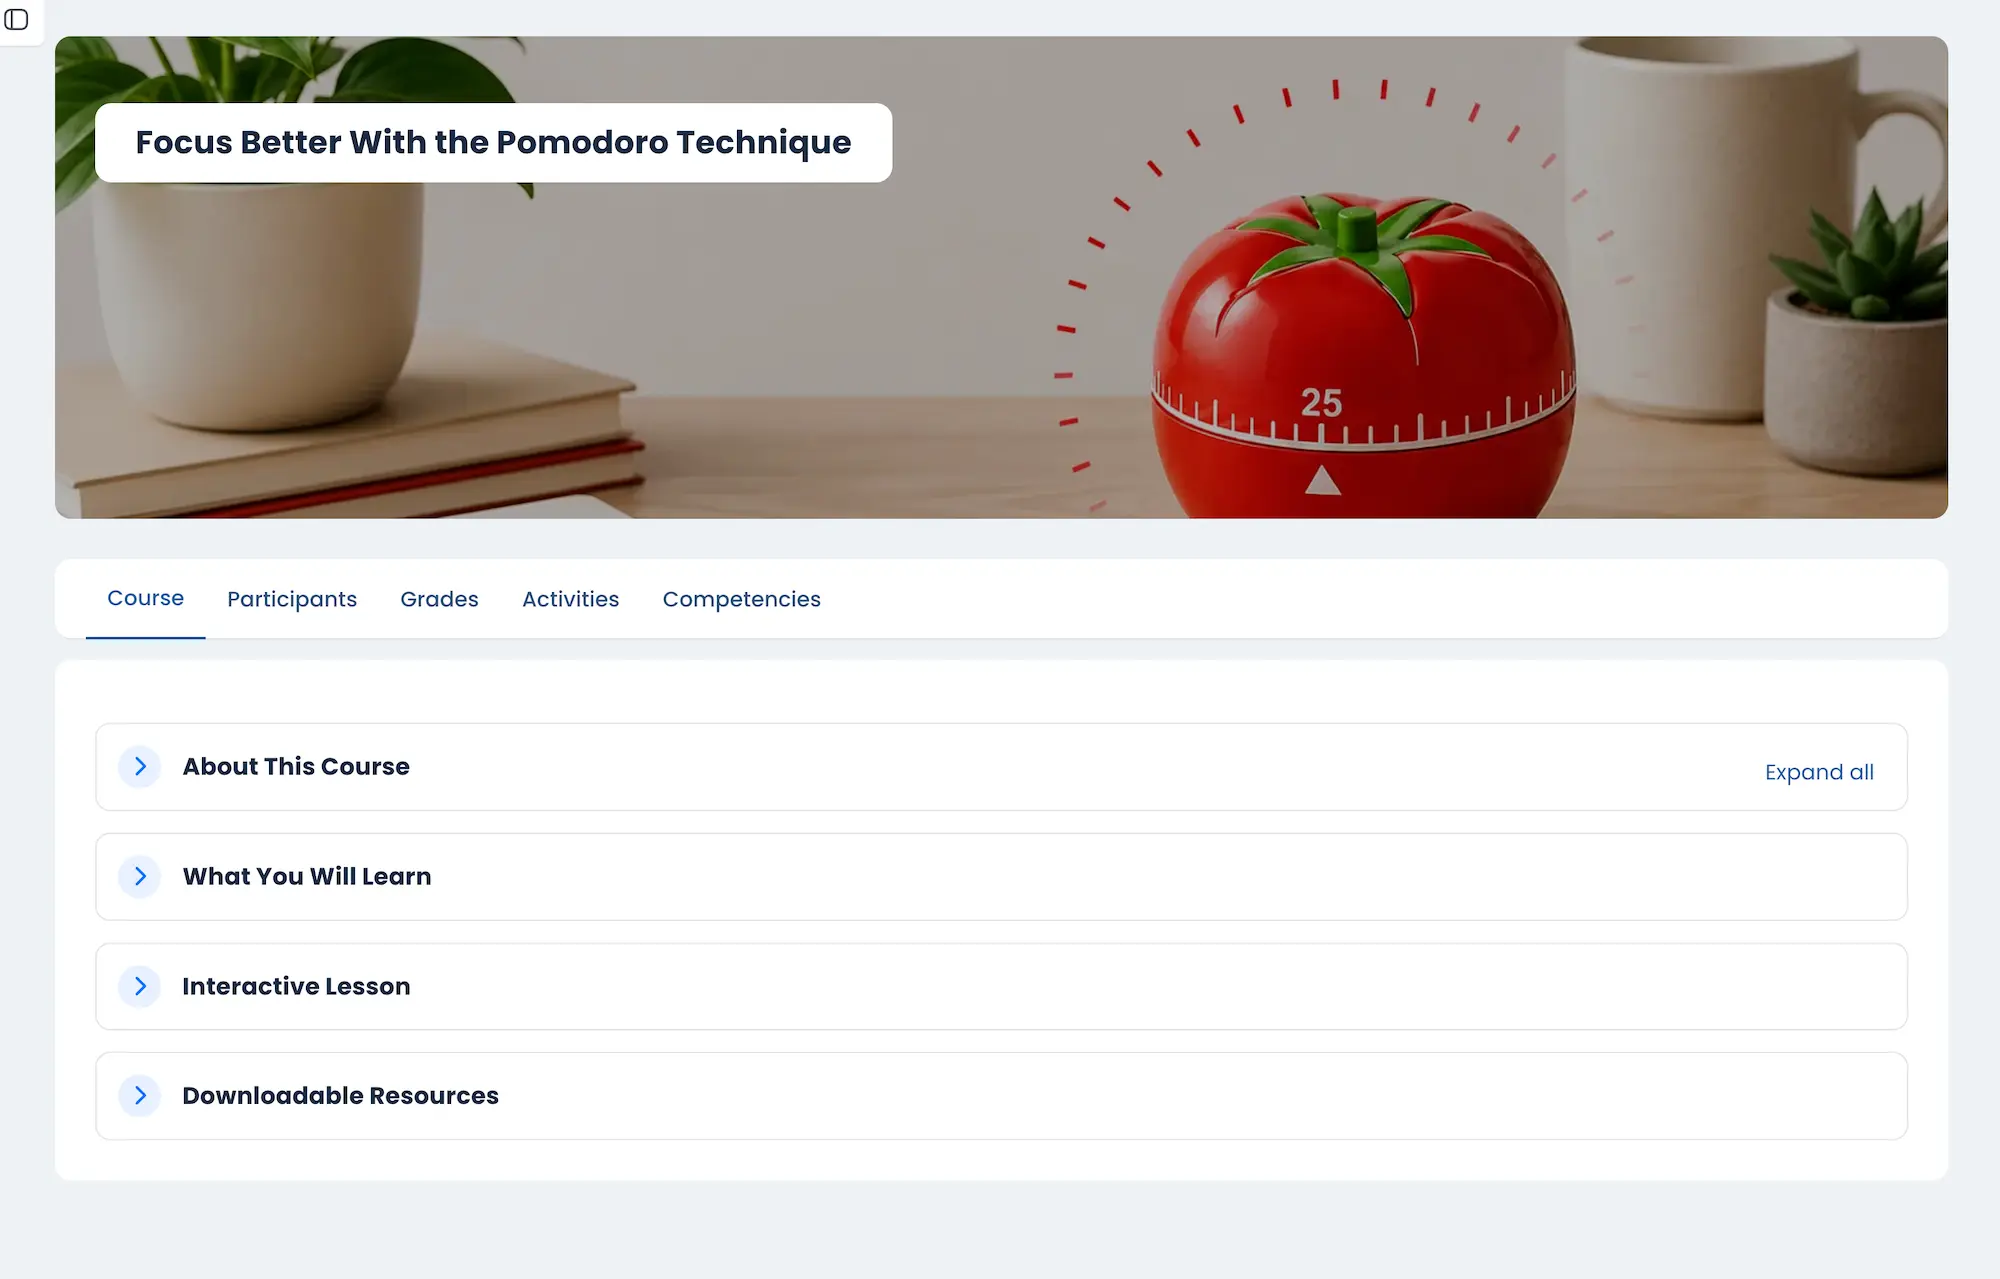
We created a short demo course called:
Focus Better With the Pomodoro Technique
The course includes:
- A YouTube-based interactive video lesson
- Reflection prompts using paused annotations
- Downloadable PDF resources
- Chapter navigation
- A simple multiple choice knowledge check
- A clean Moodle 5 course layout
We kept the course short and focused so the setup stays easy to follow.
Why Simple Interactions Improve Engagement
A standard video lesson is passive. Learners click play, watch the video, then move on.
Interactive video adds small moments of interaction that help learners stay engaged without turning the lesson into a giant quiz. Simple interactions can encourage reflection, break up long videos, make videos easier to navigate, help learners access resources at the right moment, and reinforce key ideas without adding formal assessments.
In many cases, a few lightweight interactions create a better experience than adding lots of activities and complexity.
What You Need Before You Start
Before creating your course, make sure you have the Interactive Video plugin, the required interaction types installed, and either a YouTube video or uploaded video file.
For this demo, we used a short YouTube video about the Pomodoro Technique from The Open University.
Installing additional interaction types
Some interaction types are included directly inside the Interactive Video plugin, while others need to be installed separately.
After installing additional interaction types, make sure to go to the Interactive Video plugin’s general settings page and enable the interaction types there as well.
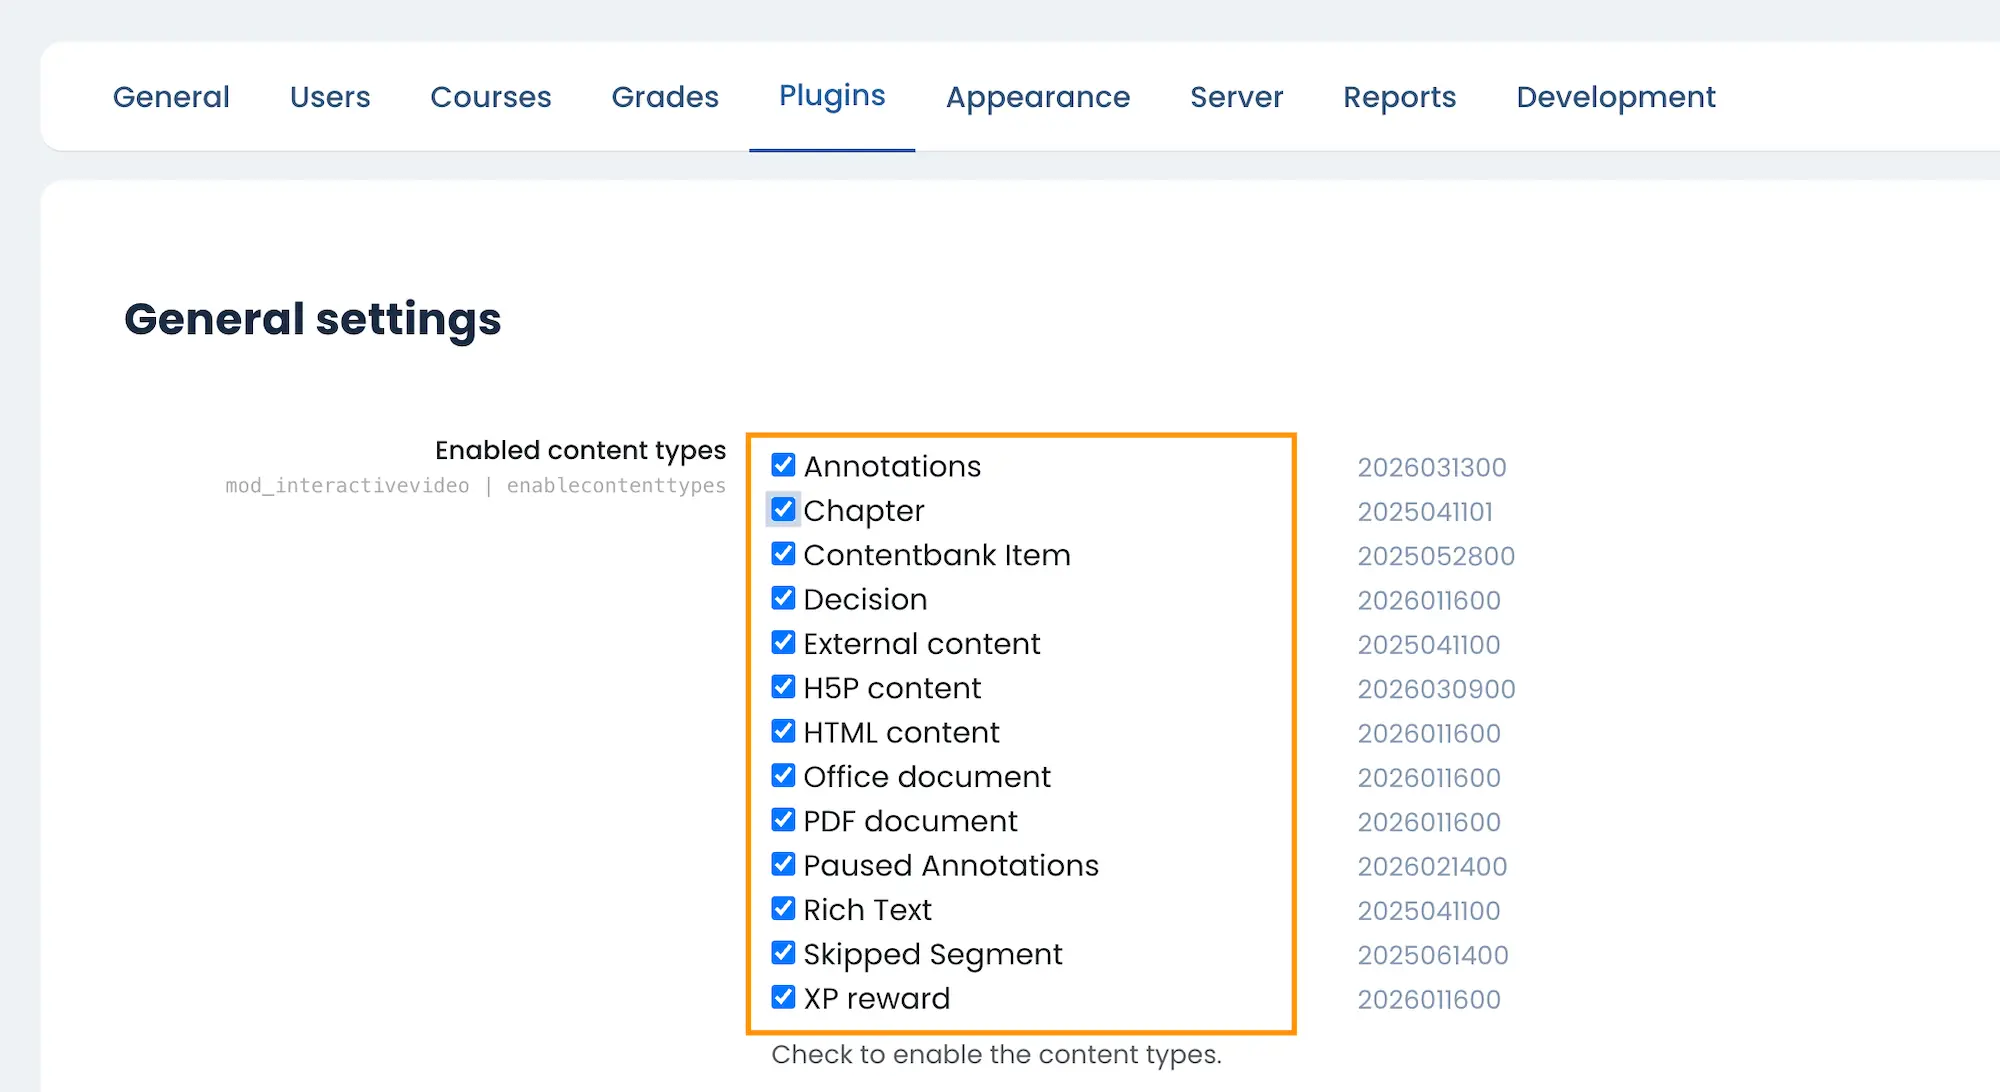
Built-in interaction types
- Chapter – Break videos into navigable sections
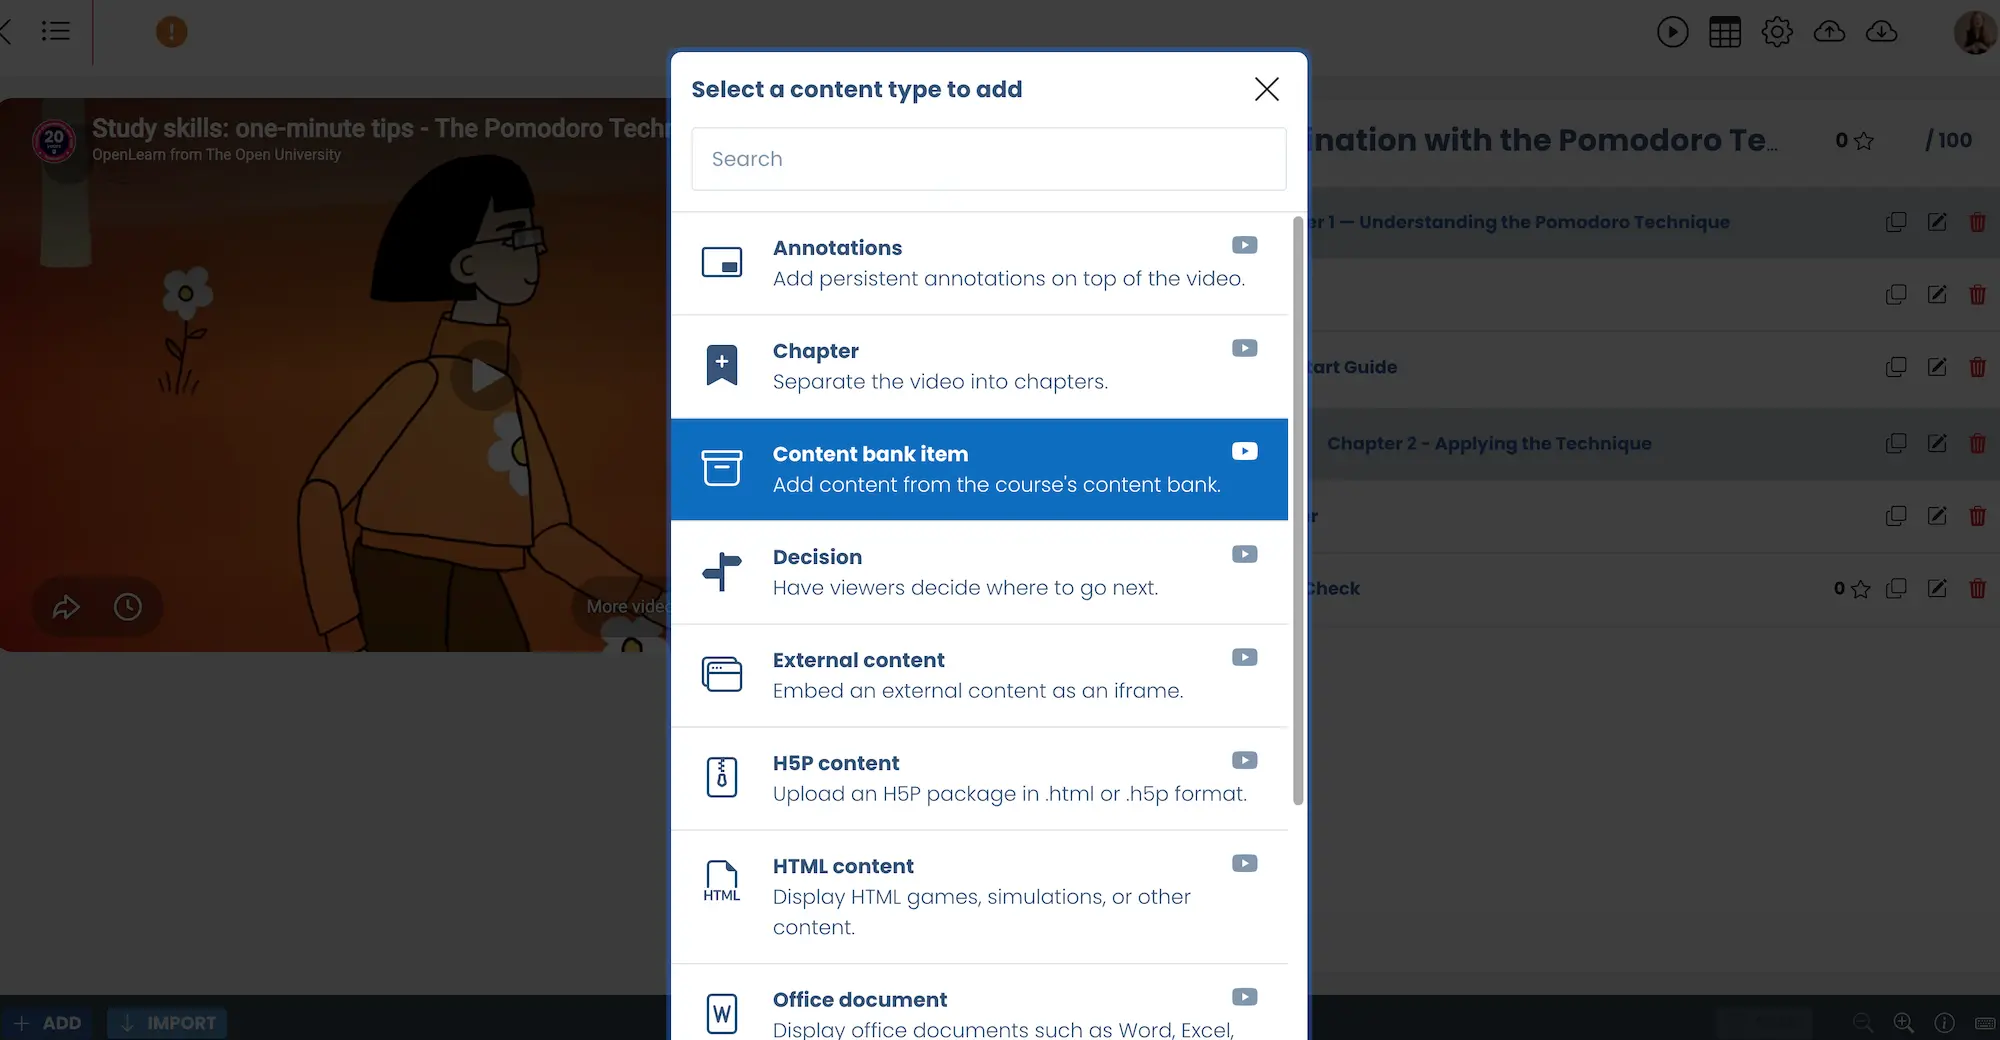
- Content bank item – Add quiz or interactive content from the Moodle content bank
- External content – Embed external content using OEmbed
- Rich text – Add formatted text overlays inside the video
- Skip segment – Automatically skip selected parts of the video
Downloadable interaction types used in this demo
Additional interaction types and plugin resources can also be found on the official Interactive Video plugin page.
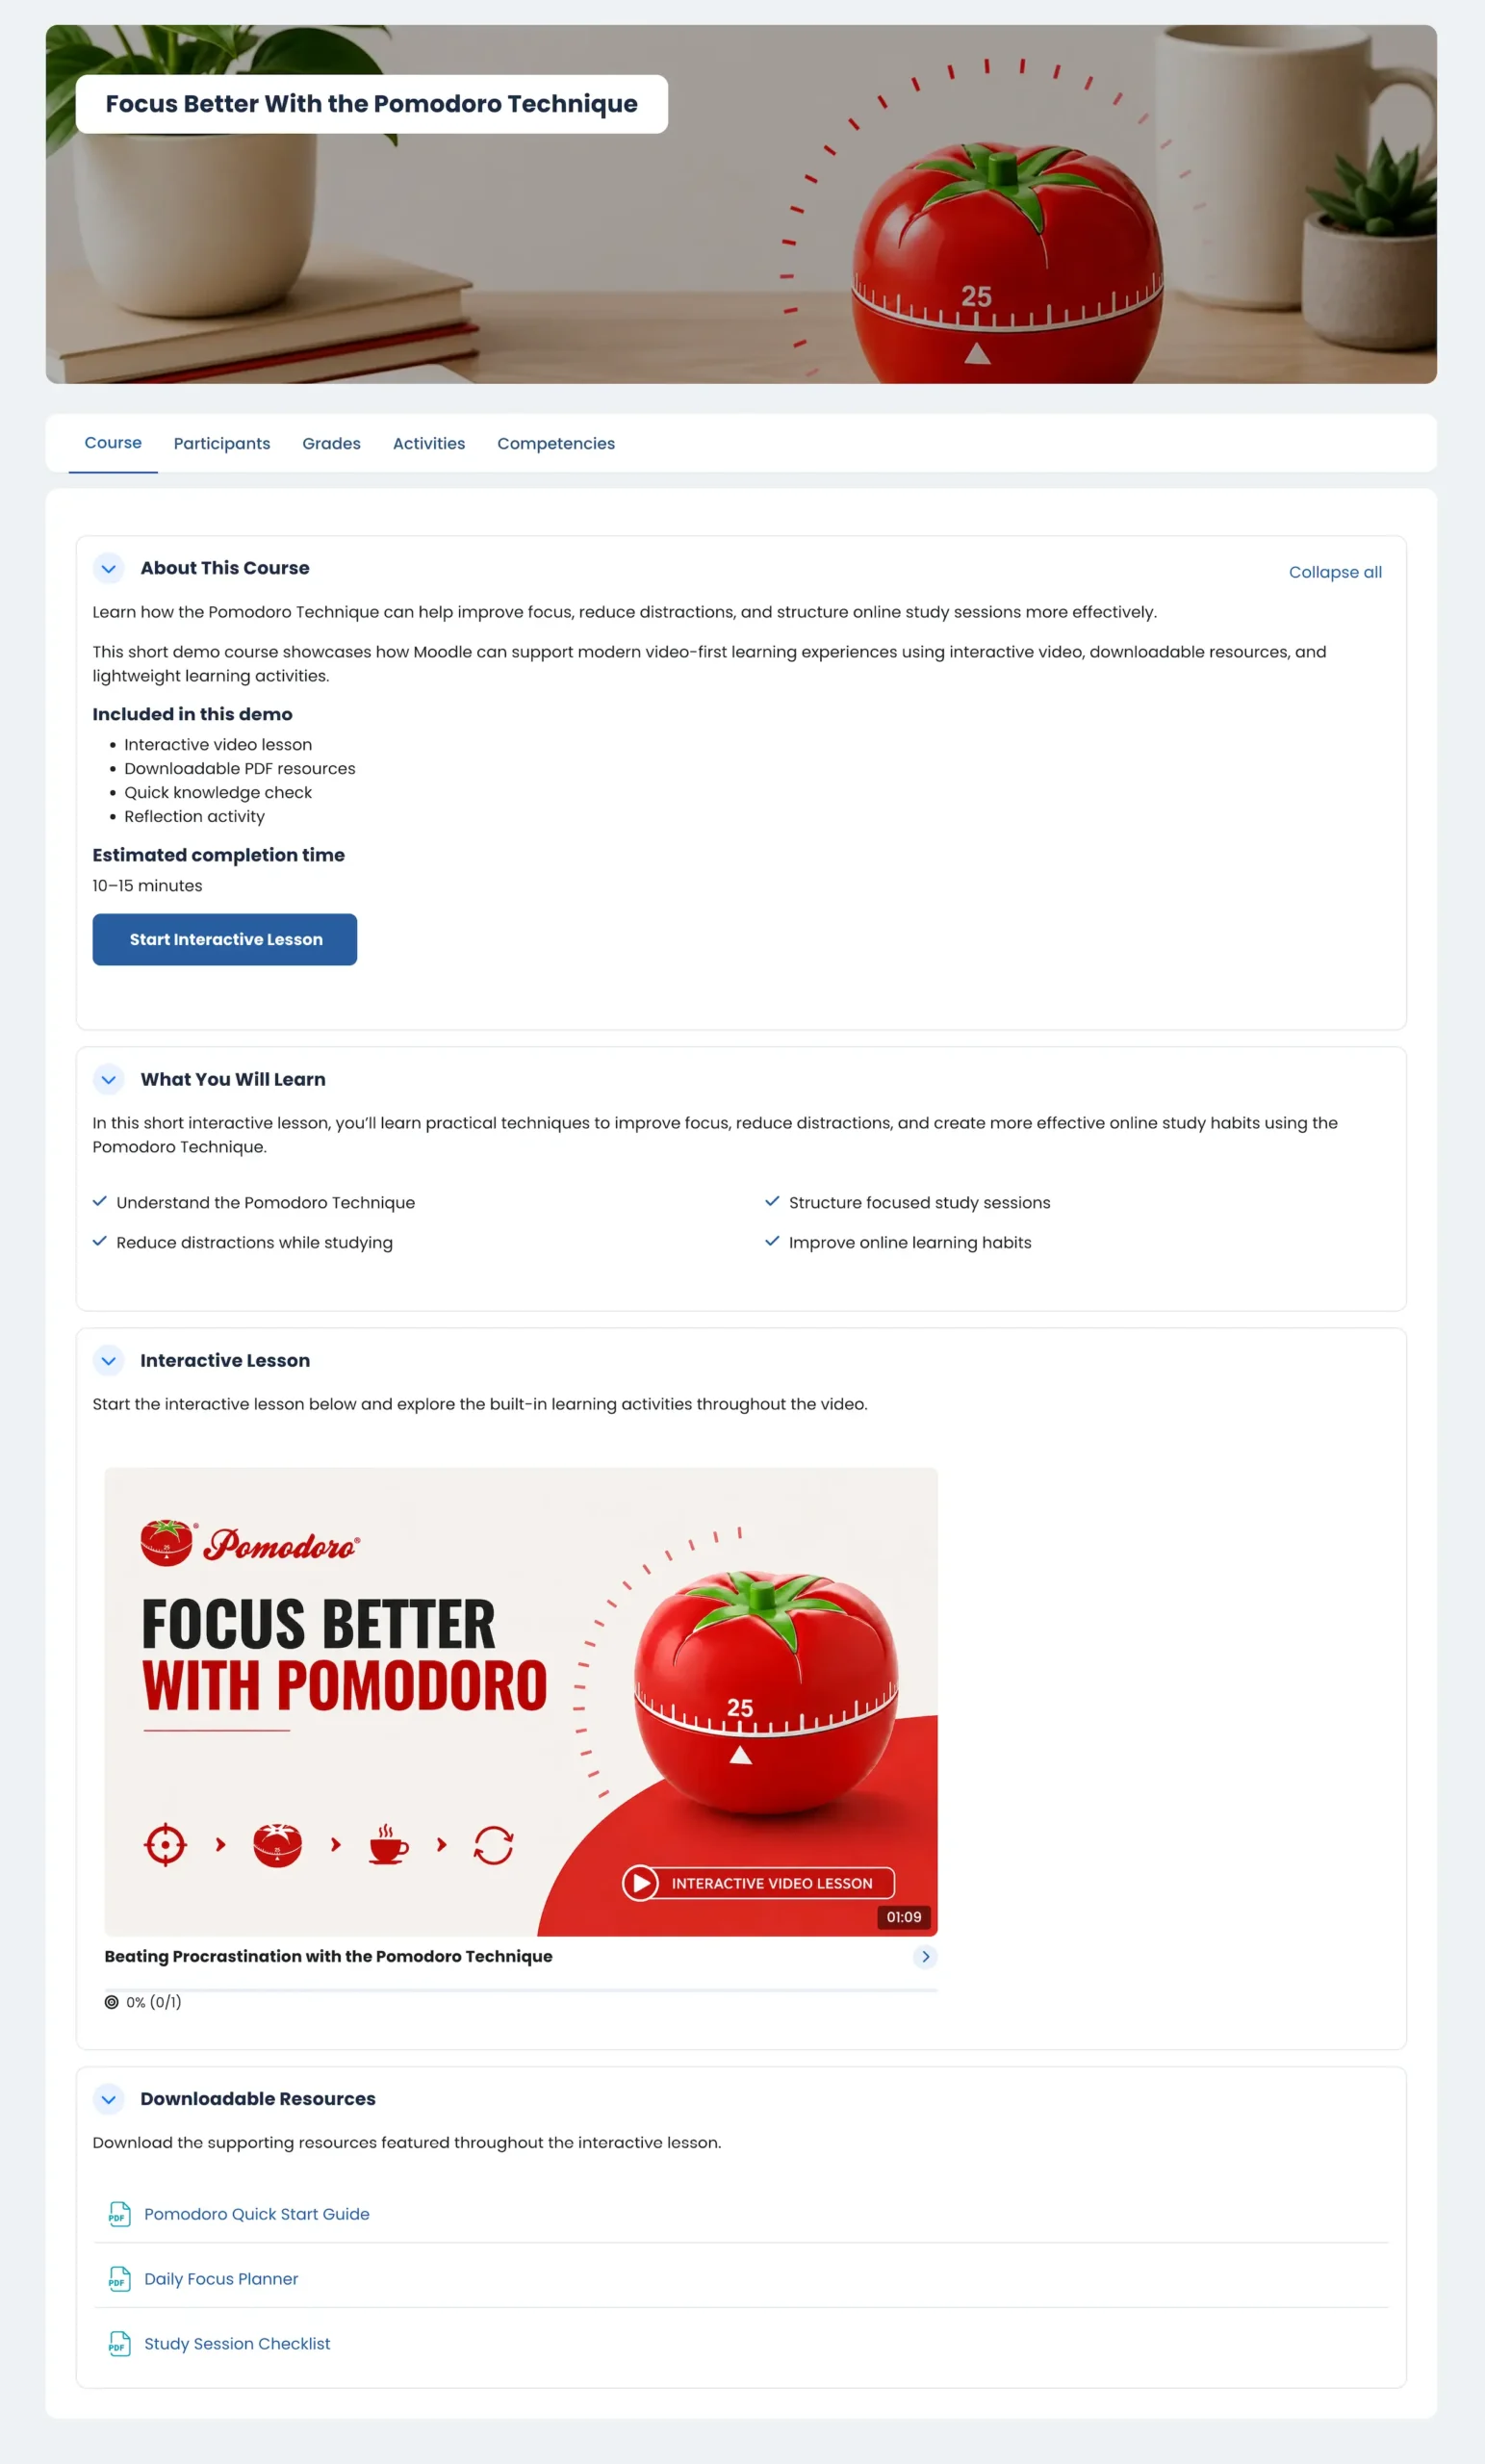
Step 1 – Set Up Your Moodle Course
Create a new Moodle course and keep the layout simple. For this demo course, we used four sections:
- About This Course
- What You Will Learn
- Interactive Lesson
- Downloadable Resources
A clean course structure makes the learning experience much easier to follow, especially on mobile devices.
Step 2 – Add Your Interactive Video Lesson
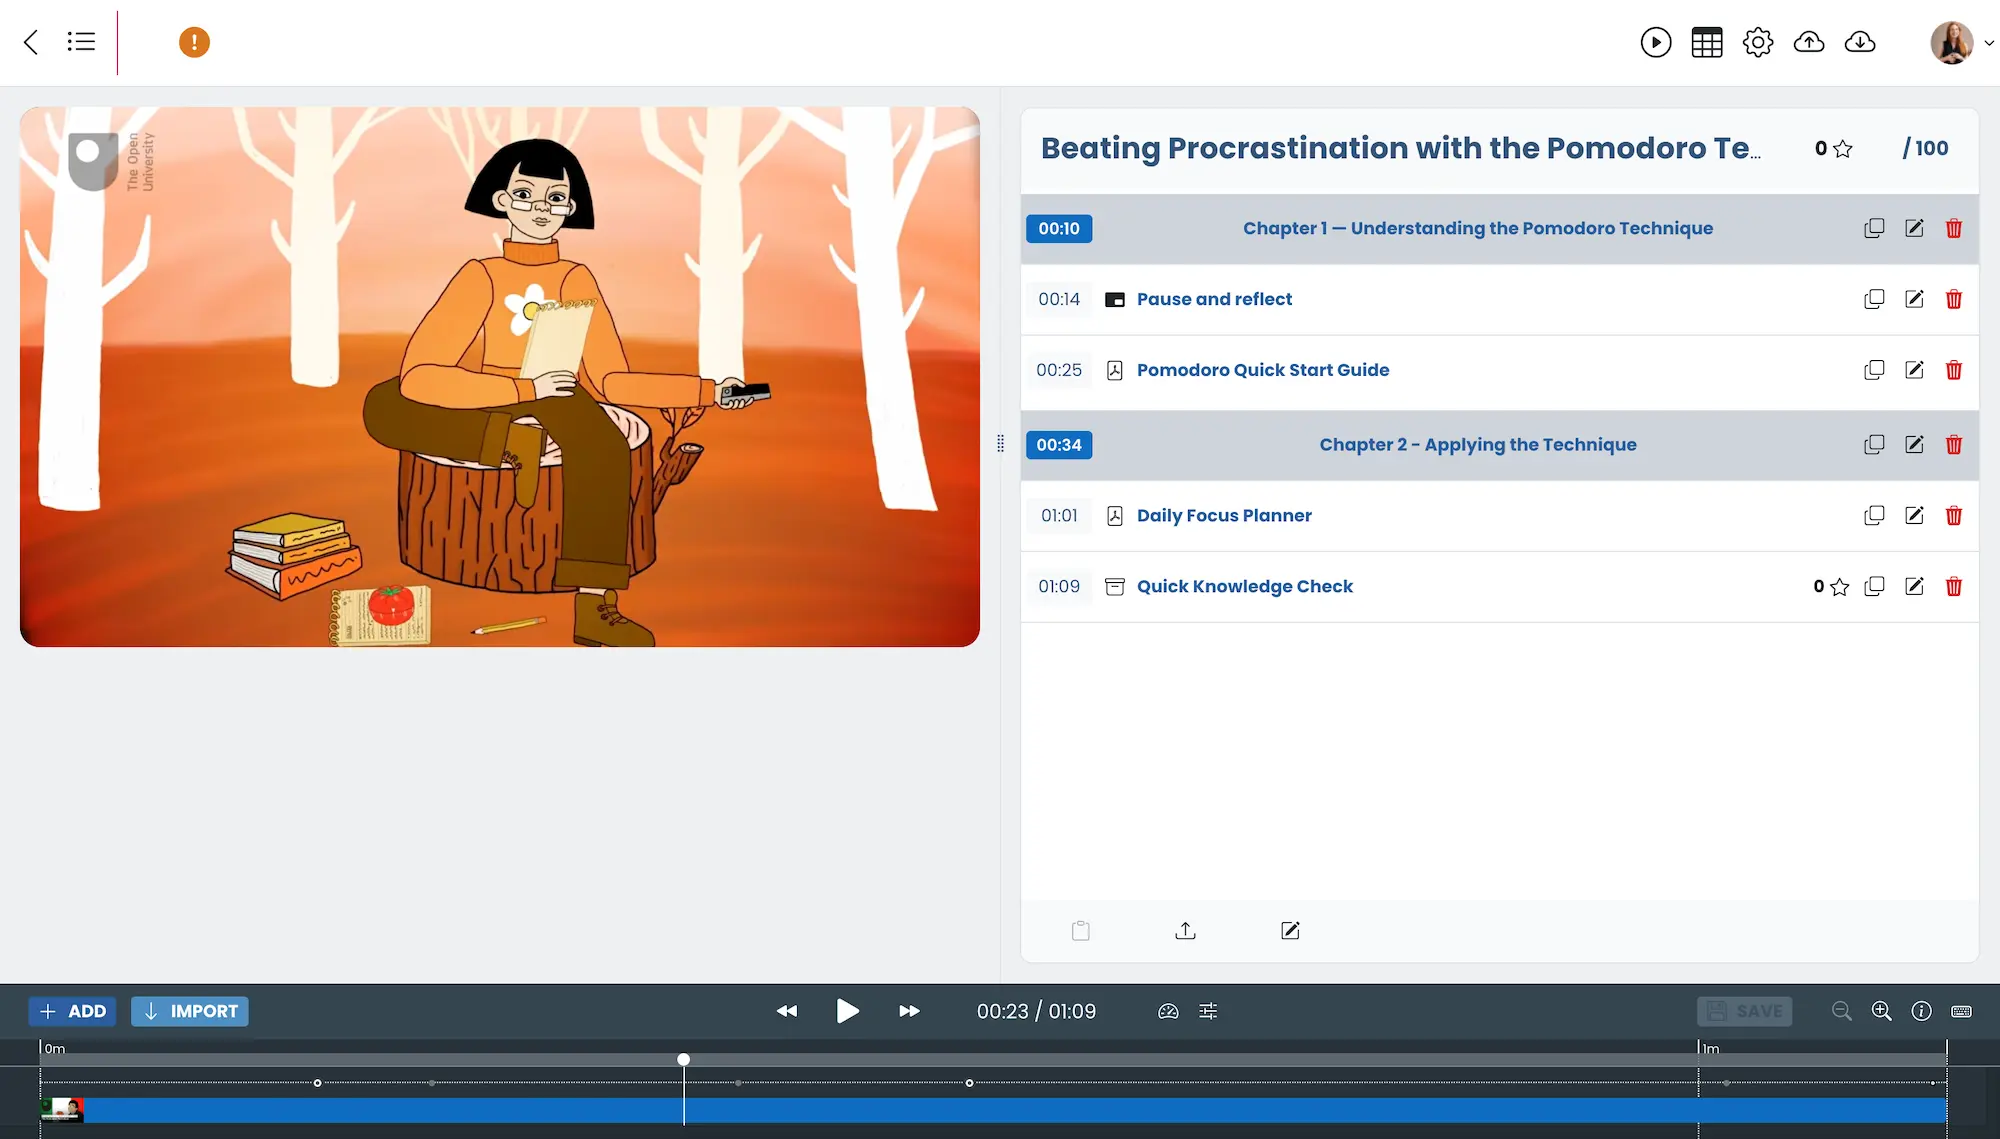
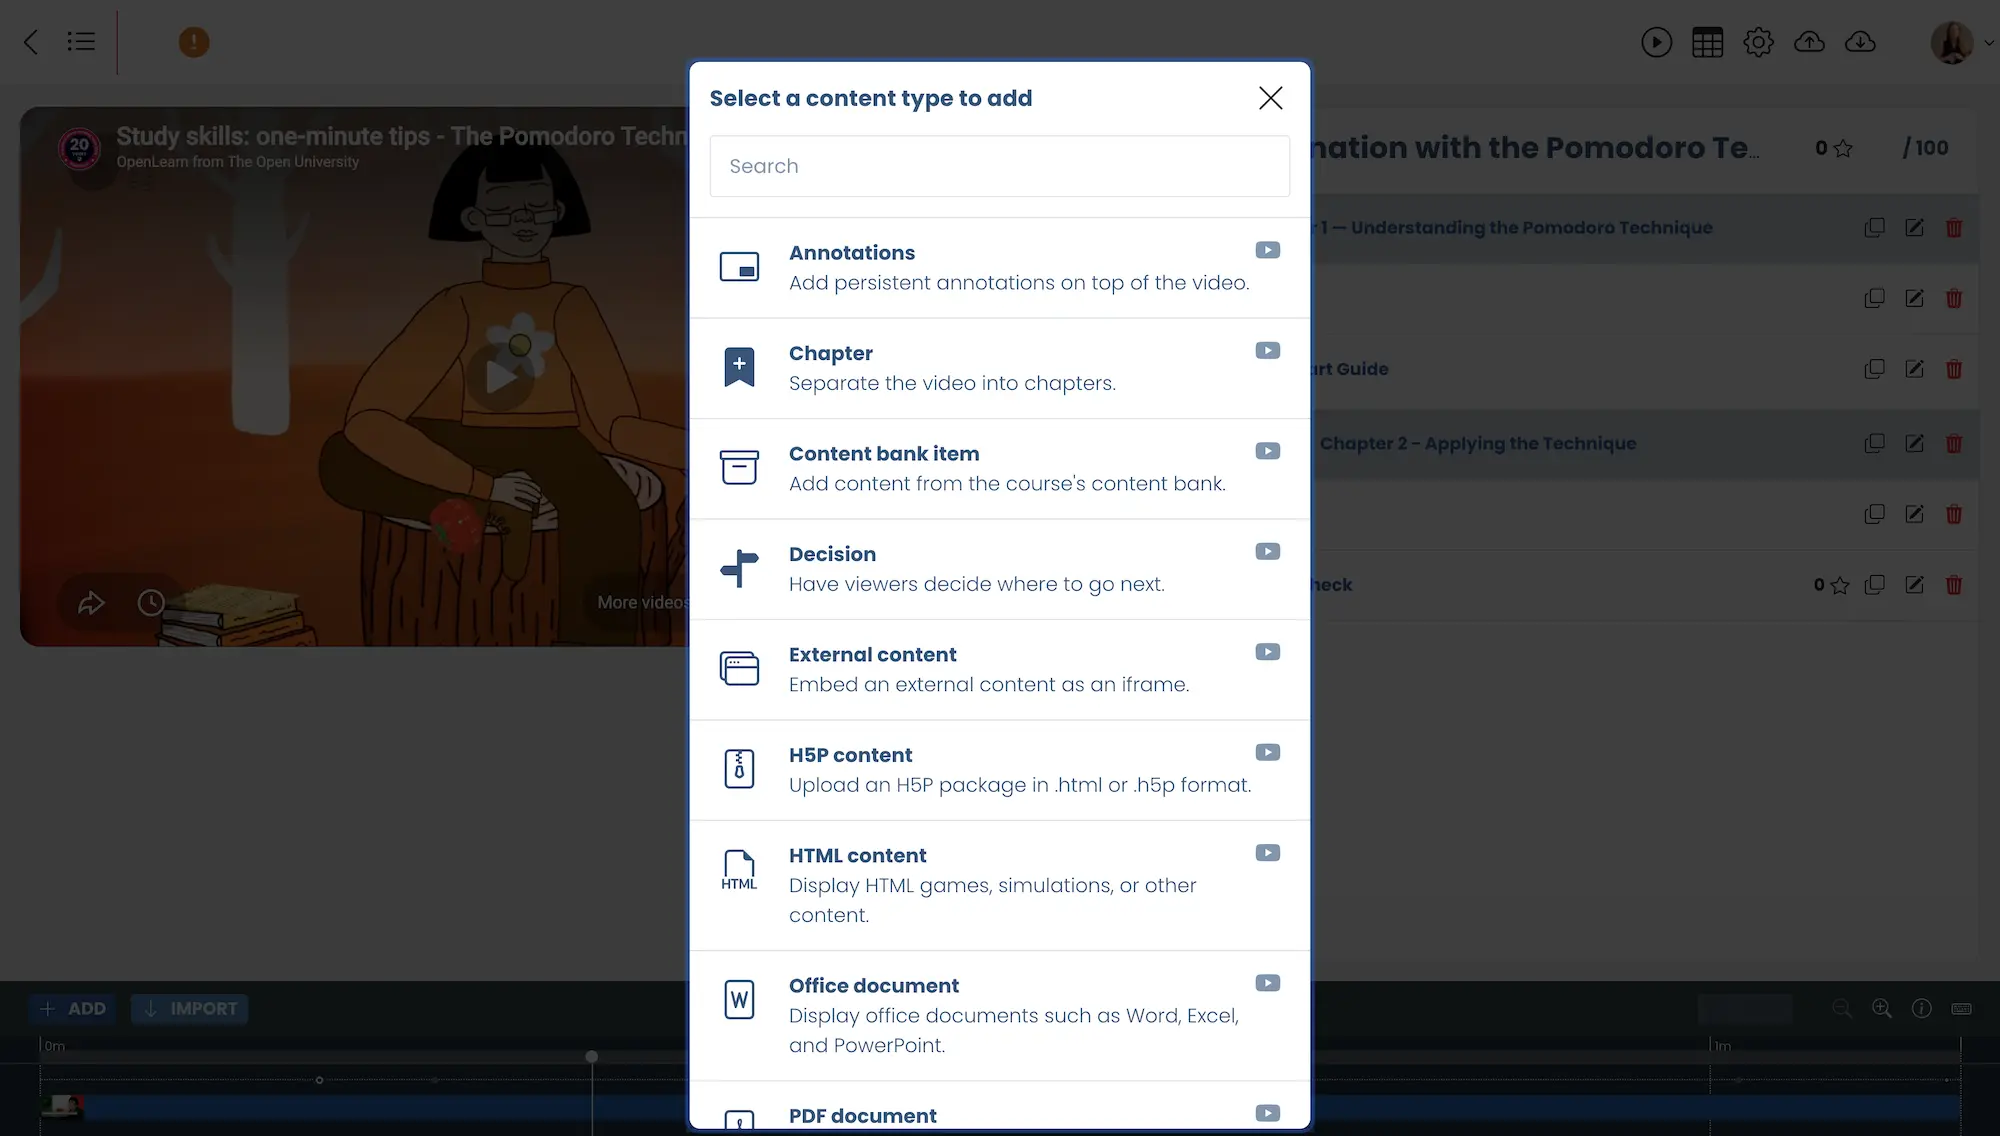
Next, add a new Interactive Video activity inside your course.
For this demo, we used a YouTube video source.

We’d recommend uploading a custom poster image for the activity card instead of relying on the default YouTube thumbnail. A good poster image makes the course page feel much more polished and visually consistent.
We’d also recommend setting the activity card appearance to: Full-width poster image
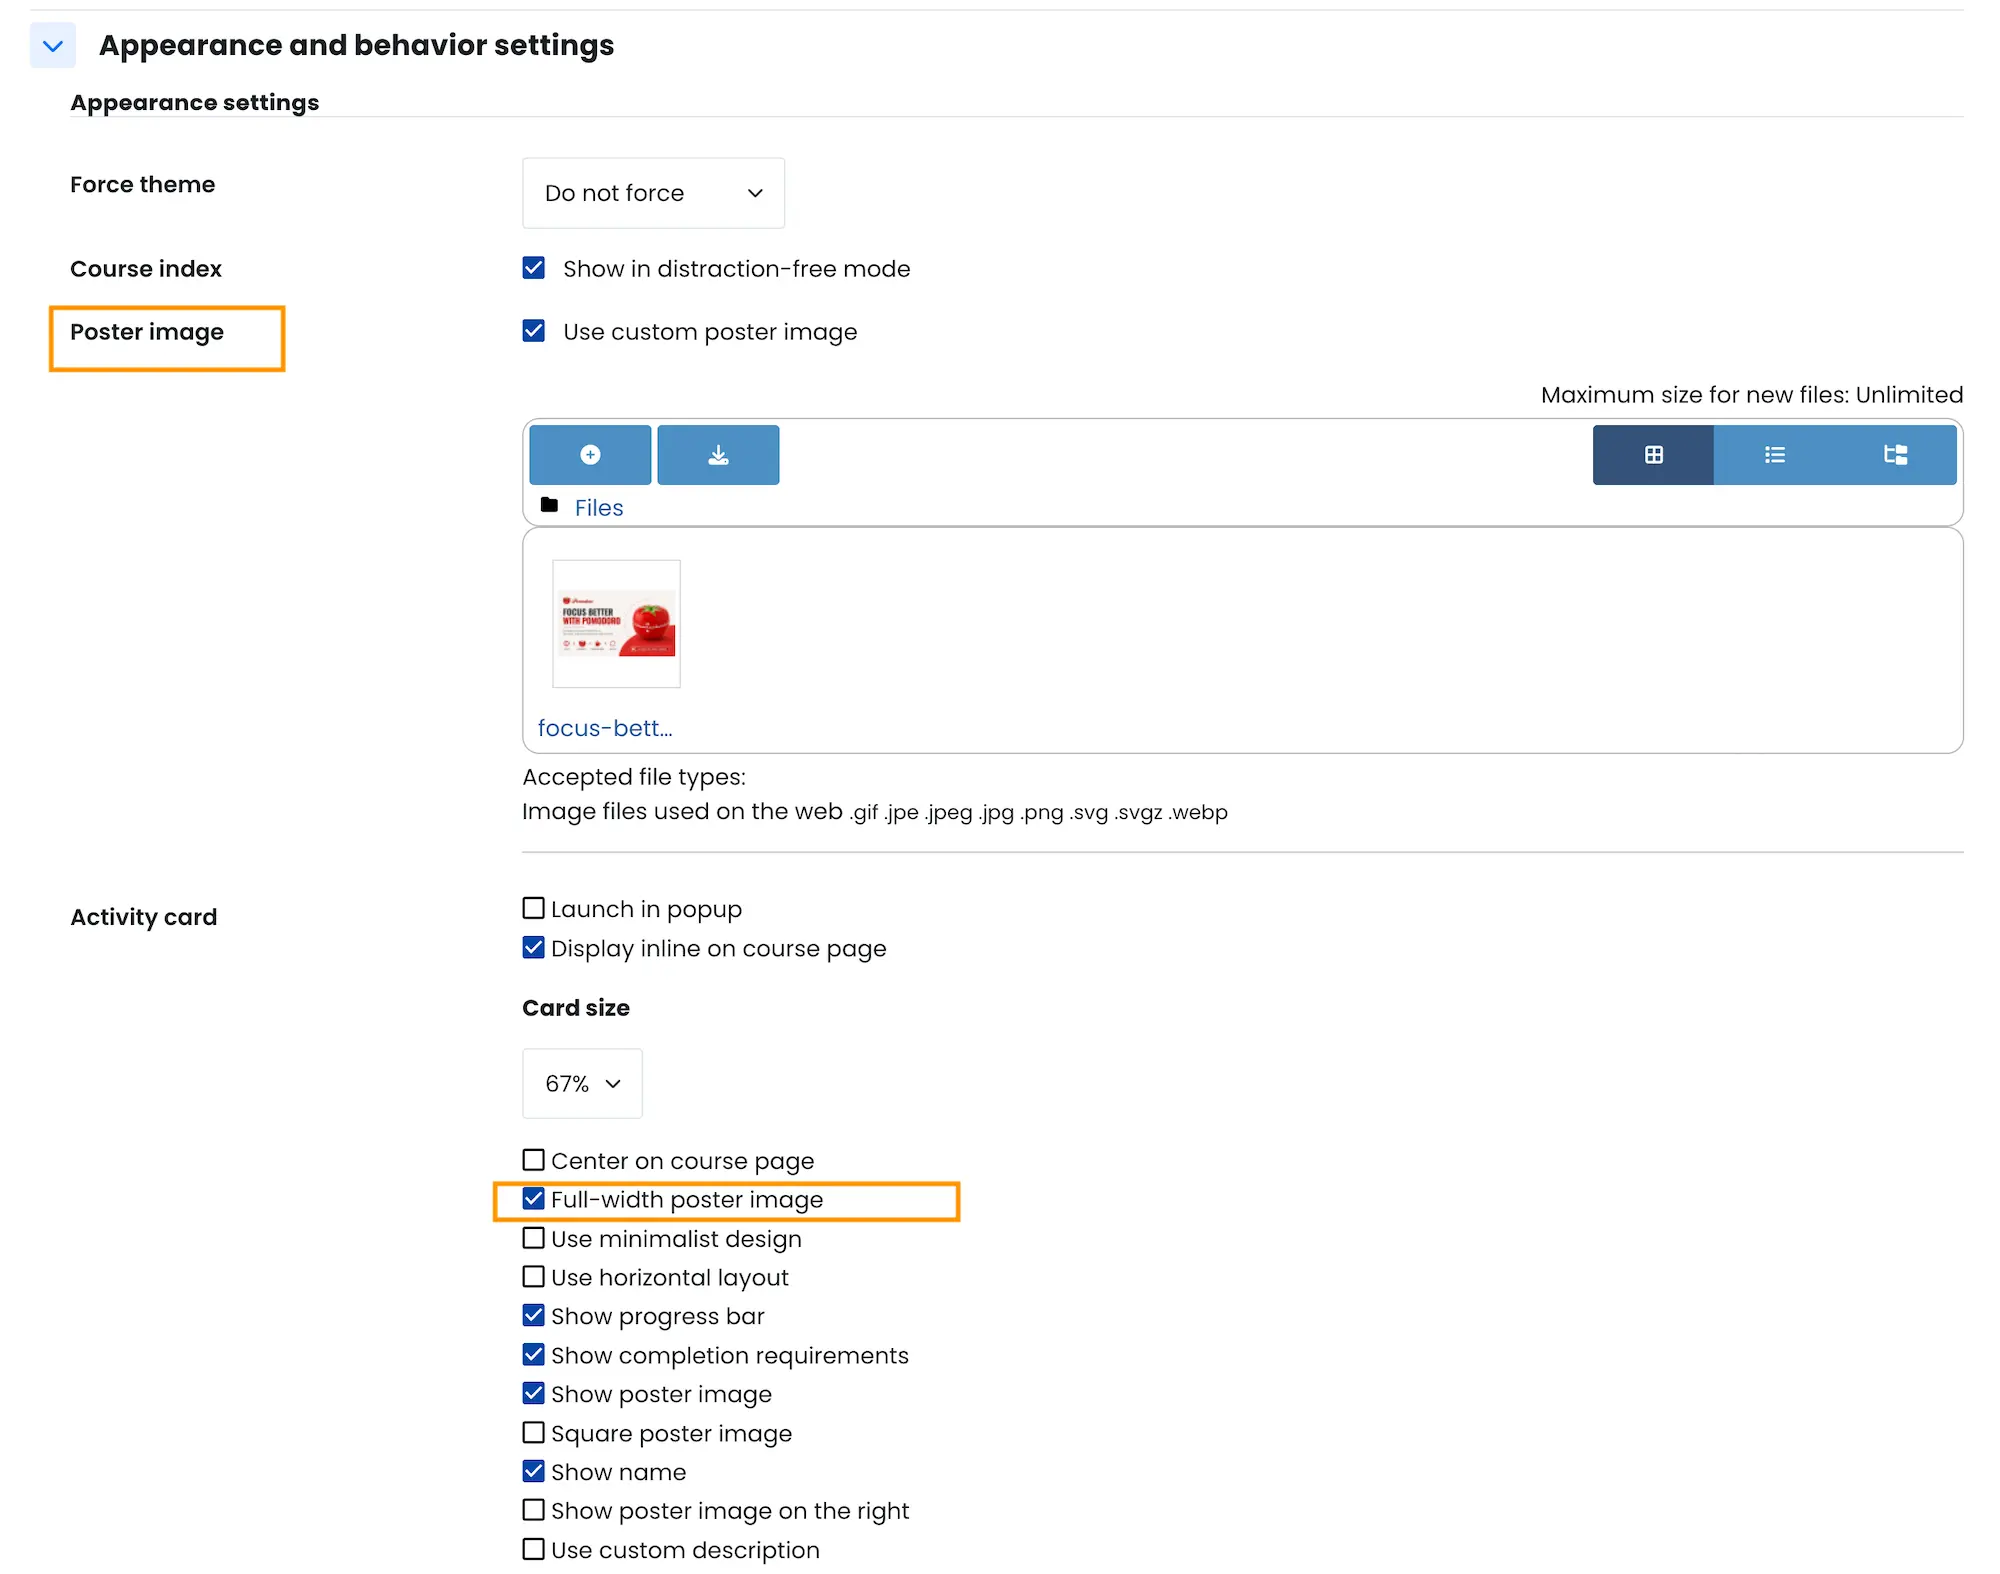
This creates a cleaner and more modern-looking course layout.

Step 3 – Add Interactive Learning Elements
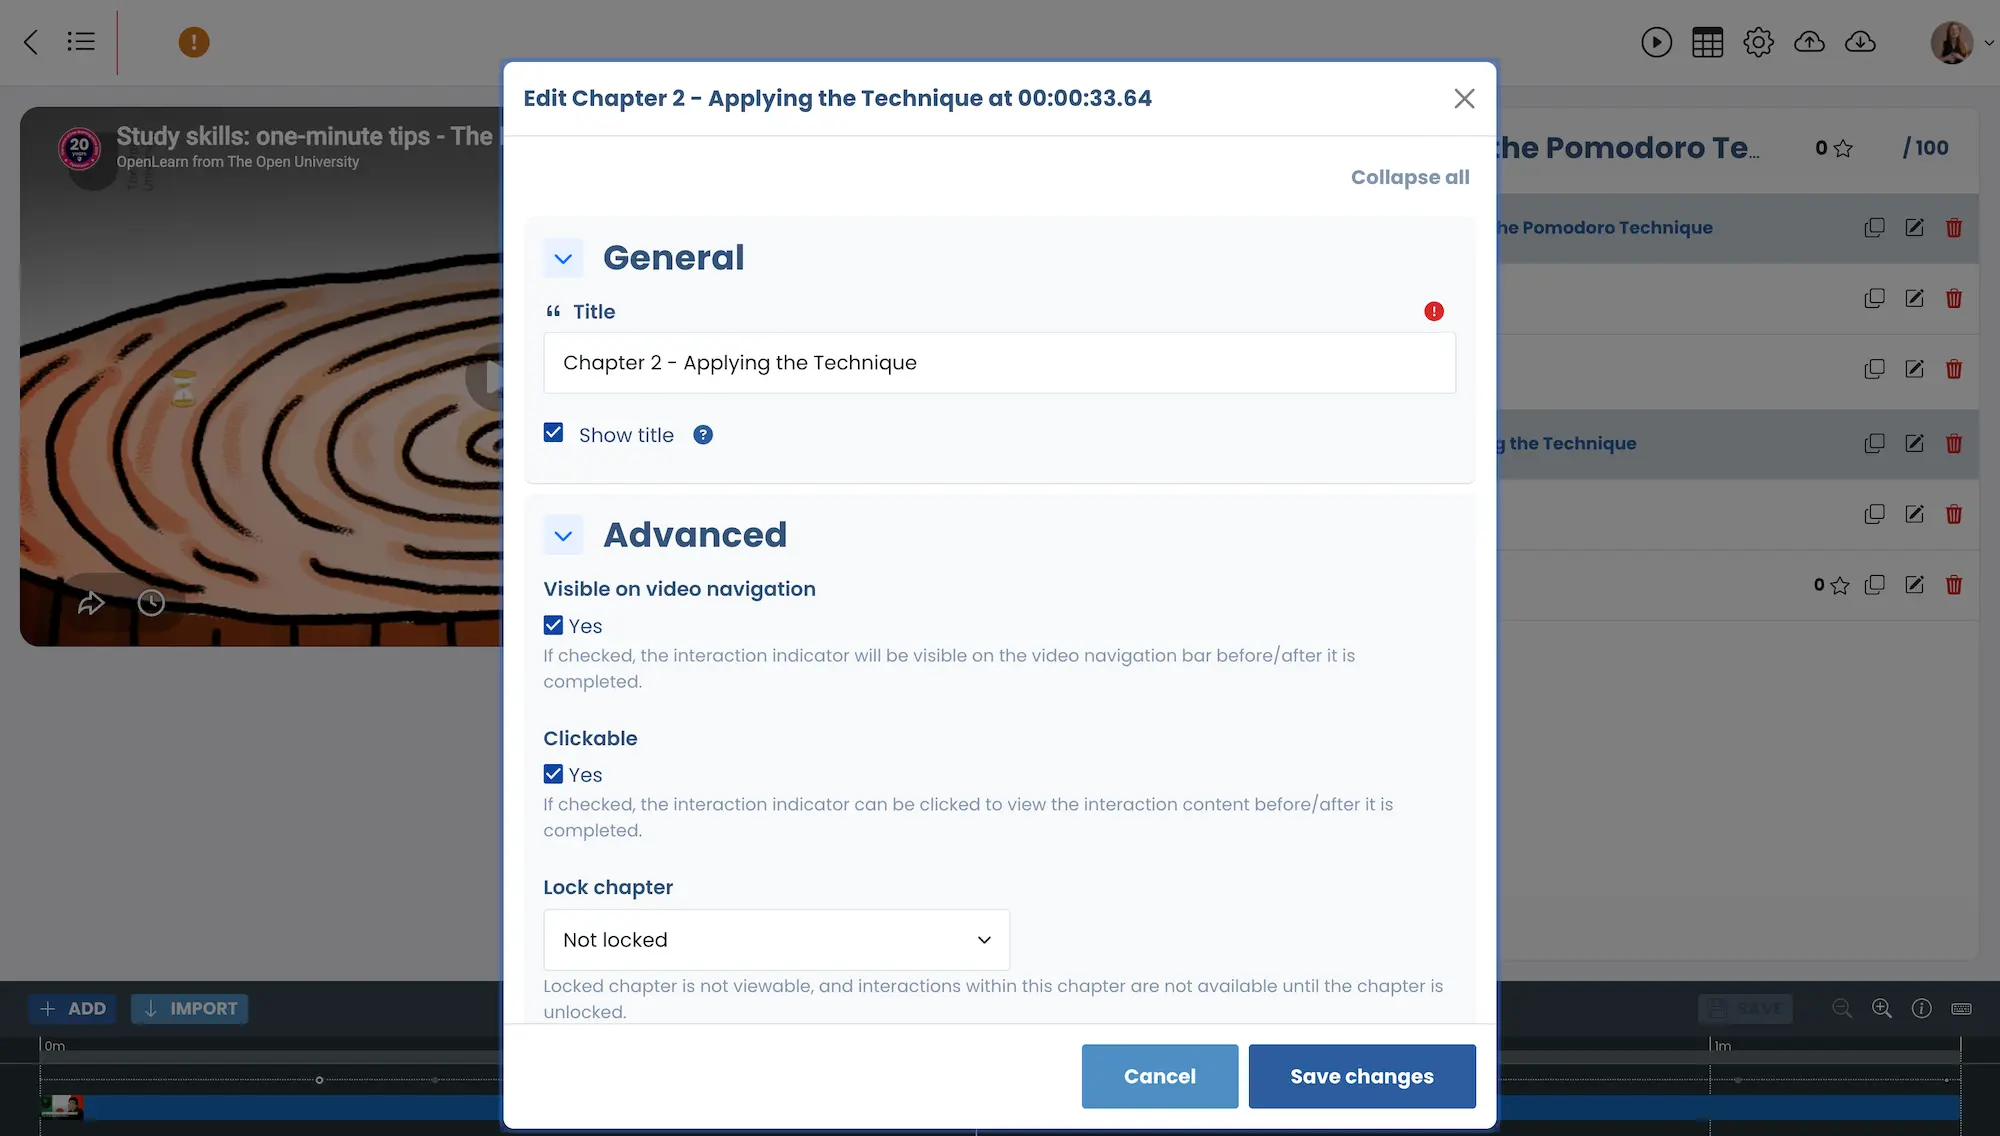
Add chapter navigation
Chapter navigation makes videos easier to scan and revisit later. Even short videos benefit from chapters because learners can quickly jump back to important sections.
For this one-minute lesson, we only used two chapters.
The plugin author also has a dedicated YouTube tutorial covering chapter navigation setup.
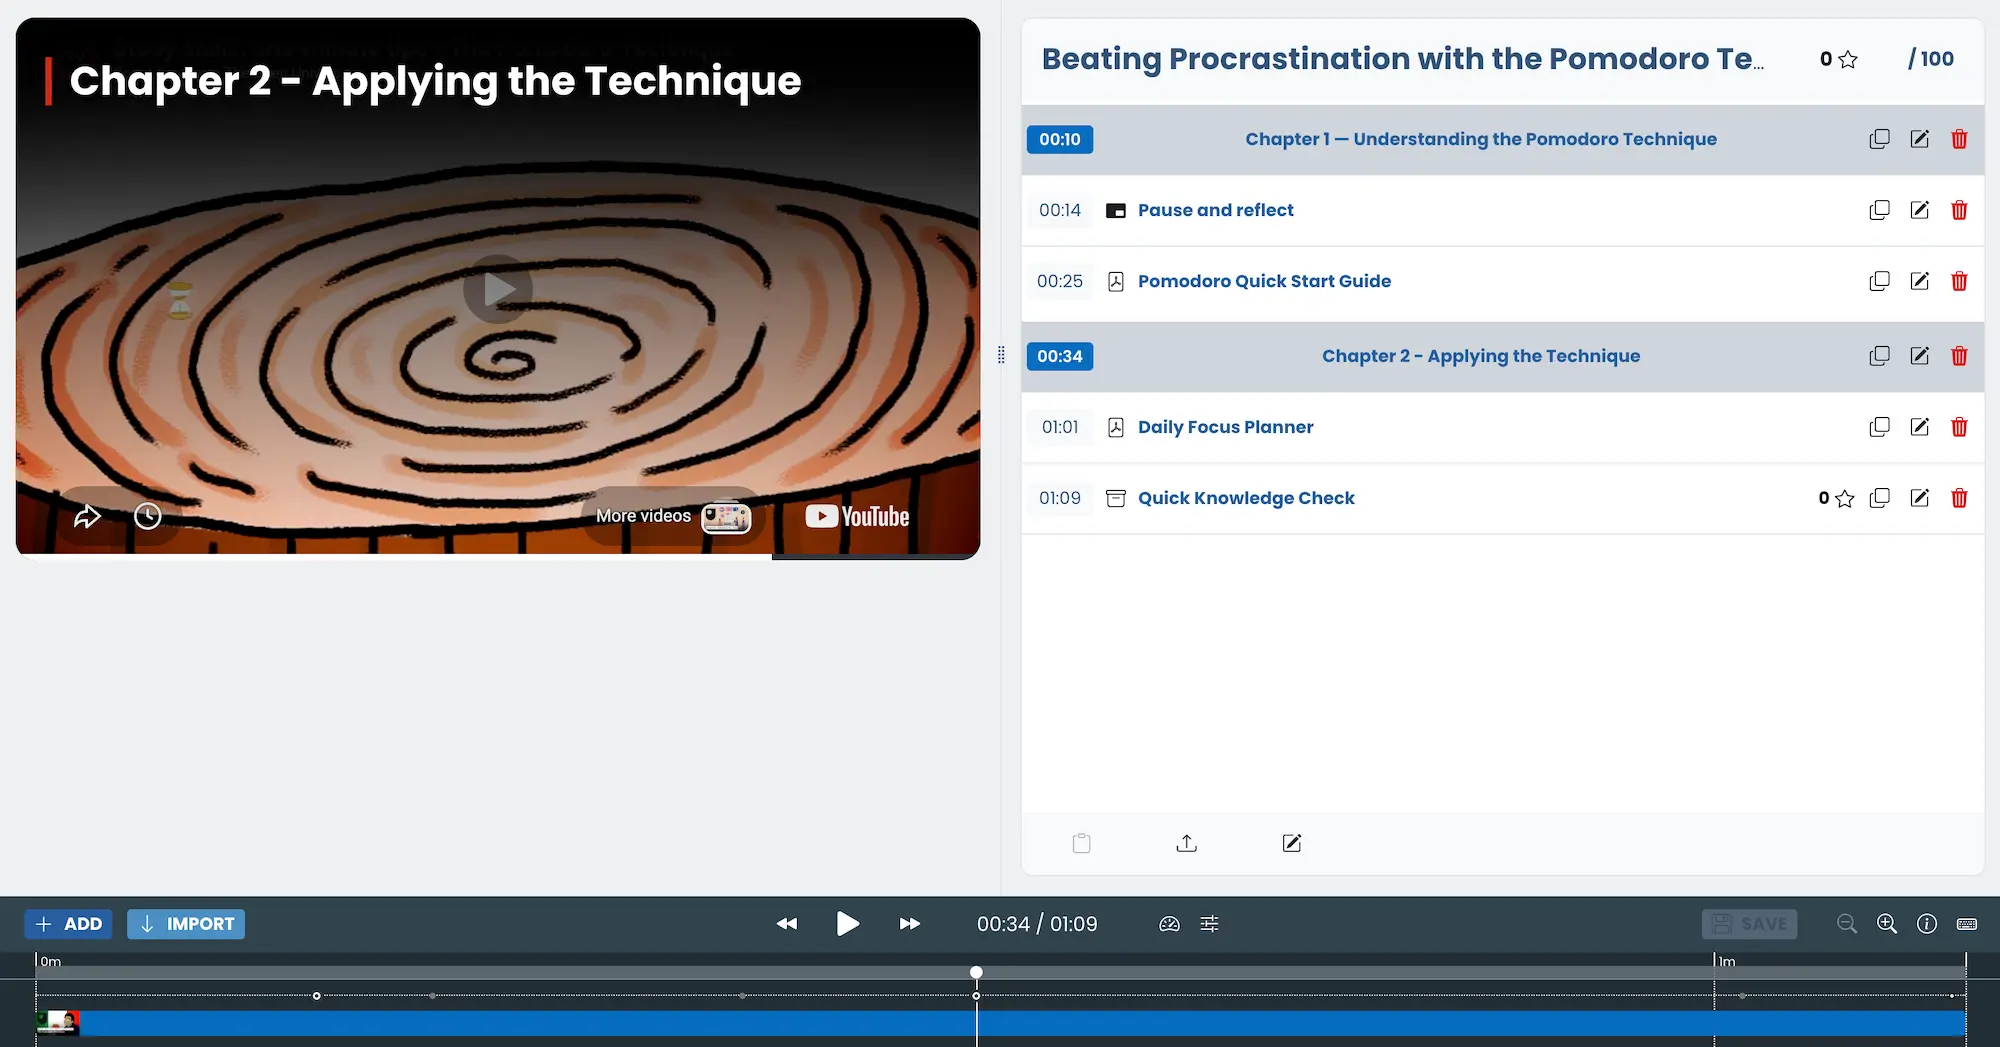
Add a reflection pause
Next, we added a Paused Annotation interaction with a short reflection prompt.
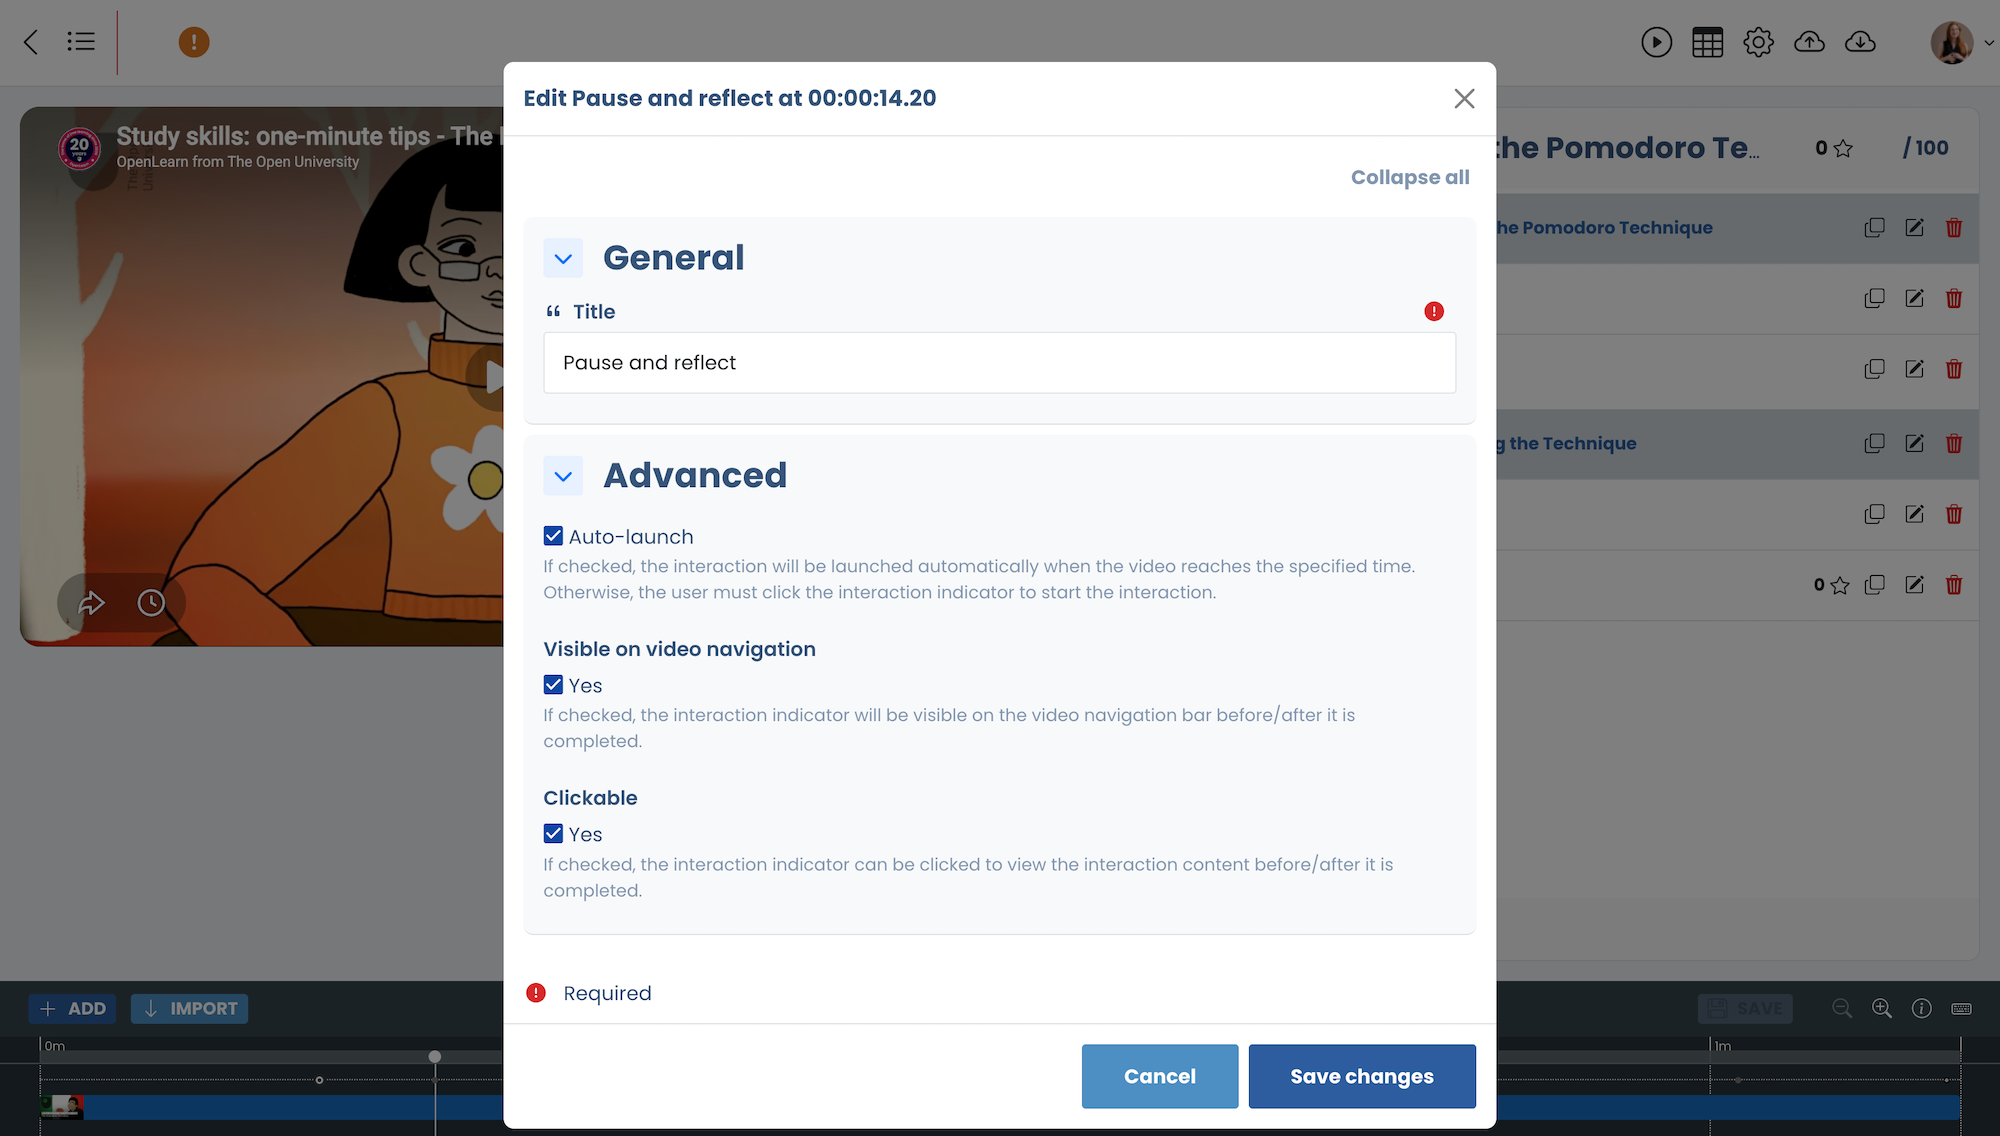
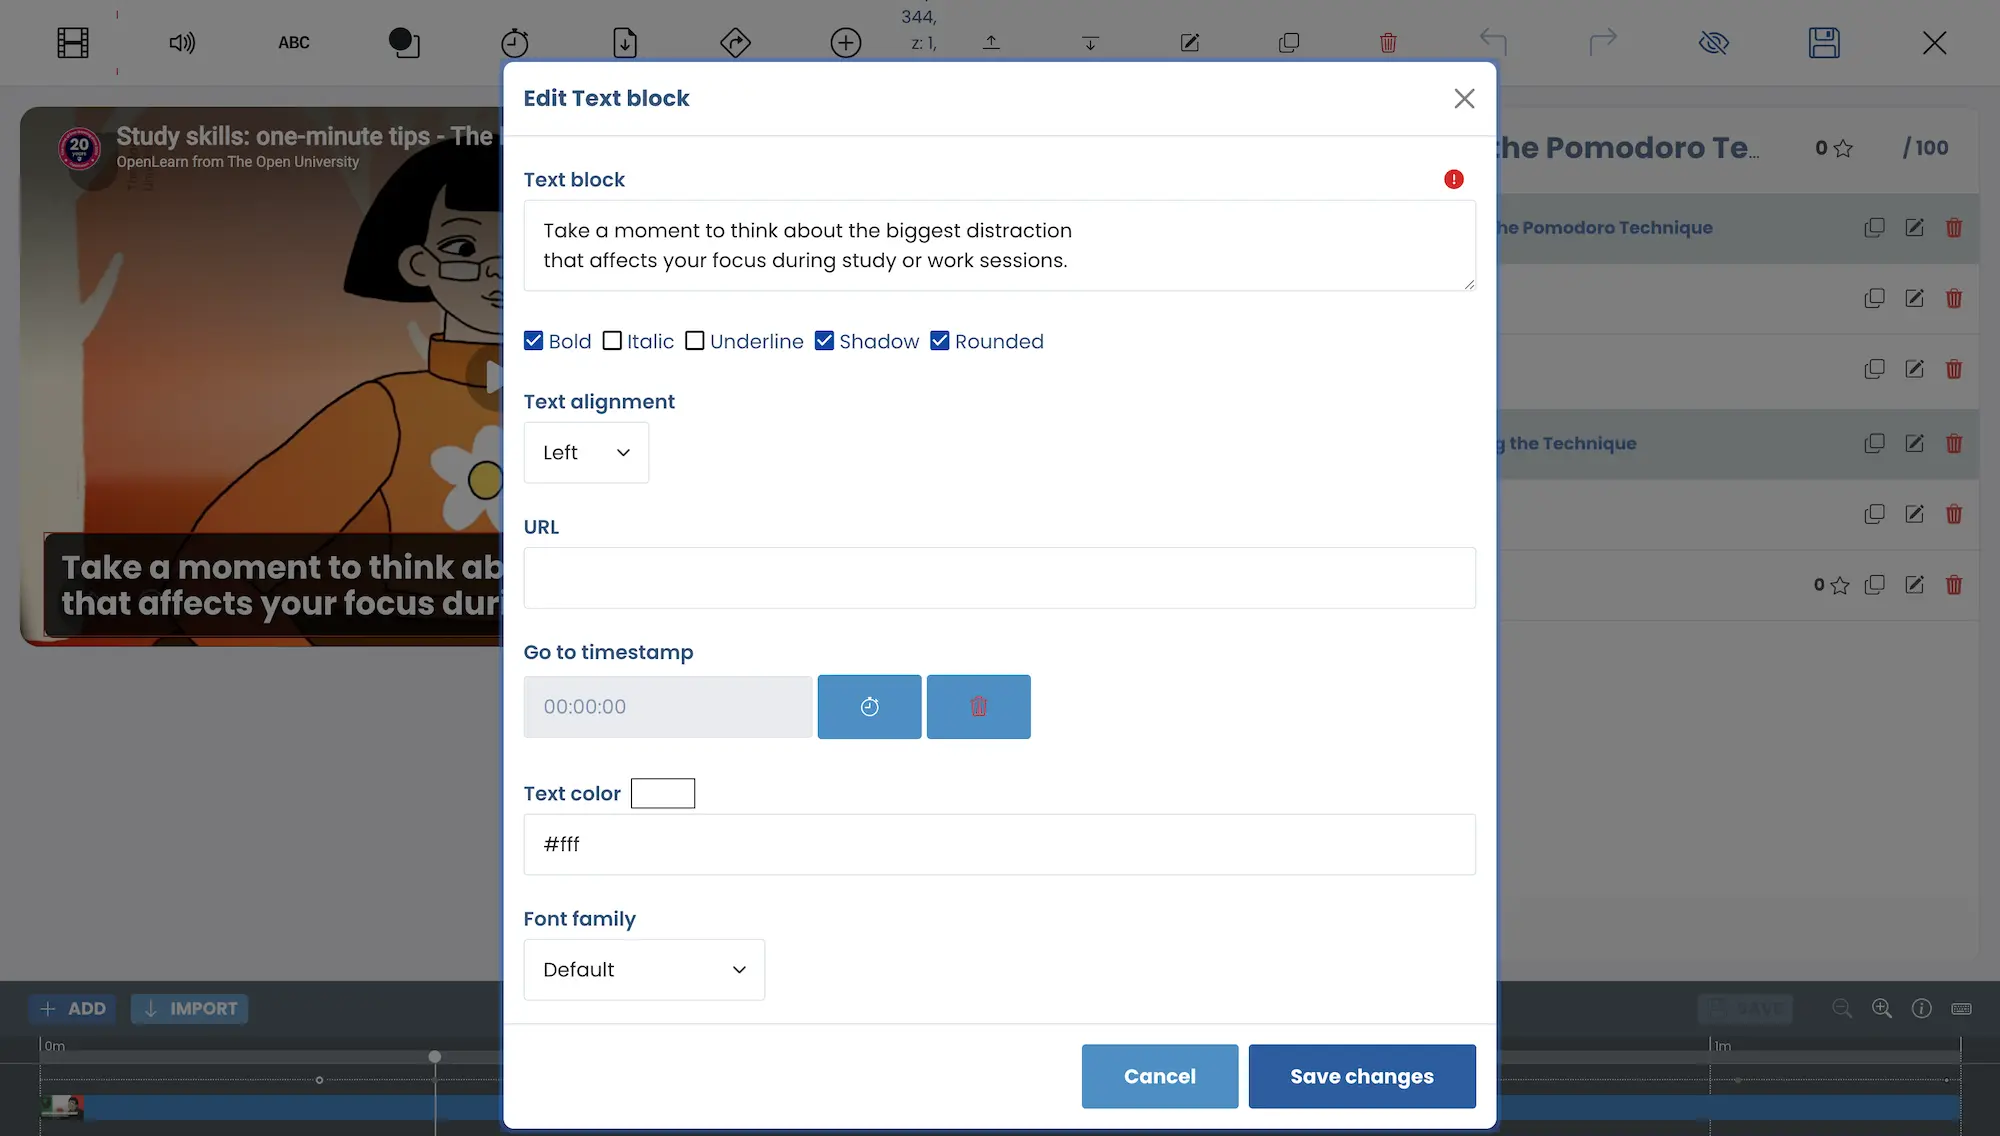
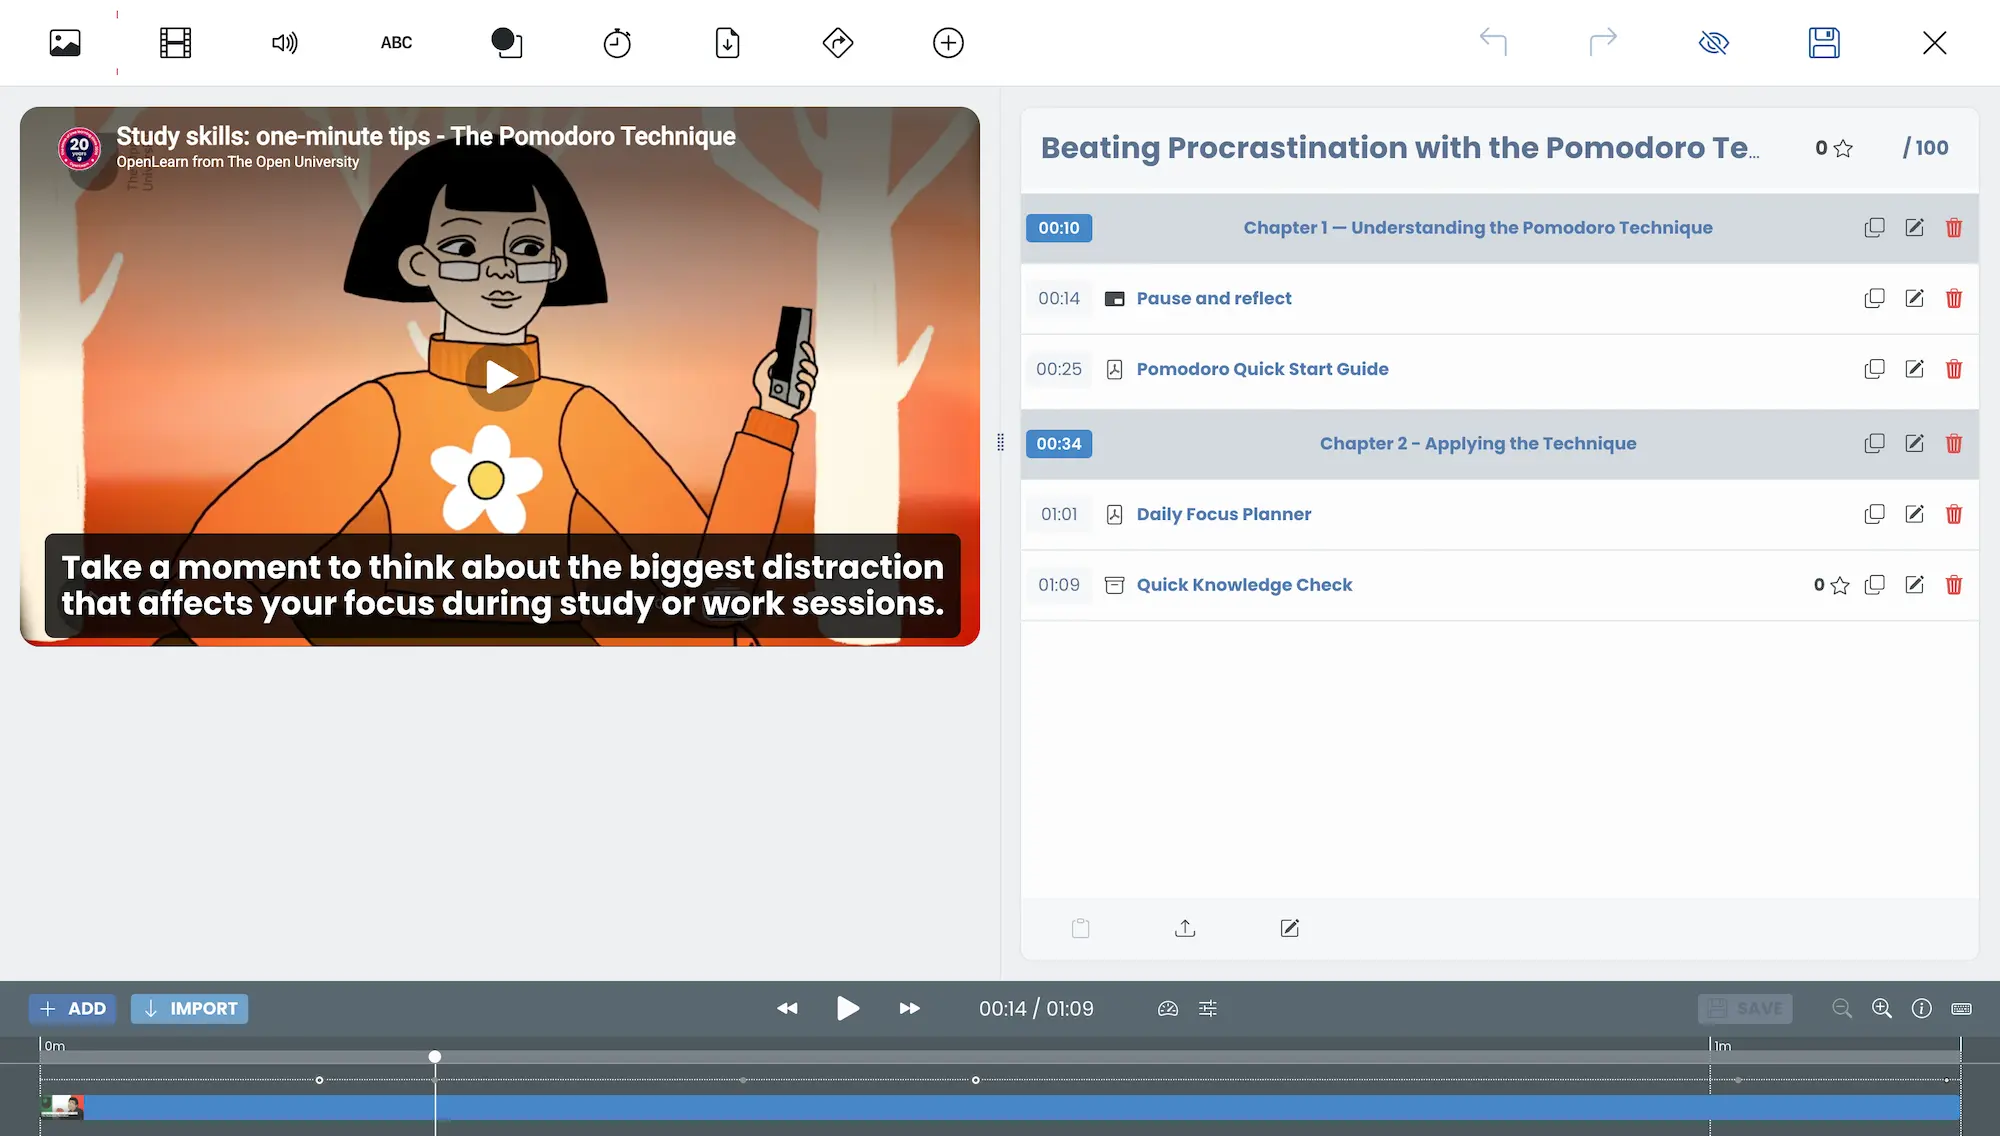
This works well because it encourages reflection without disrupting the flow of the lesson too aggressively. For short courses, simple prompts often work better than adding too many quiz questions.
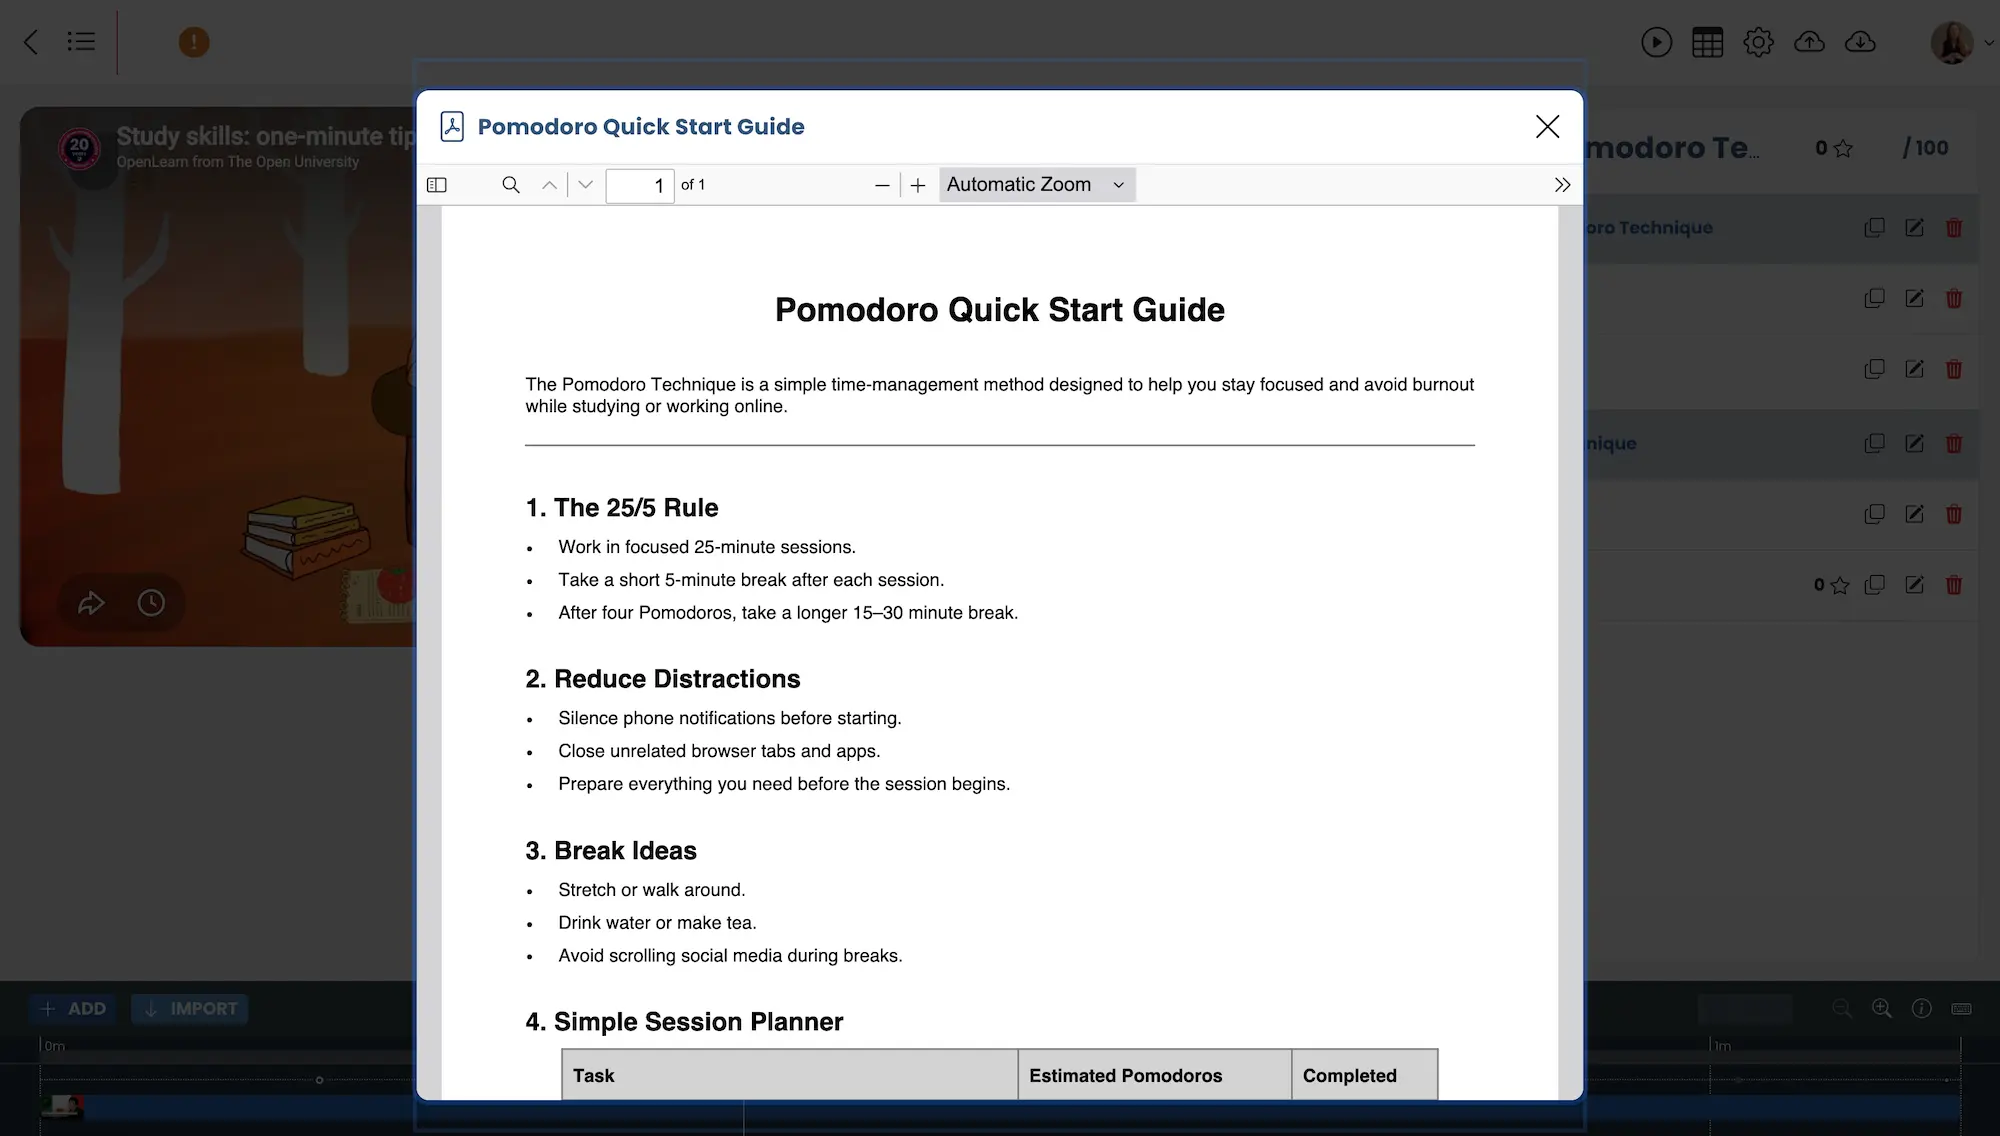
Add downloadable PDF resources
Next, we added downloadable PDF resources directly inside the video.
 </p>
</p>
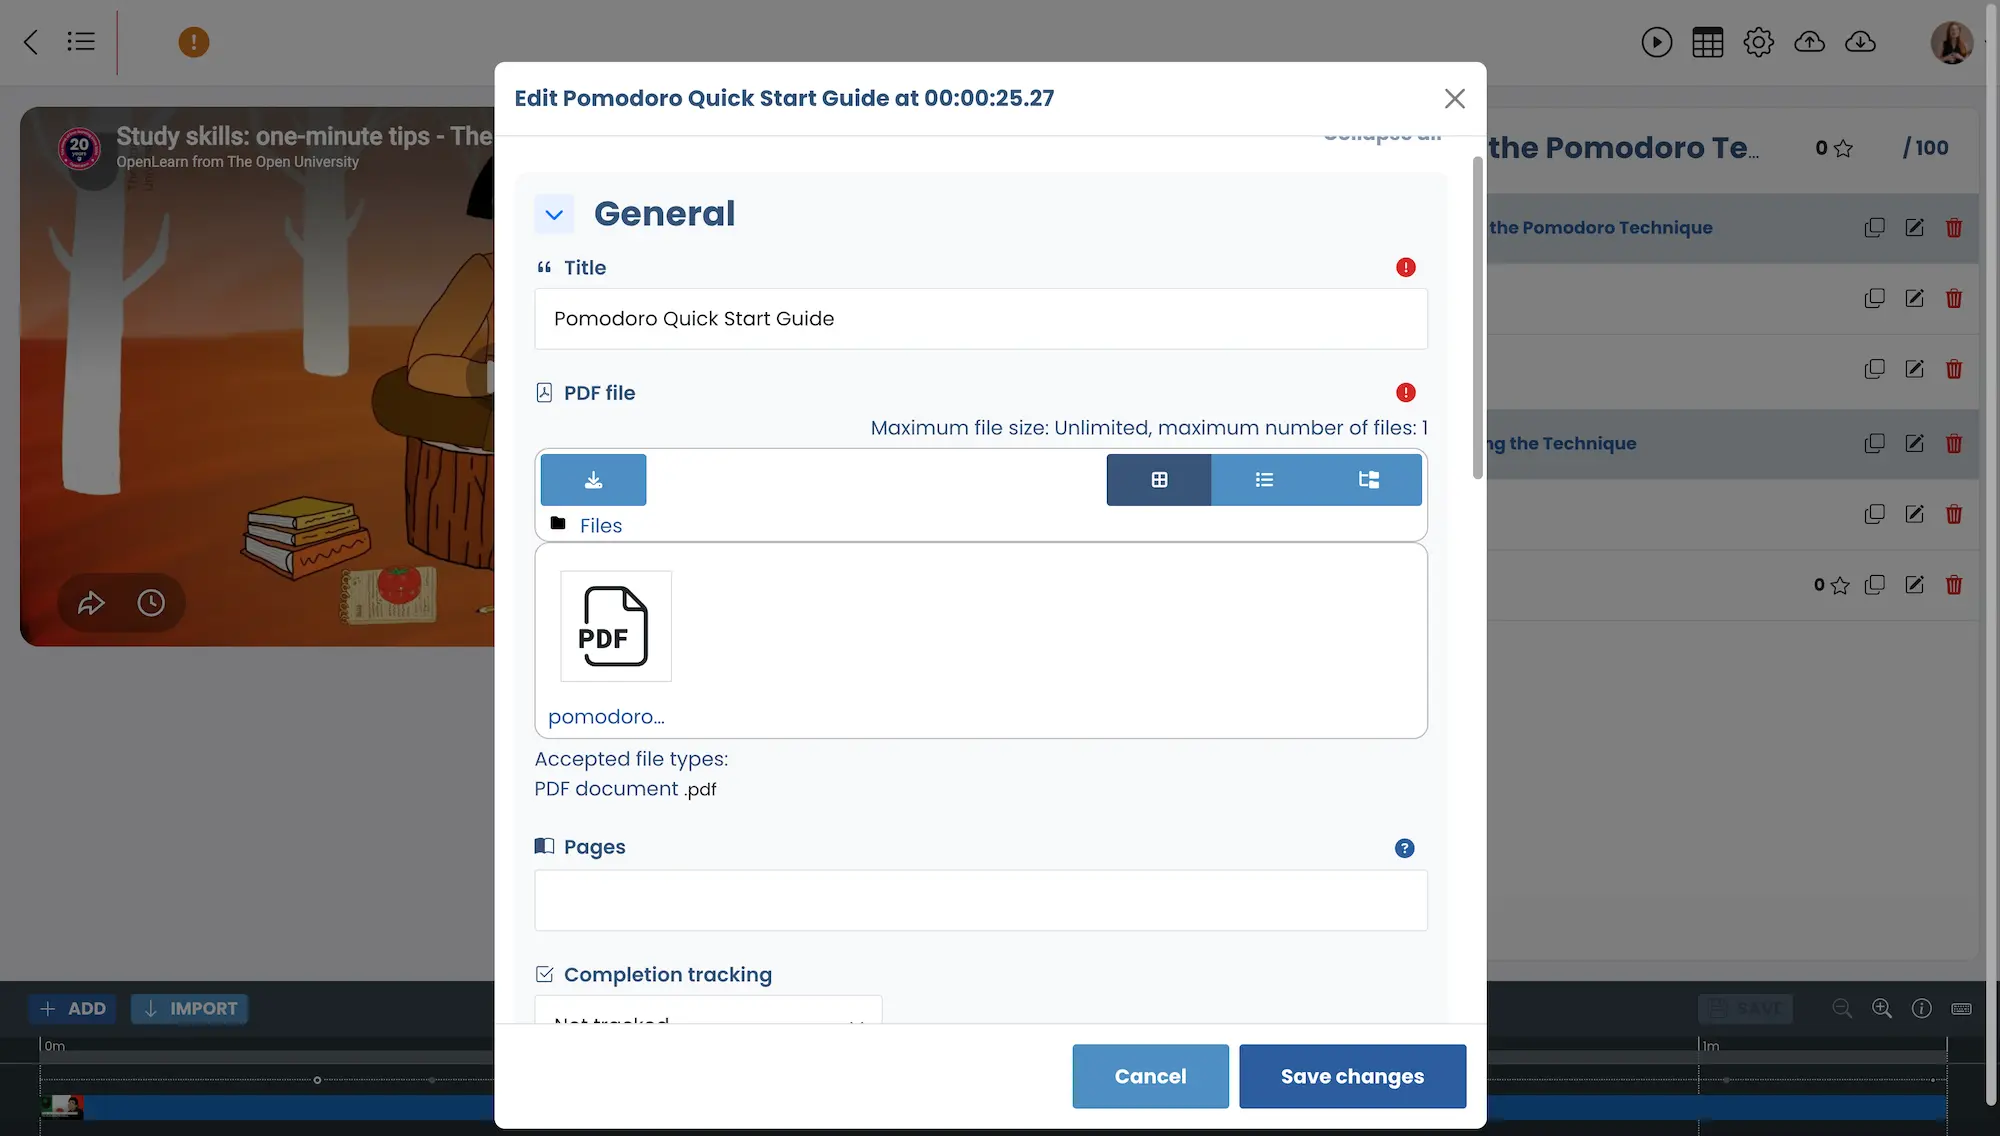
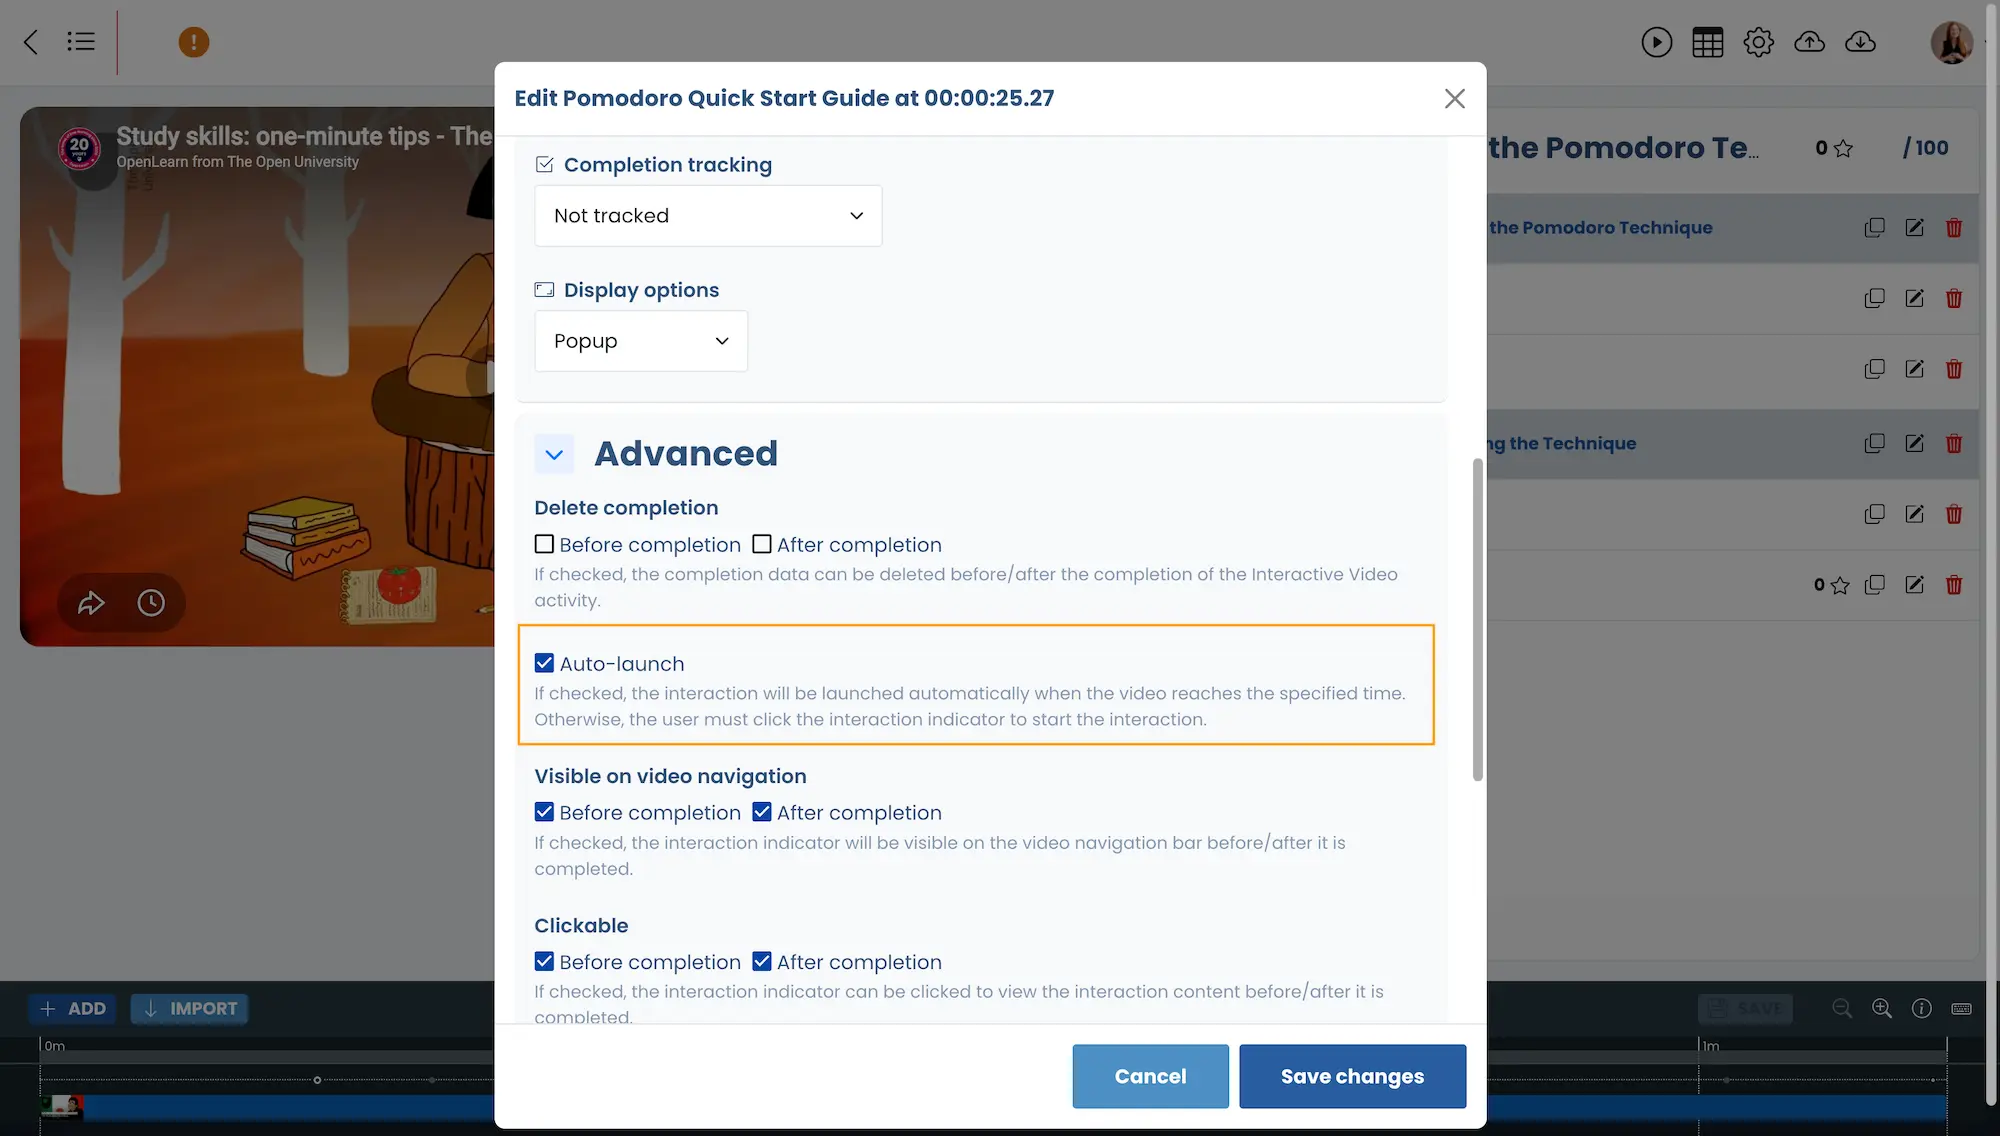
For this demo course, we kept the default auto-launch setting enabled so the interactions are easier to demonstrate. For real courses, we’d usually leave PDF auto-launch disabled. Otherwise learners can end up with too many popups during longer lessons.
Add a quick knowledge check
Finally, we added a simple multiple choice question near the end of the video using the built-in Content Bank integration.
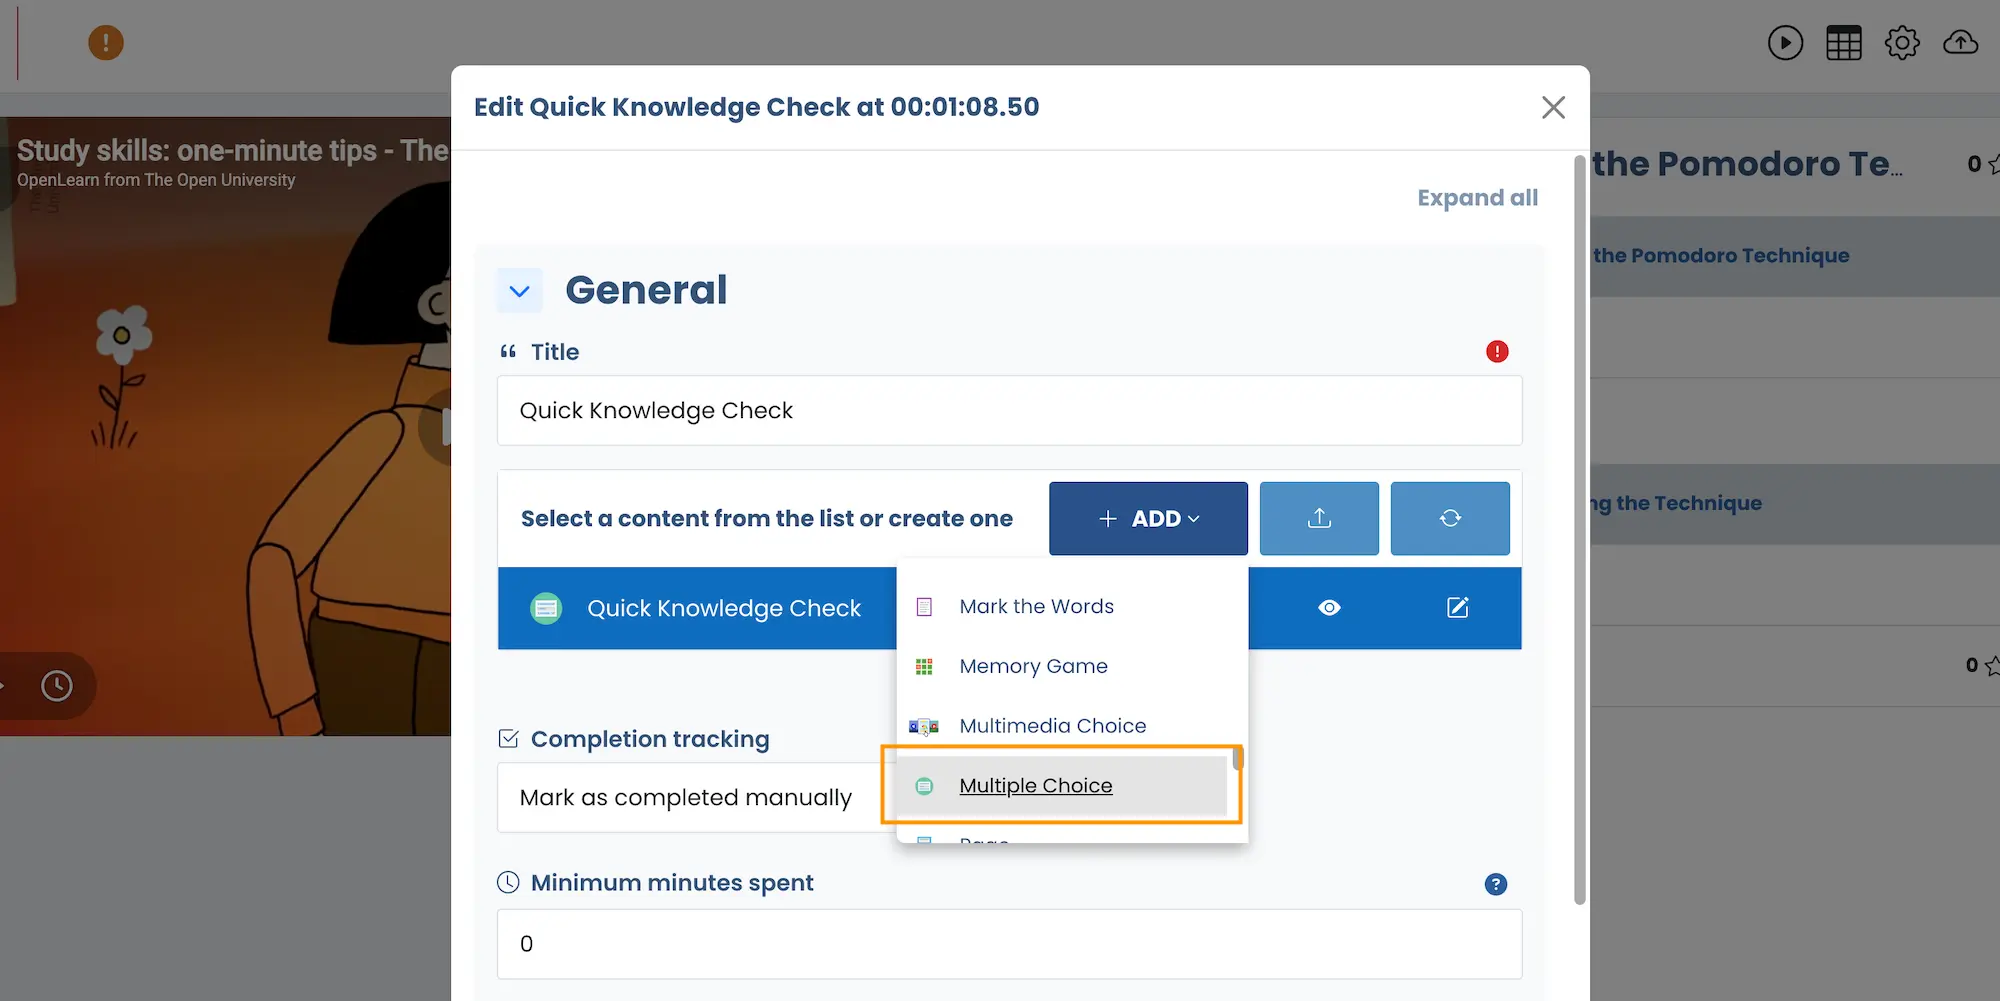
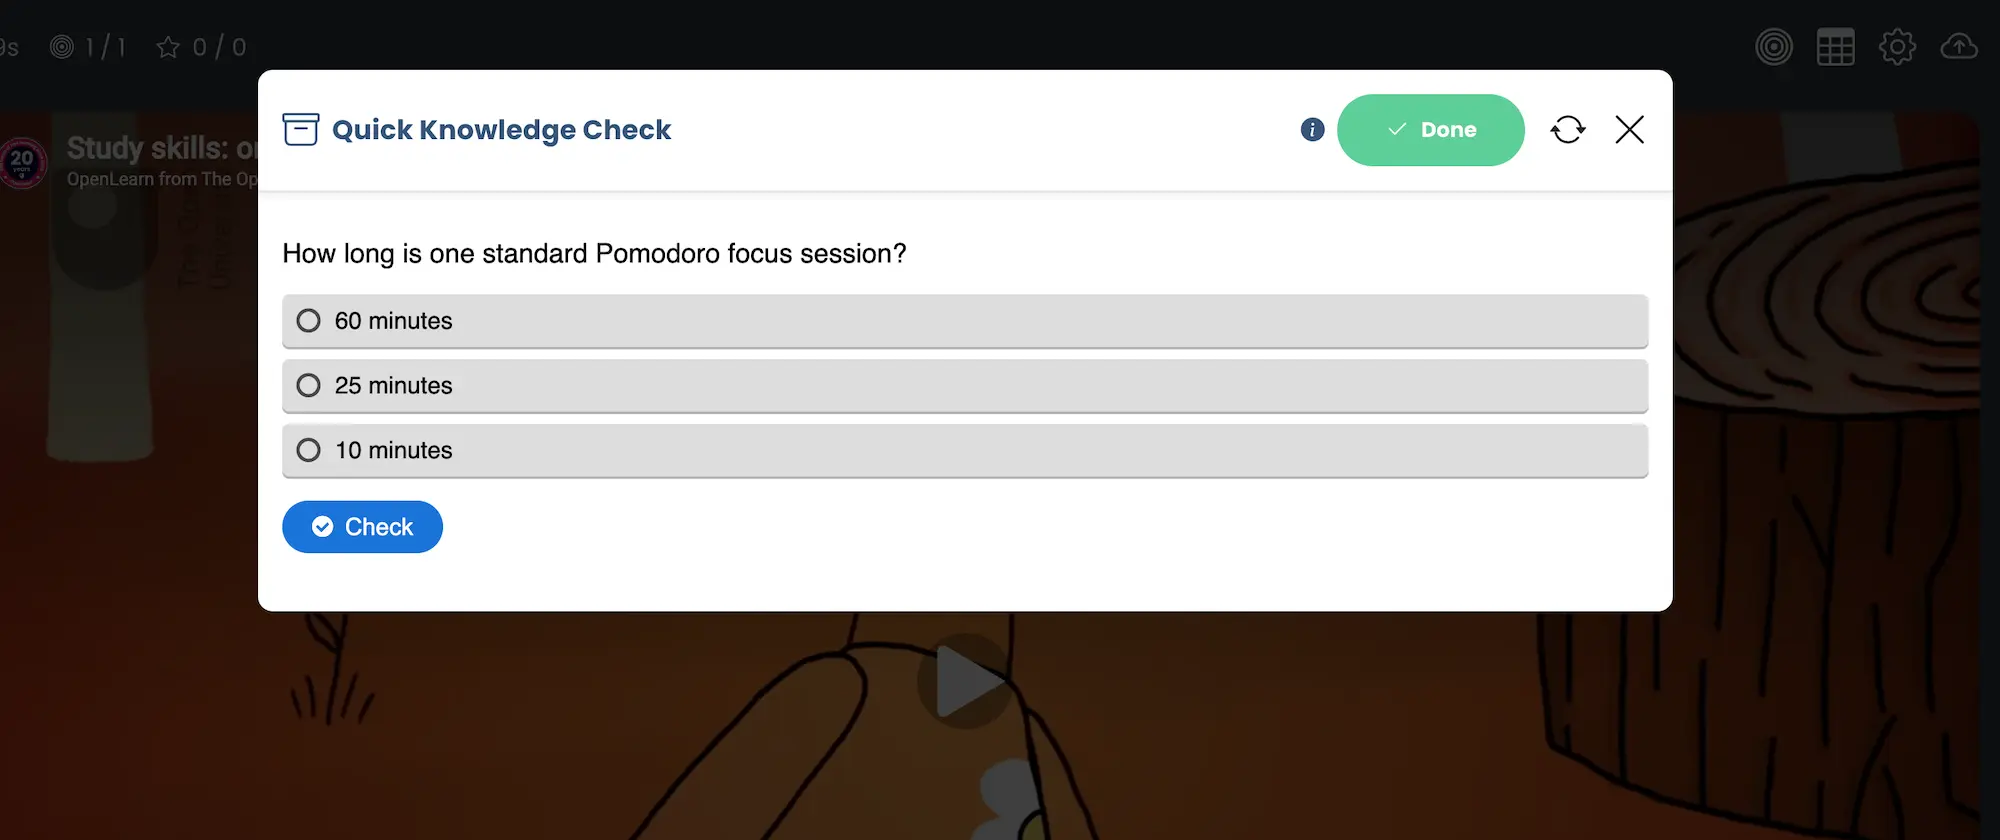
A lightweight knowledge check is often enough to reinforce the main learning points without interrupting the overall learning flow too much.
Final Thoughts
The main takeaway from this demo is that you don’t need a huge course or complicated setup to make Moodle feel more interactive.
In many cases, a clean layout and a few well-placed interactions are enough to create a much better learning experience.
The Interactive Video plugin is also far more flexible than what we covered here. This tutorial only scratches the surface of what’s possible. Once you understand the basics, you can start experimenting with more advanced interaction types and course designs.
If you’re looking for upgrade-safe, Boost-based Moodle themes built for stable, long-term LMS platforms, you can also check out our premium Moodle themes
You can explore the live demo course on our Moodle theme demo sites:
Interactive Video Demo on Lumo
Interactive Video Demo on Edutor
Interactive Video Demo on Maker
Troubleshooting
How do I import the demo course to my Moodle site?
Create a new course on your Moodle site and open the More dropdown menu inside the course page.
Next, click Course reuse → Restore and upload the downloaded course backup file (*.mbz).
Moodle will then guide you through the course restore process step-by-step.
Why are the installed interaction types not showing up?
After installing additional interaction types, make sure they are enabled in the Interactive Video plugin’s general settings page.