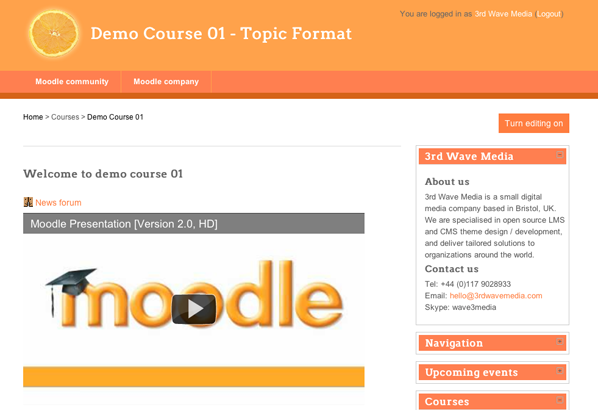
More and more teachers and trainers are using video clips to enhance their material these days. As YouTube has gained great popularity among educators, I’m going to show you how to embed YouTube videos into your Moodle course.
Step 1
First things first, before doing any work in Moodle, you need to go to YouTube and find the video you’d like to use. Here I’m going to use a Moodle presentation video, you can find the video here: http://www.youtube.com/watch?v=WvCIv5KCbeE
Step 2
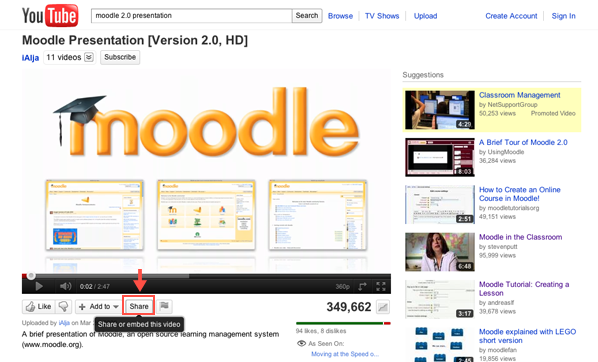
On the video page, click the “Share” button
Step 3
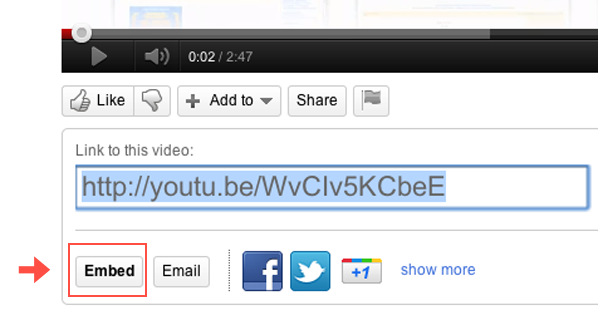
Now you should see something like the screenshot below, and you need to click the “Embed” button.
Step 4
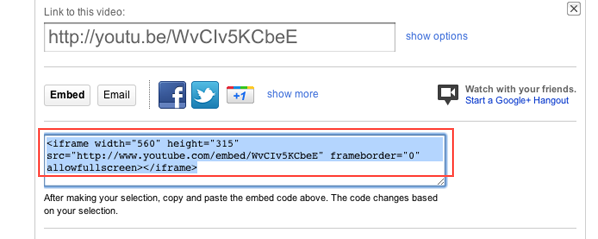
After clicking the “Embed” button, a box with some HTML code will appear. Now, you need to highlight the code as shown in the screenshot and copy it (“Ctrl +C” on PC or “Cmd+C on Mac).
Step 5
Let’s go back to Moodle now:
Log in and navigate to the desired course where you’d like to embed the video.
Step 6
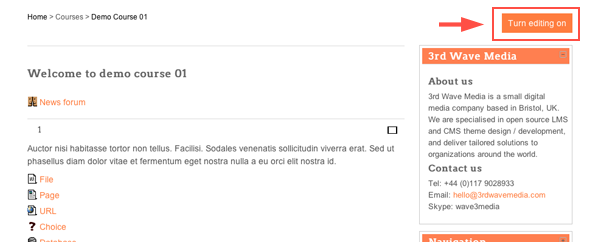
Click the “Turn editing on” button.
Step 7
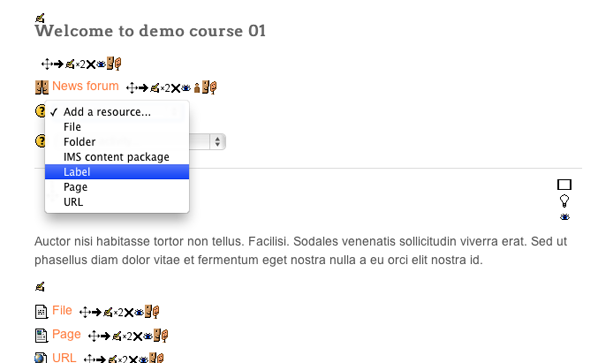
Select the “Label” option from the “Add resources…” pull down menu.
Step 8
Now you are on the “Add a new label” page, and you should see a form field called “Label text”. Click the “HTML” button on the form editor menu.

Step 9
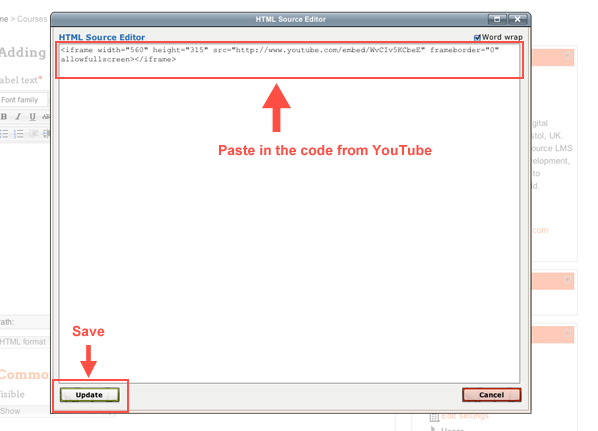
A popup called “HTML Source Editor” should be triggered where you can paste in the code which you copied from YouTube in Step 4 above (“Ctrl+V” on PC or “Cmd+V” on Mac to paste). Then you need to click the ”Update” button to save the code.
Step 10
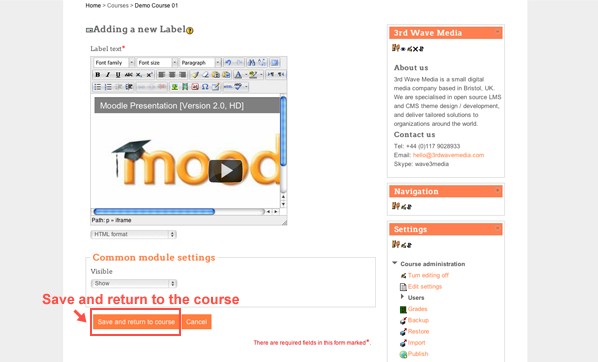
After clicking the “Update” button the HTML Source Editor popup should be closed and you are back to the “Add a new label” page like shown below. Now you need to click the “Save and return to course” button.
Step 11
There you go, a YouTube video is now embedded in the Moodle course. Remember to exit the editing mode by clicking the “Turn editing off” button; otherwise you might not see the video on the course page!
