Do you want to use free Google fonts on your Moodle site but are concerned about EU regulation GDPR? If you’re using Moodle Boost theme or a Boost-based theme you can follow the steps in this tutorial to host your desired Google fonts locally to avoid any potential GDPR compliance issues.
Step 1 – Disable Google Fonts API
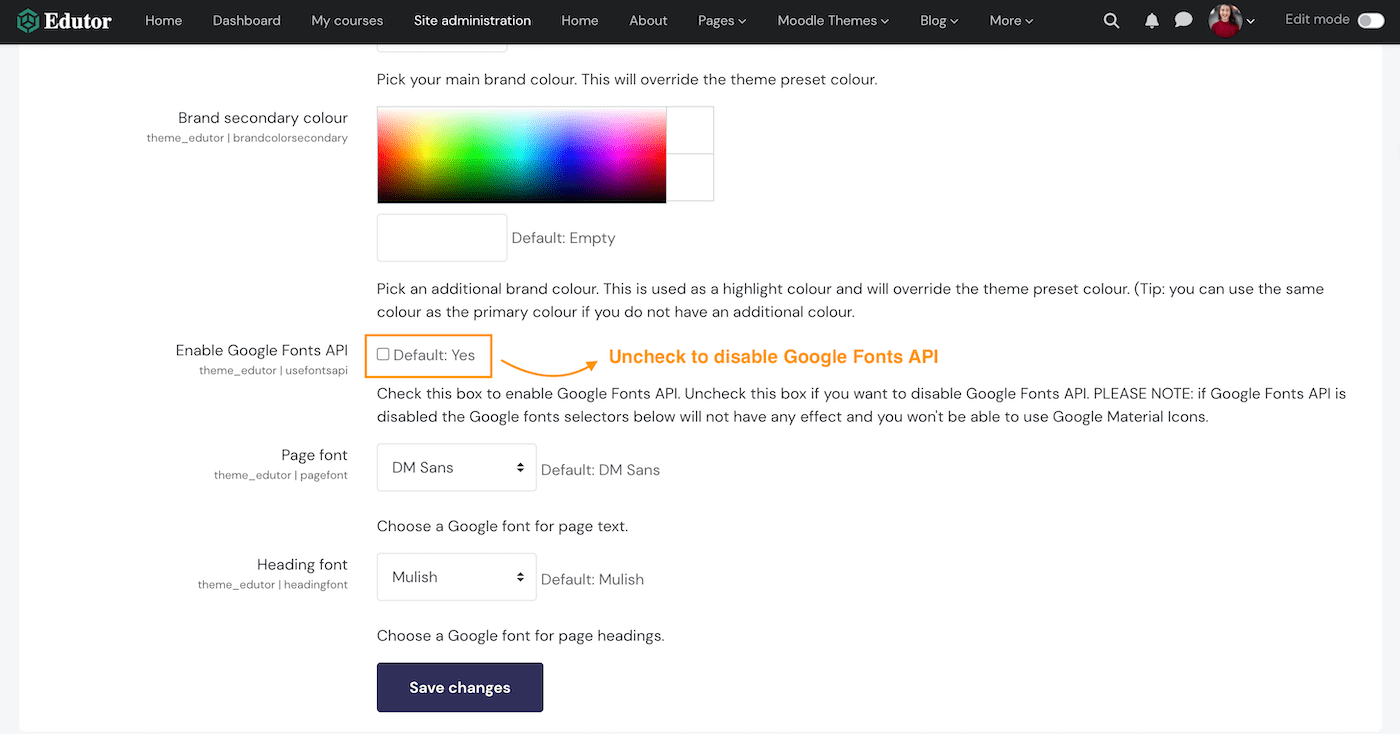
If the Moodle theme your site is using is already using Google Fonts API to load fonts from Google’s server, you need to disable the API first.
We have added the option to disable Google Fonts API in our latest Moodle theme Edutor and Maker. You just need to go to theme settings and uncheck a box under the General Settings section.
Step 2 – Download Google Fonts
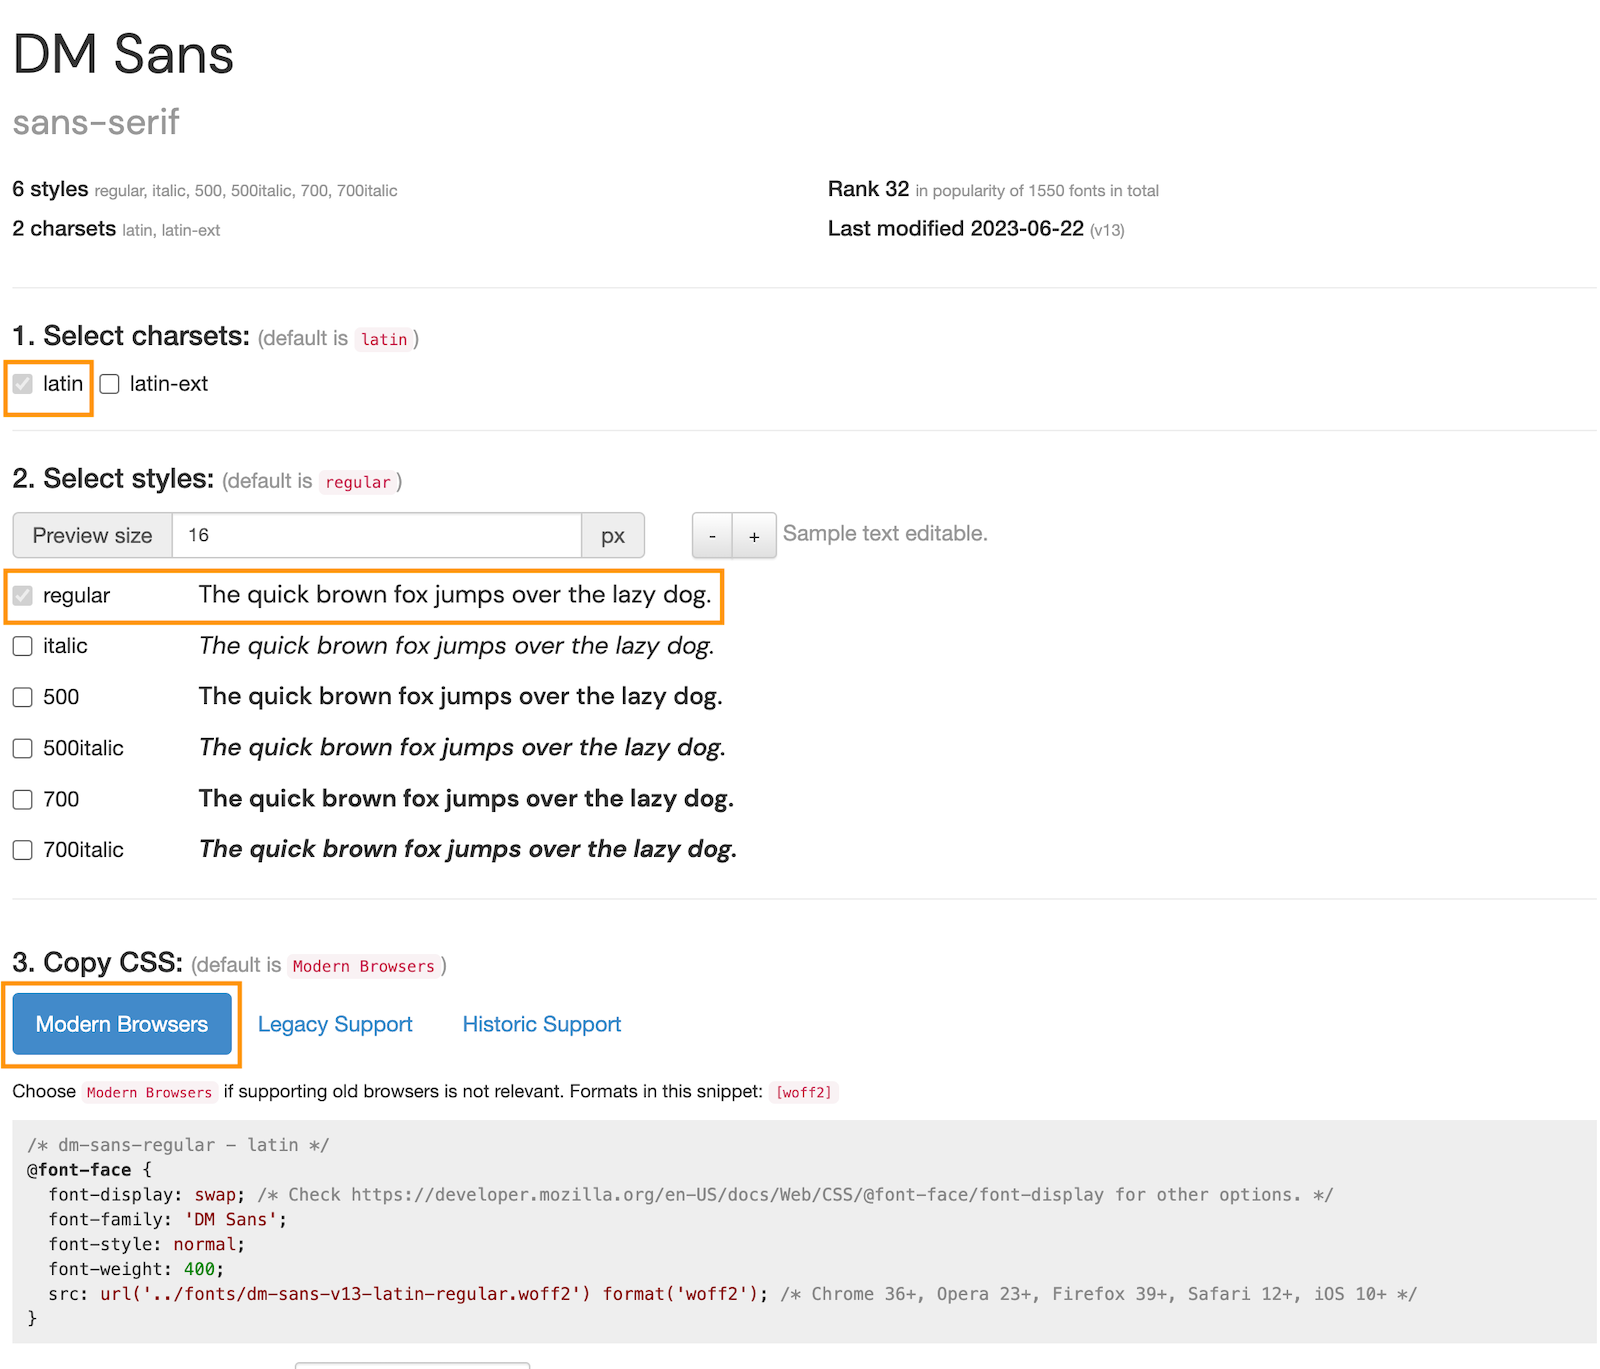
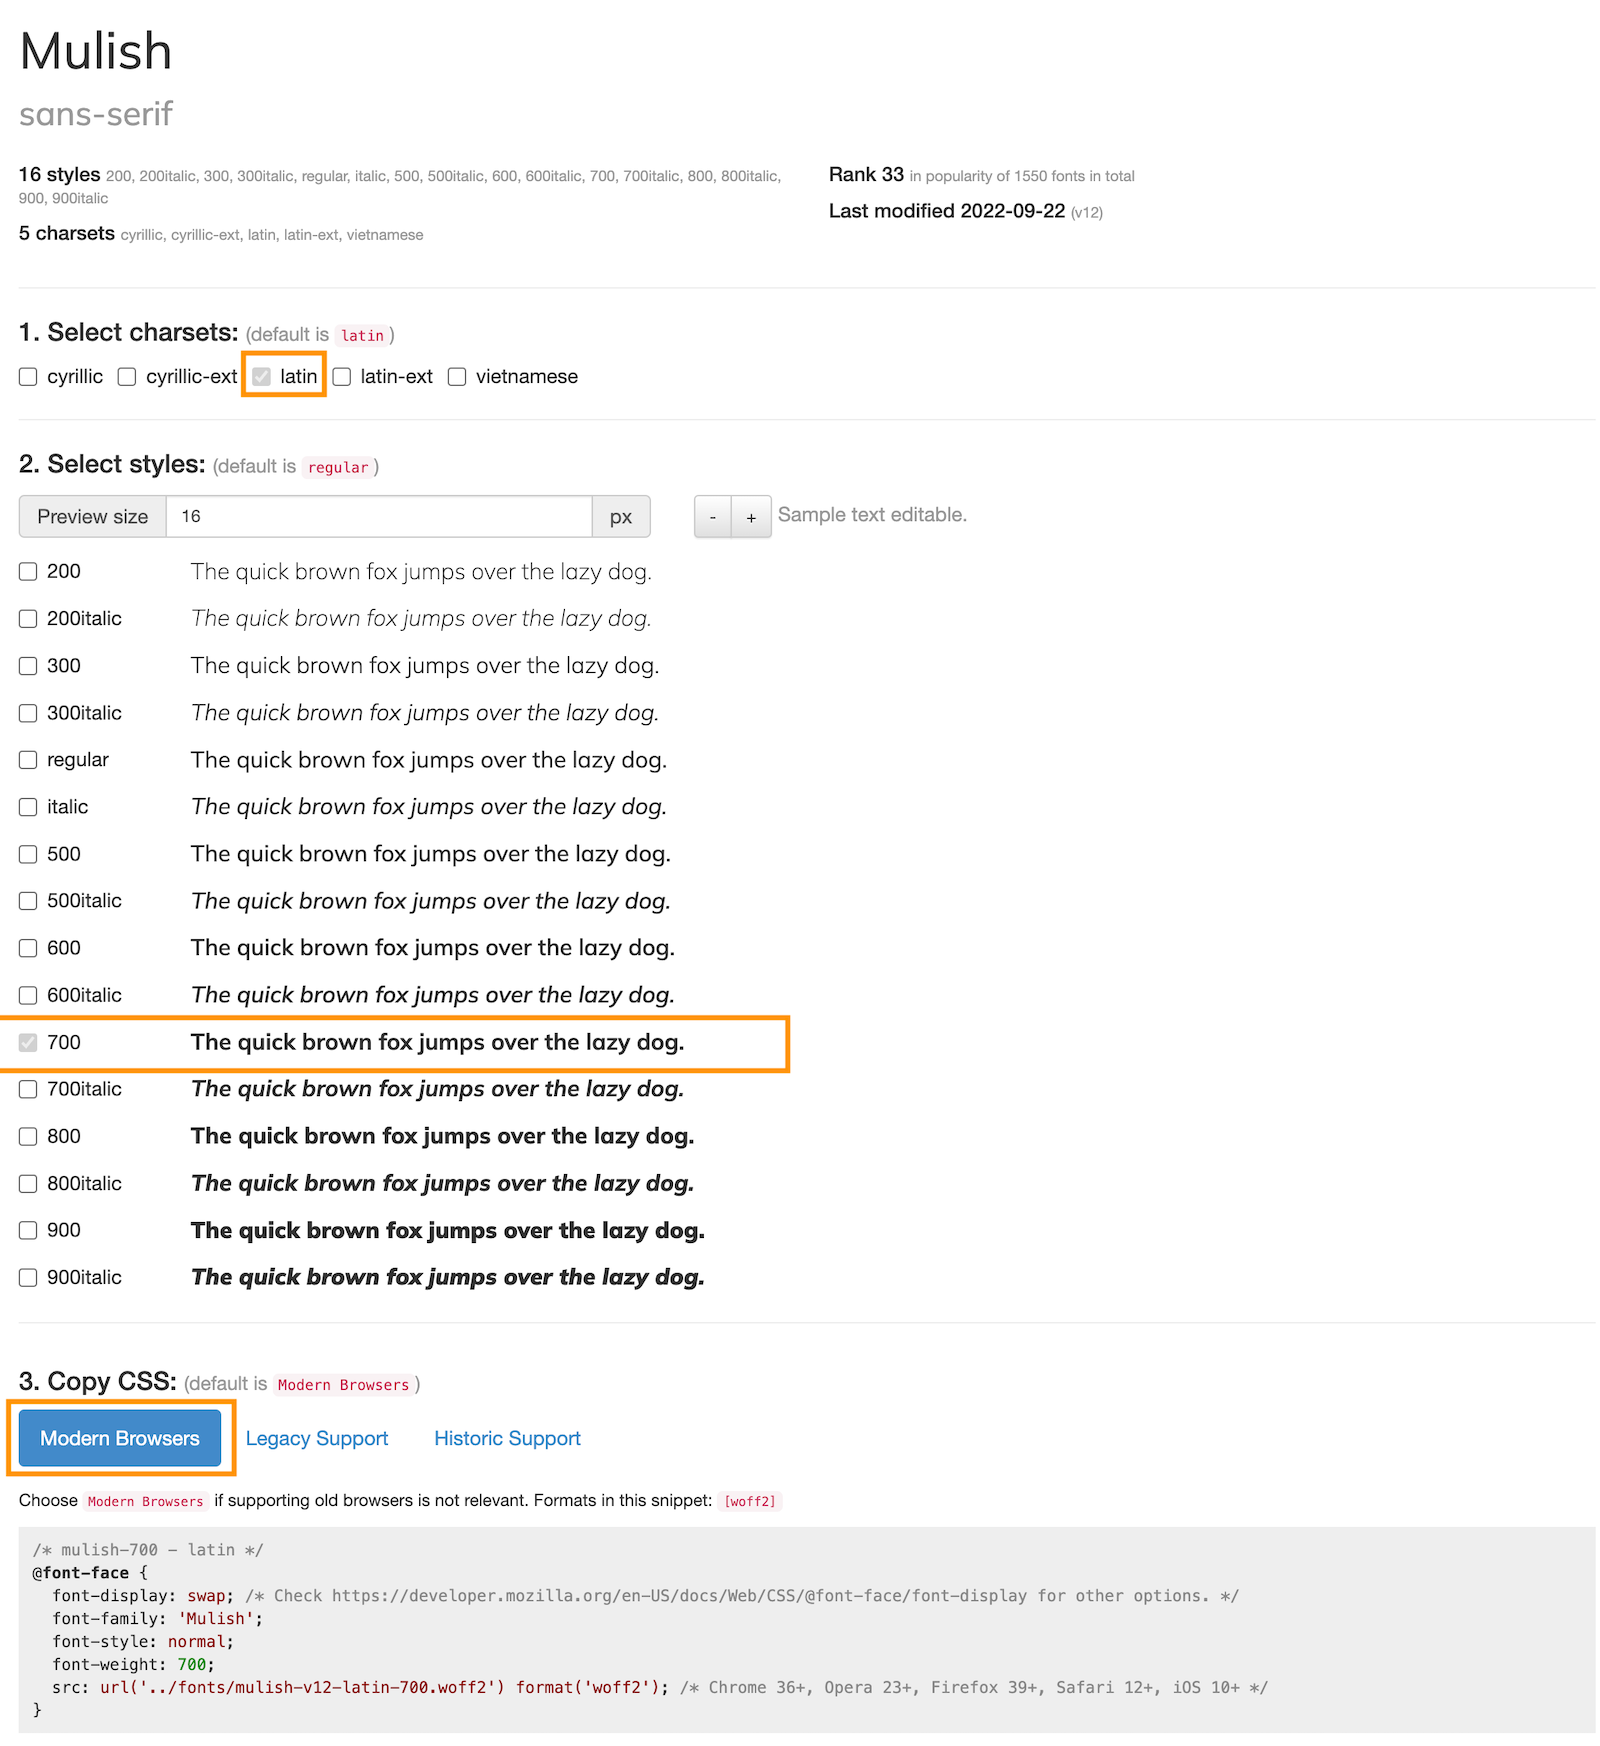
Head to the online tool Google Web Fonts Helper and download the fonts you’d like to use on your Moodle site.
For demo purposes, we chose DM Sans as our Moodle site’s main font and Mulish as the heading font.
Step 3 – Host Google Fonts
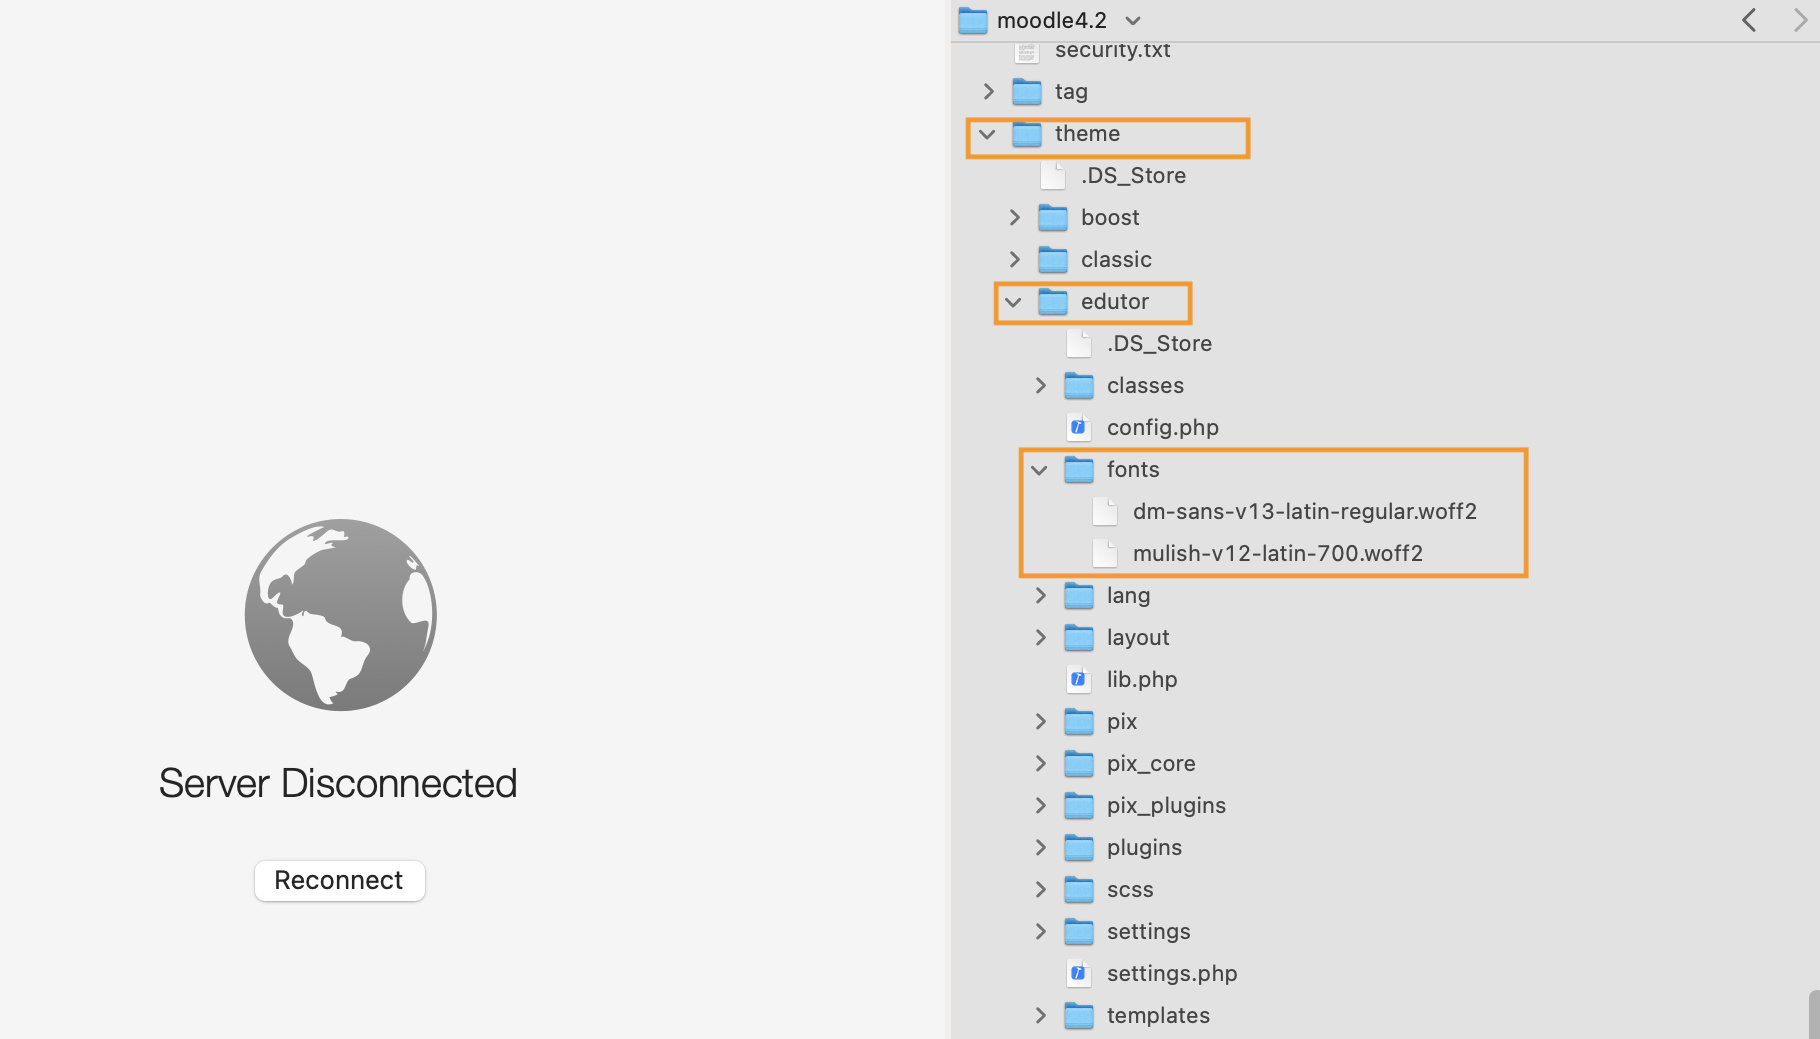
Create a folder called fonts in your Moodle theme folder on your server and upload the downloaded fonts files to that folder.
Step 4 – Add Google Fonts To Your Site
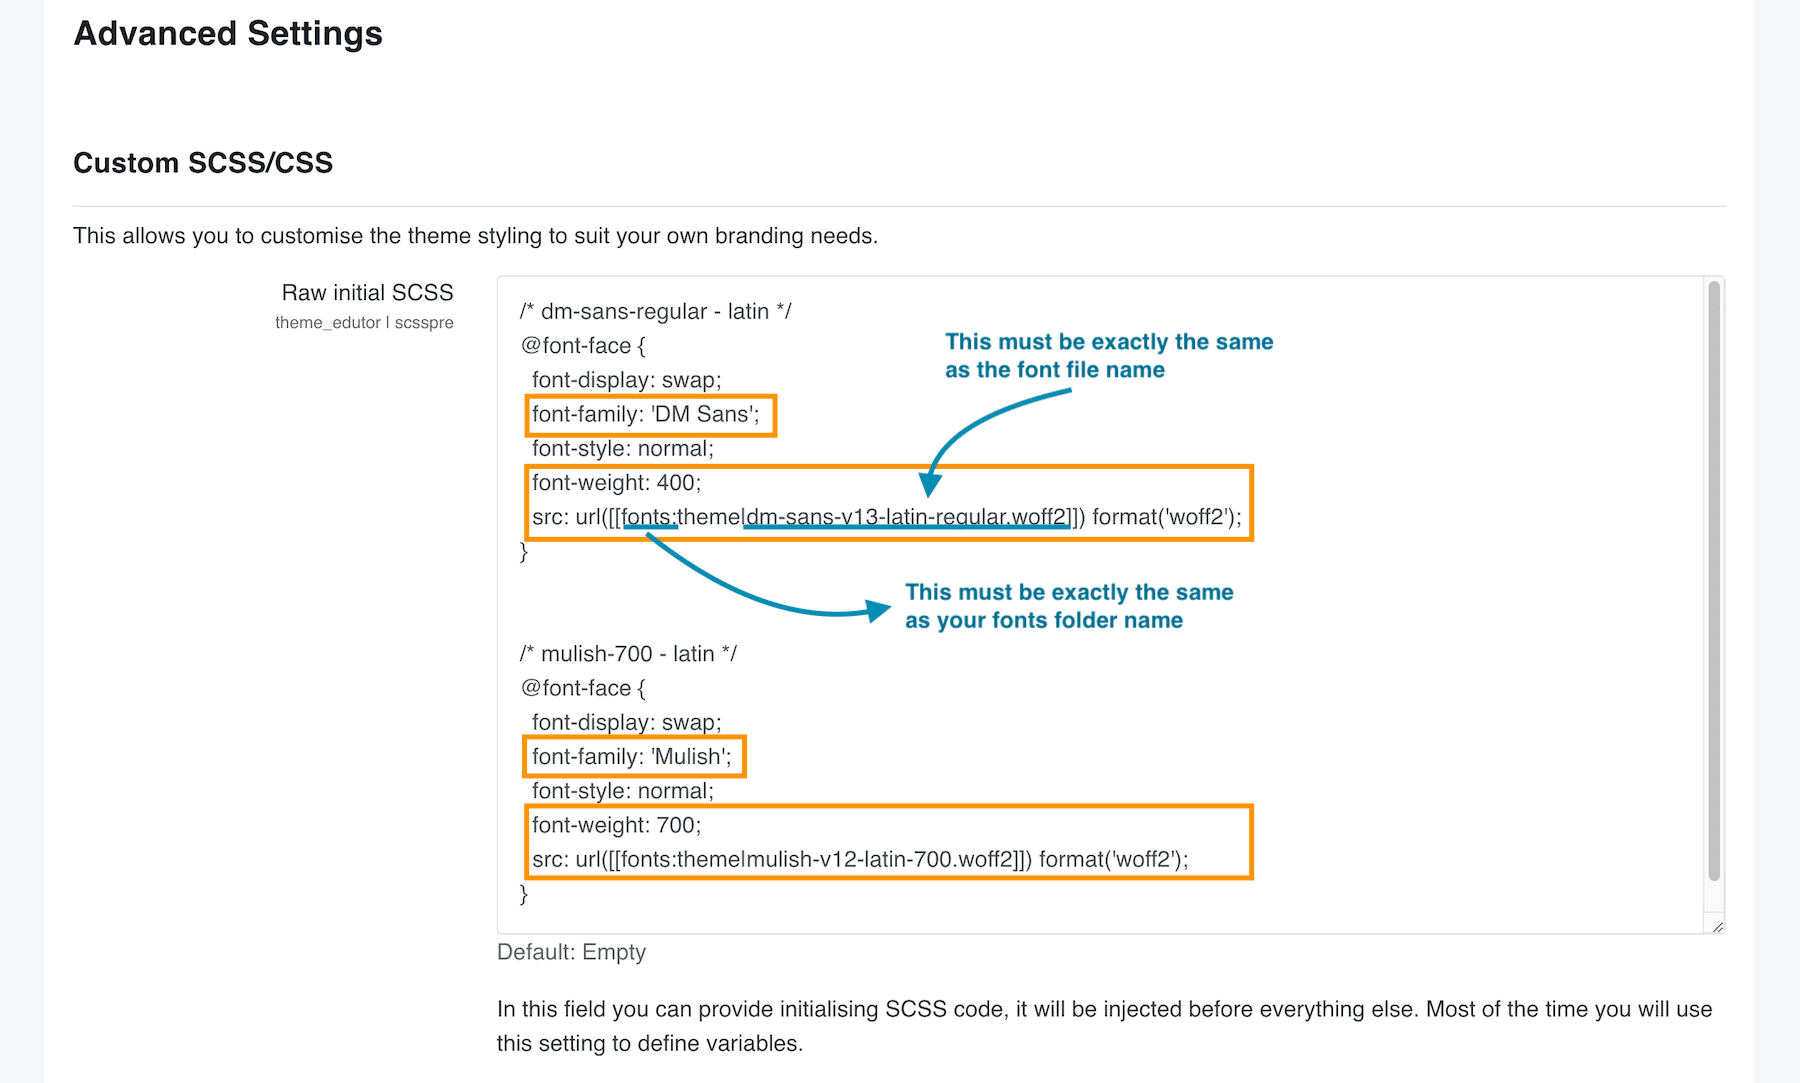
Go to your theme’s settings page and find the Custom SCSS/CSS section. Boost T
In the Raw initial SCSS input field add the fonts definition code.
/* dm-sans-regular - latin */
@font-face {
  font-display: swap;
  font-family: 'DM Sans';
  font-style: normal;
  font-weight: 400;
  src: url([[fonts:theme|dm-sans-v13-latin-regular.woff2]]) format('woff2');
}


/* mulish-700 - latin */
@font-face {
  font-display: swap;
  font-family: 'Mulish';
  font-style: normal;
  font-weight: 700;
  src: url([[fonts:theme|mulish-v12-latin-700.woff2]]) format('woff2');
}
In the Raw SCSS input field add your custom css code to assign the fonts to relevant page elements.
body {
    font-family: 'DM Sans', sans-serif;
}

h1, h2, h3, h4, h5, h6 {
    font-family: 'Mulish', sans-serif;
}


